QuickSwap is a decentralized cryptocurrency exchange (and a Layer 2 DEX) that runs on several cryptocurrency networks. However, in this QuickSwap tutorial we will use Polygon. Please note the following important details before proceeding for the safety of your funds:
- QuickSwap is not a bank nor a centralized exchange. Therefore it cannot recover lost nor stolen funds.
- Tokens traded by QuickSwap are not stored on QuickSwap. They pass through QuickSwap and land in their respective owners’ wallets. This means that you must take care to back up your cryptocurrency wallet, because the keys to your tokens will be stored on your phone/computer.
- You must carry out your due diligence and review your country’s financial laws to ensure that you use QuickSwap safely and in a lawful manner.
- With power, comes responsibility. QuickSwap, as well as many of the tokens traded on it are designed to put you in charge of your funds. That freedom comes with the responsibility of managing your wallet carefully to prevent lost or stolen funds. It is best to use a hardware wallet to securely store your tokens. If that isn’t an option, you’ll have to avoid malware hotspots and be extra careful to prevent phishing.
Networks That QuickSwap Can Trade On
- Polygon.
- Ethereum.
- Dogechain.
- Polygon zkEVM.
- Soneium.
- Somnia.
- X-Layer.
- Manta.
- Immutable zkEVM.
Getting Started With QuickSwap – Swapping Tokens
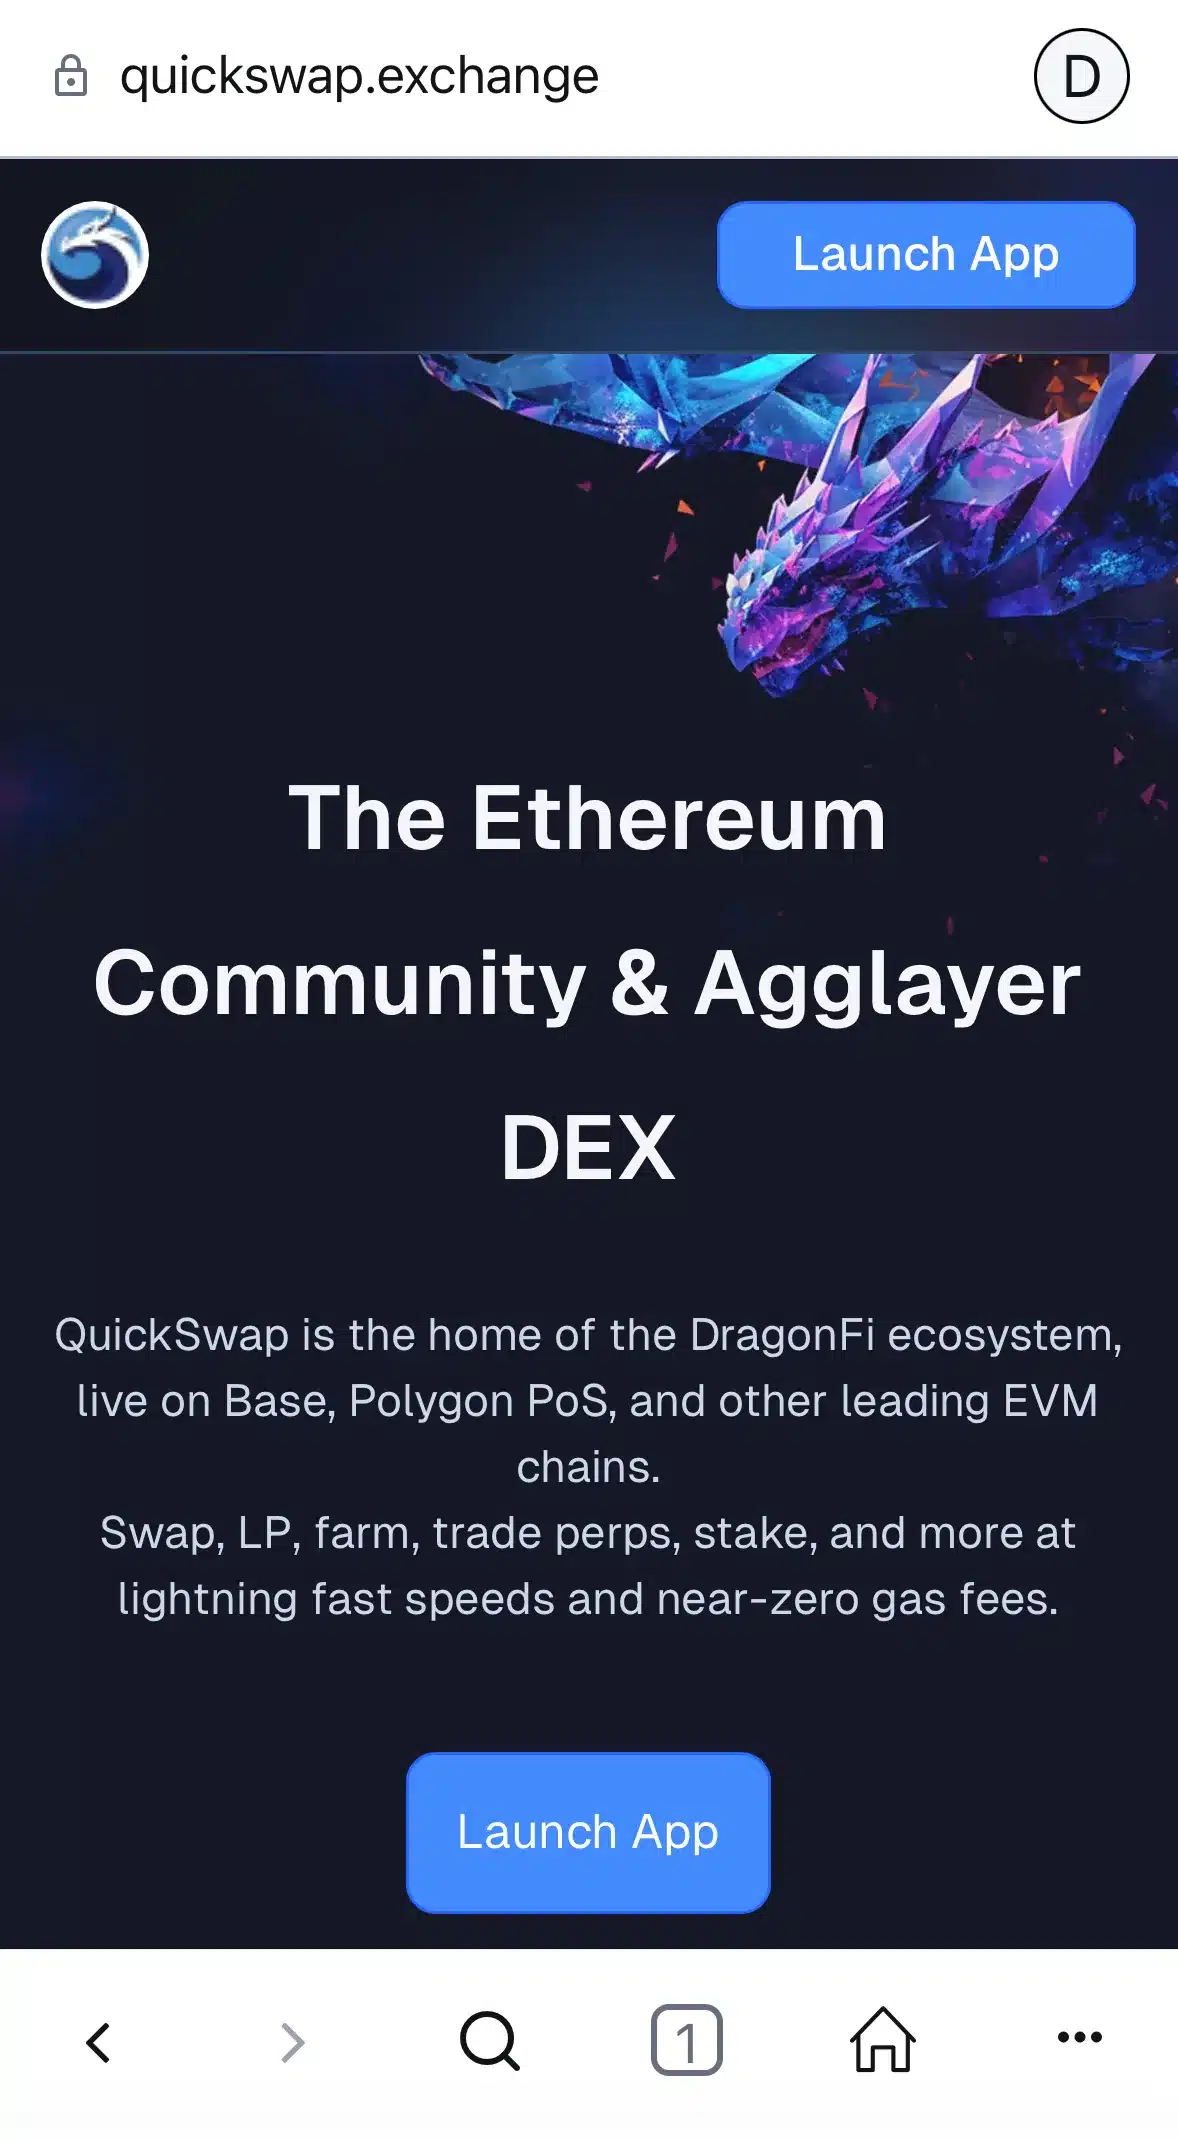
To swap or exchange tokens on QuickSwap, you would visit the QuickSwap landing page and then click ‘ Launch App‘. Ensure that you are on ‘quickswap.exchange‘ — nowhere else! Phishers create domains that look similar to trick you into thinking they are QuickSwap. That’s how they convince you to connect your wallet so they can steal your tokens.
If you wish to use QuickSwap to trade tokens on the Polygon network, you will need to switch to the Polygon network before proceeding. You can switch by pressing the button in the top right-hand corner of the Swap page on Quickswap. Once the Swap screen loads, click ‘Connect Wallet’ in the top right-hand corner of the screen.
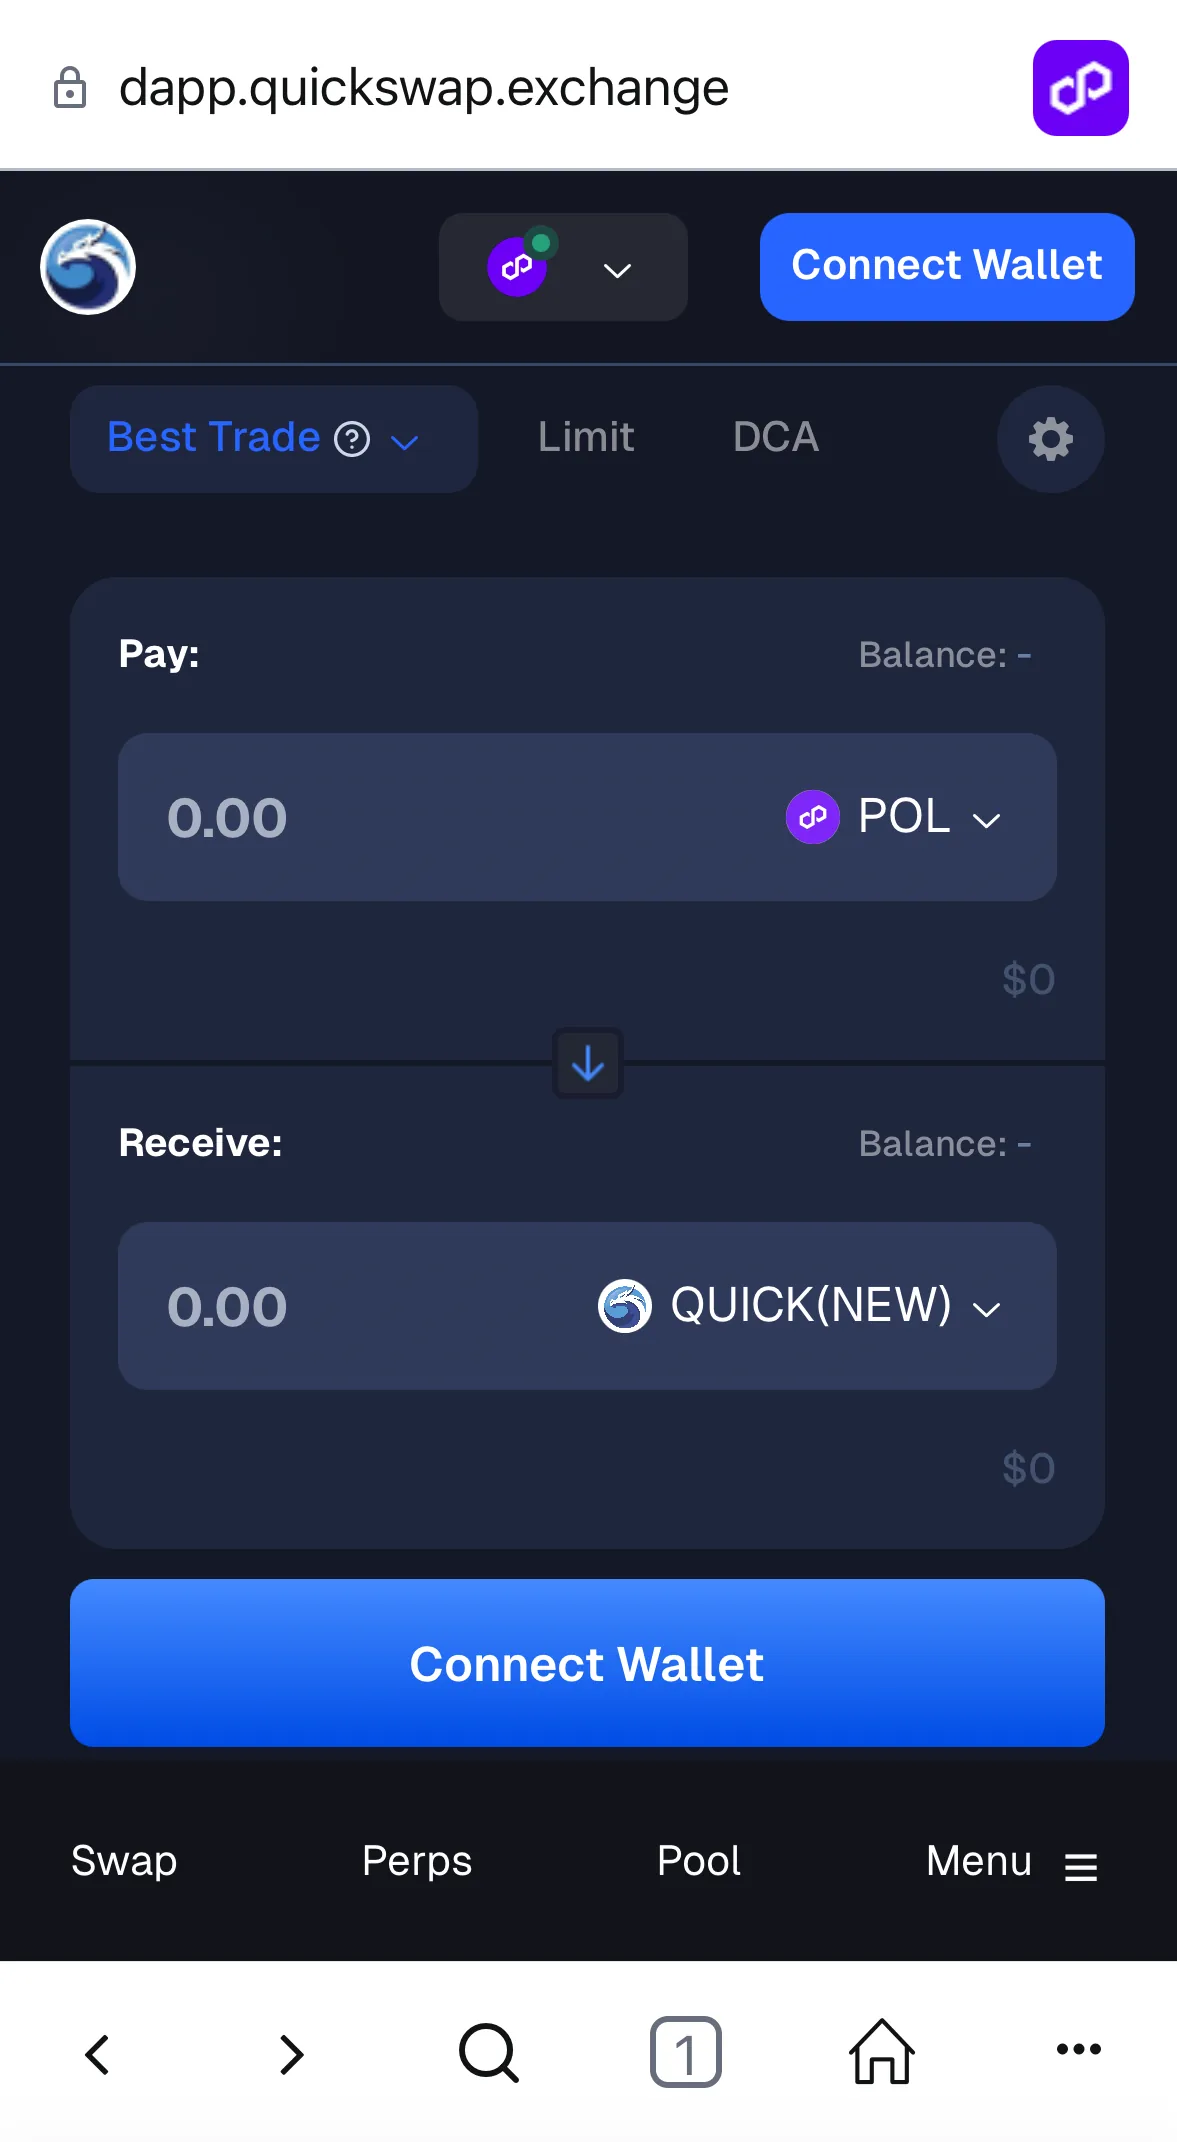
Pay close attention to the tabs at the top: ‘Best Trade‘, ‘Limit‘ for limit orders and ‘DCA‘ for dollar cost averaging. For this portion of the tutorial we will use the ‘Best Trade’ option, which streamlines the exchange and gets it done quickly. Also take a look at the bottom tabs: ‘Swap’, ‘Perps’, ‘Pool’, ‘Menu’. It is important to ensure that you are on the ‘Swap’ tab for this tutorial and in the future — the tab that corresponds to what you are doing at the moment.
If you haven’t already, you’ll need to purchase tokens that are available on the Polygon network before proceeding with this Polygon-based QuickSwap tutorial. Ideally you should purchase ‘POL’ tokens, which are required to pay Polygon’s transaction fees. That also makes it easier to follow this tutorial. If you already have ETH or other tokens on the Ethereum network, or another non-Polygon network that you’d like to use: you can transfer them to Polygon using the Polygon Bridge.
Click ‘Connect Wallet’ and a confirmation prompt should pop up. In this tutorial, we’re using MetaMask.
Your next step is to enter the quantity of tokens you want to trade. In this example, we will trade ‘POL’ tokens for ‘QUICK’ tokens. The tokens you are trading from are in the top dropdown box (where you see ‘Pay:’ and ‘POL’ in the screenshot above), and that is where you type in how many ‘POL’ tokens you want to exchange for ‘QUICK’. Before proceeding, tap or click that drop down box that says ‘POL’ to take a glance at the tokens you’ll be able to choose from in future trades! Once you’ve entered the number of tokens, the exchange will display the estimated number of ‘QUICK’ tokens you will received once the trade has been completed.
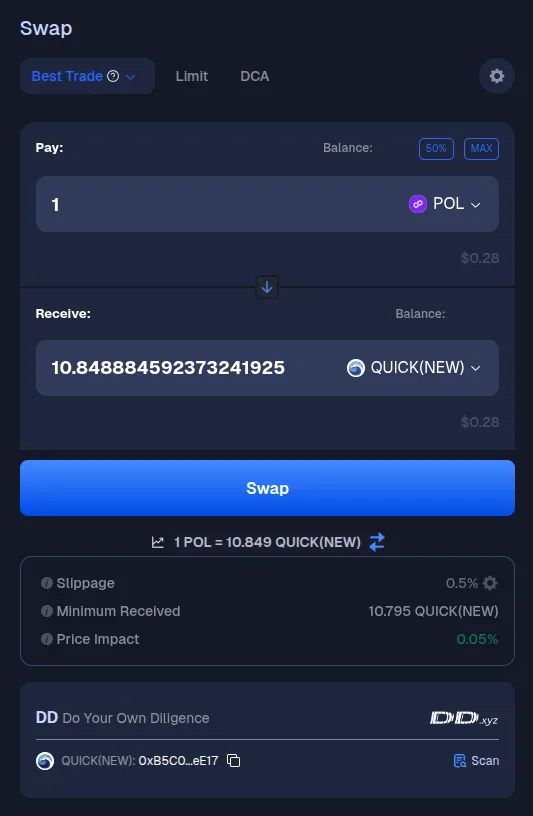
After reviewing the details, click ‘Swap’ and wait for the exchange to pop up the confirmation prompt shown below:
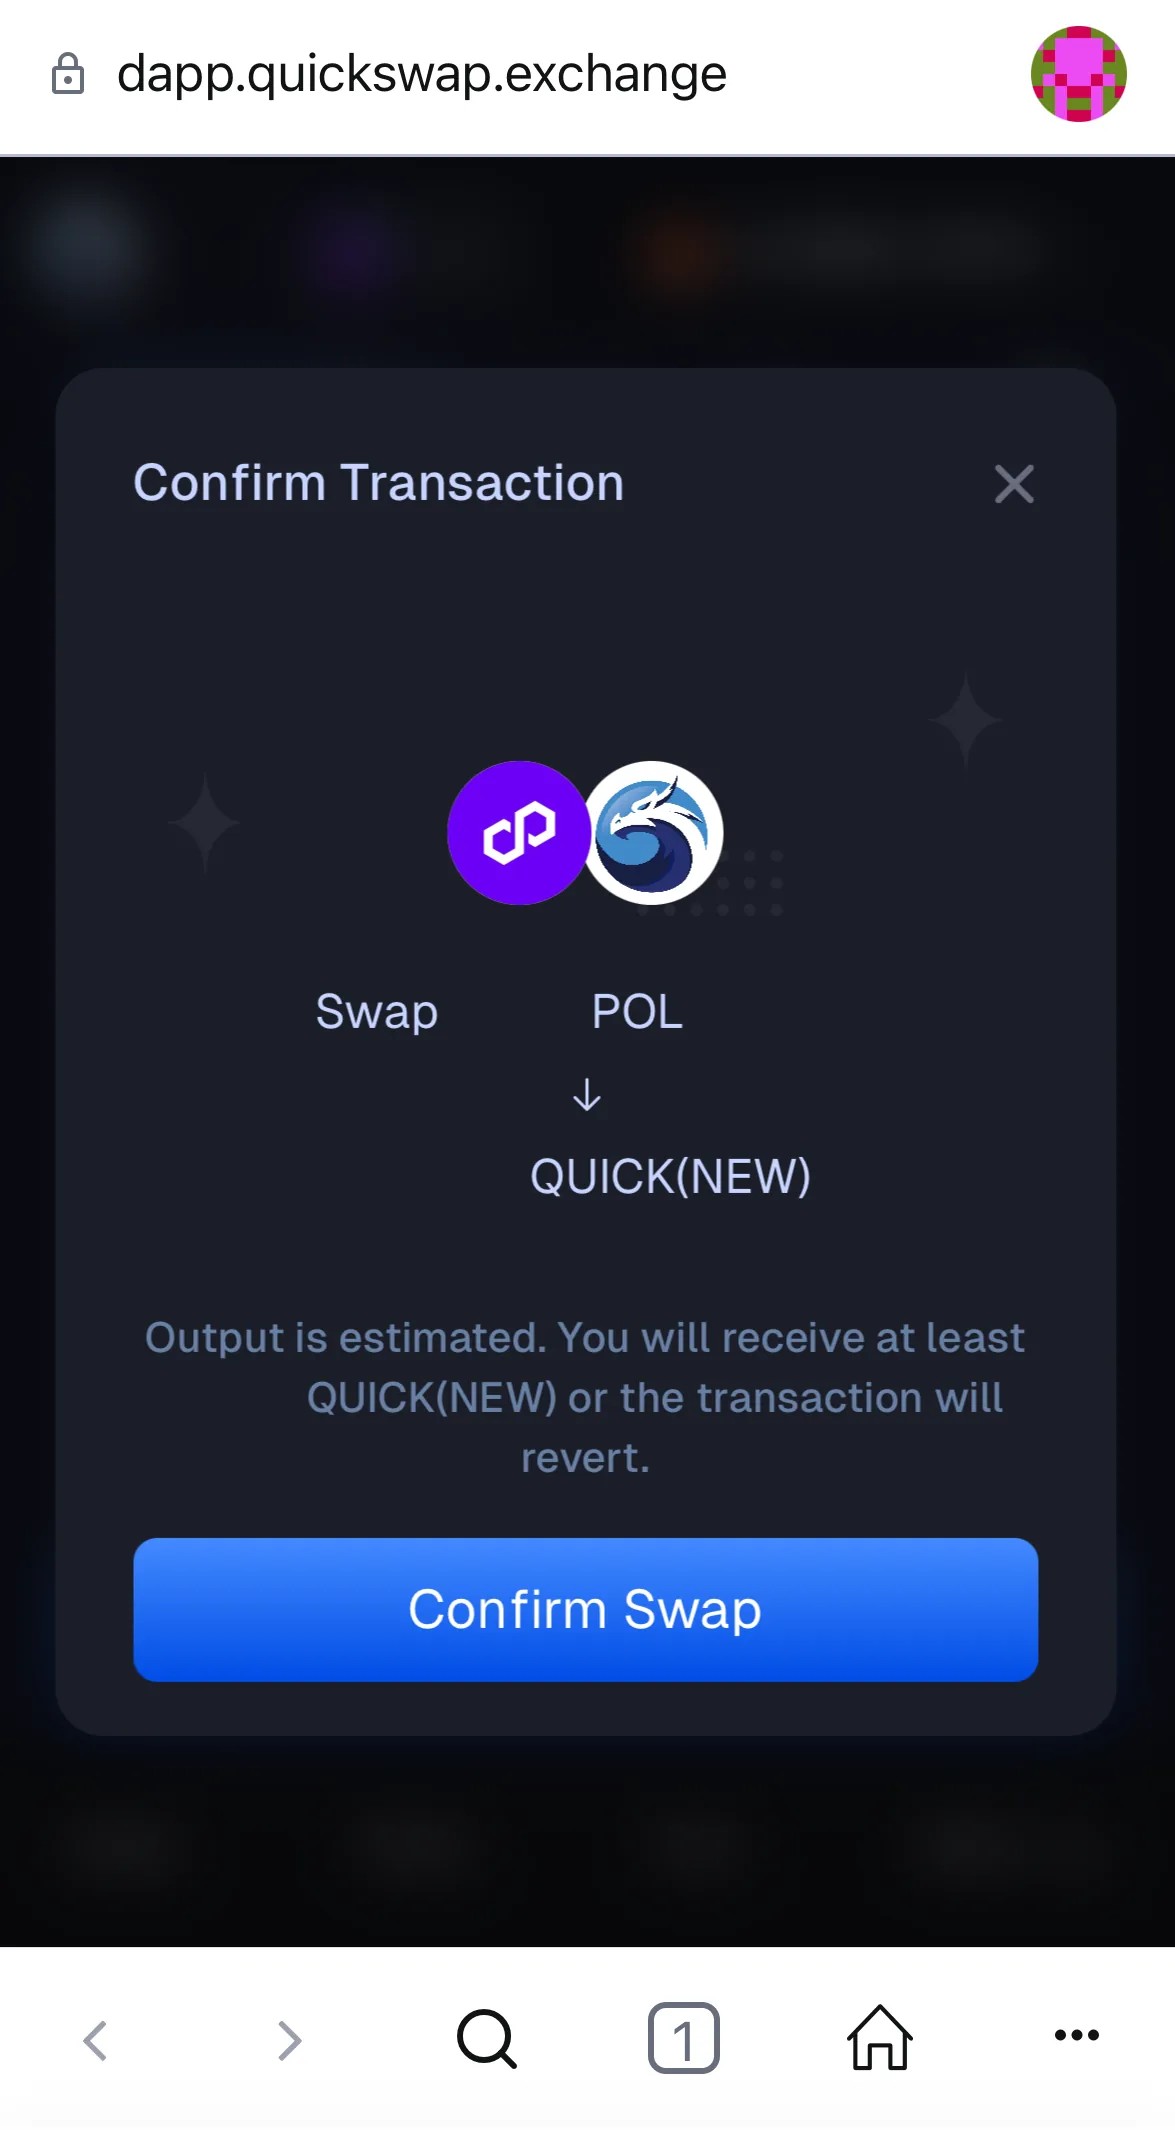
Review the estimates it provides (they are blanked out in the screenshot above) and then click ‘Confirm Swap’. Wait for your browser wallet or wallet app’s confirmation screen to load as shown below.
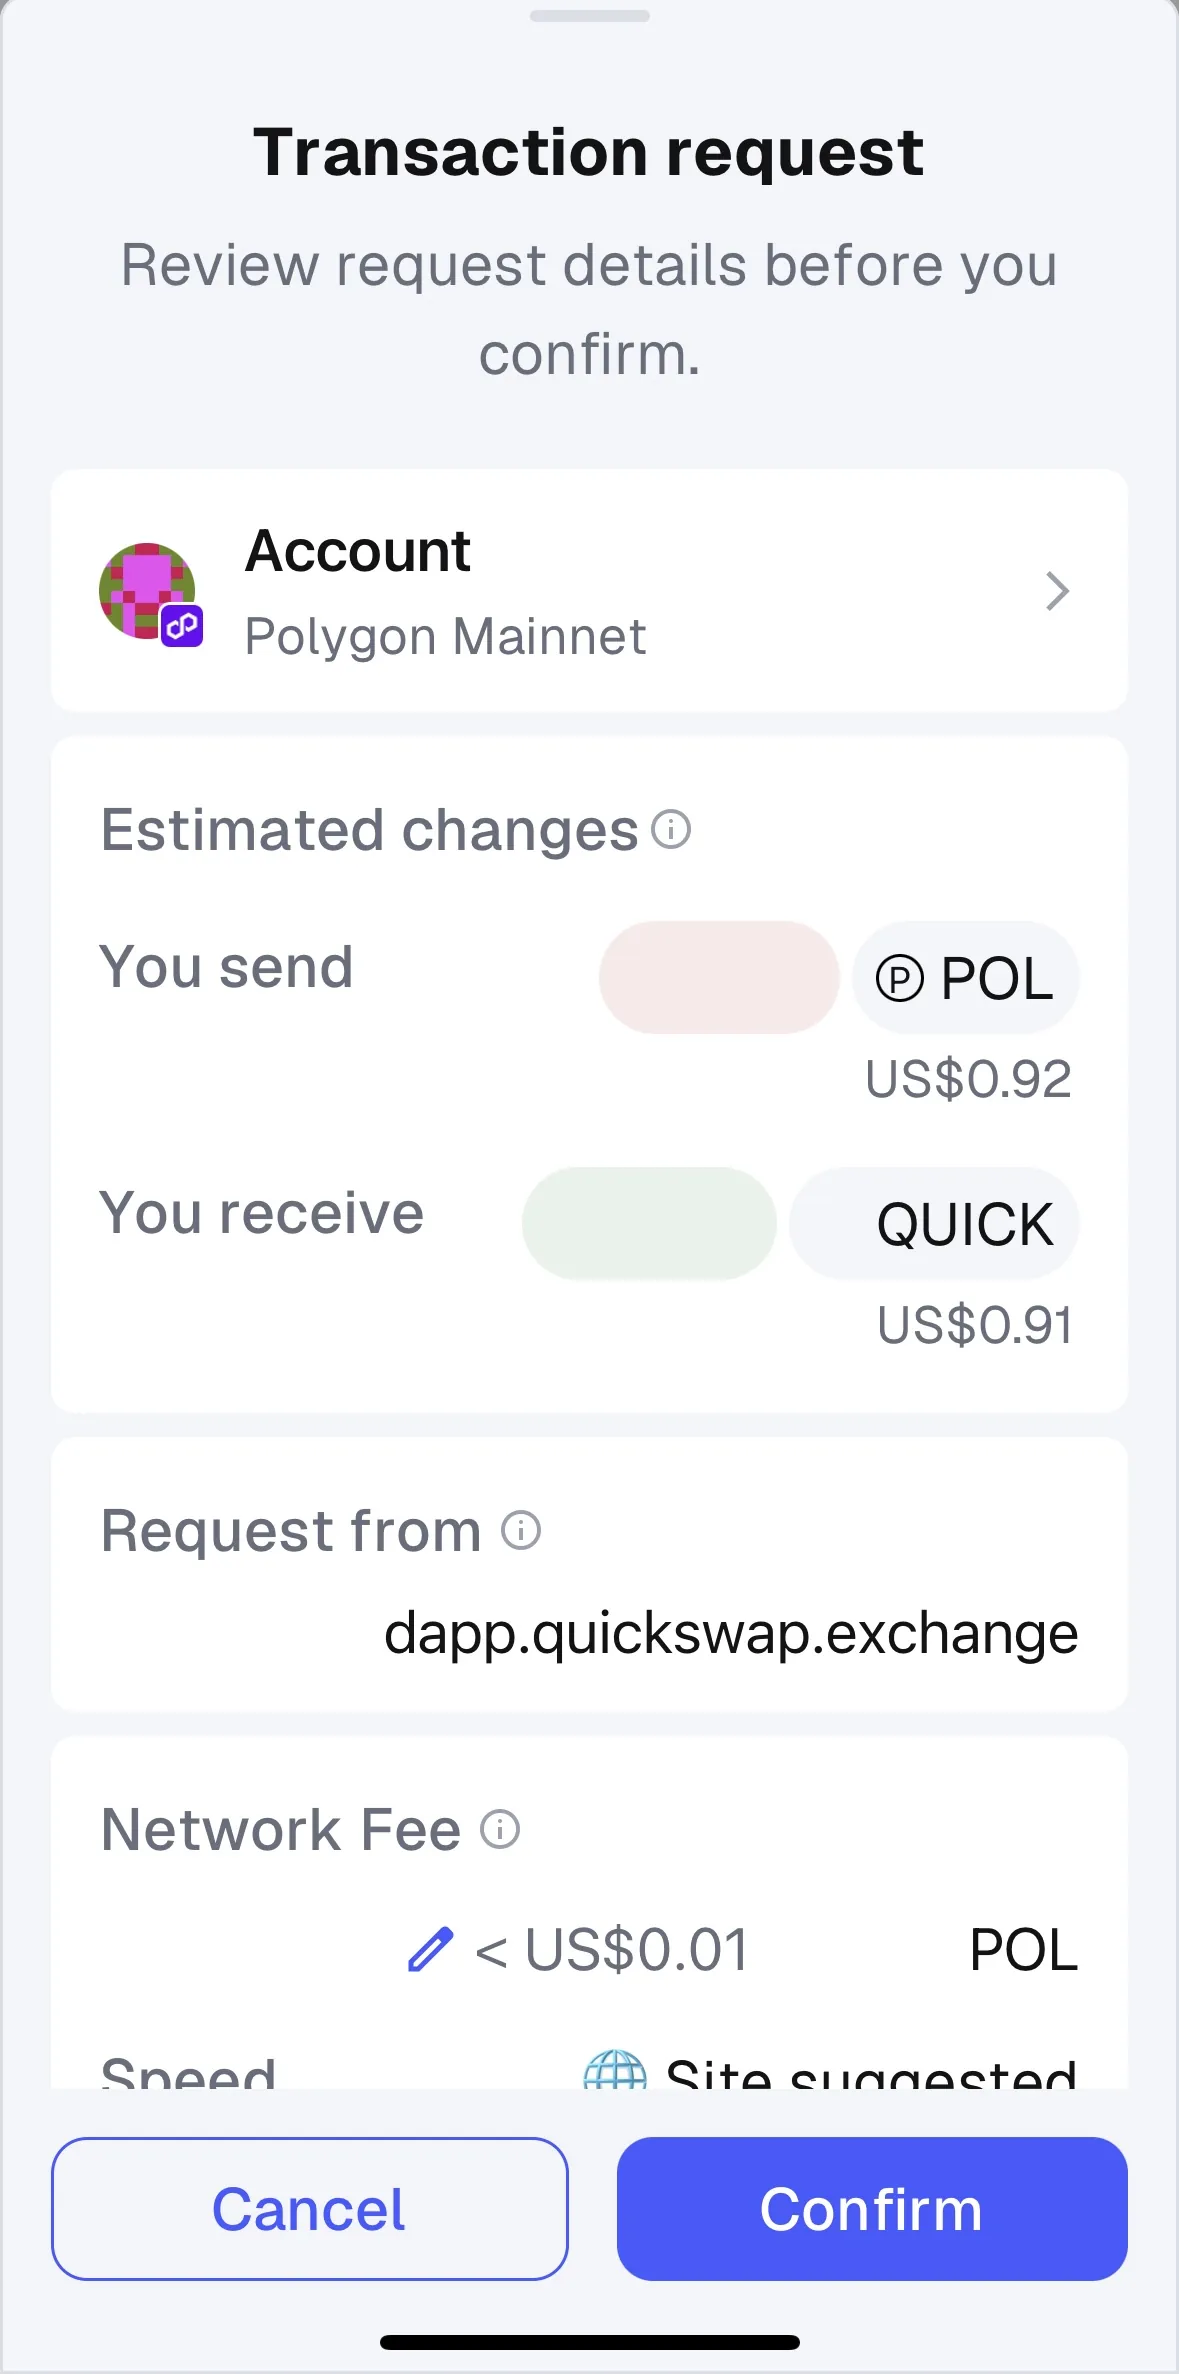
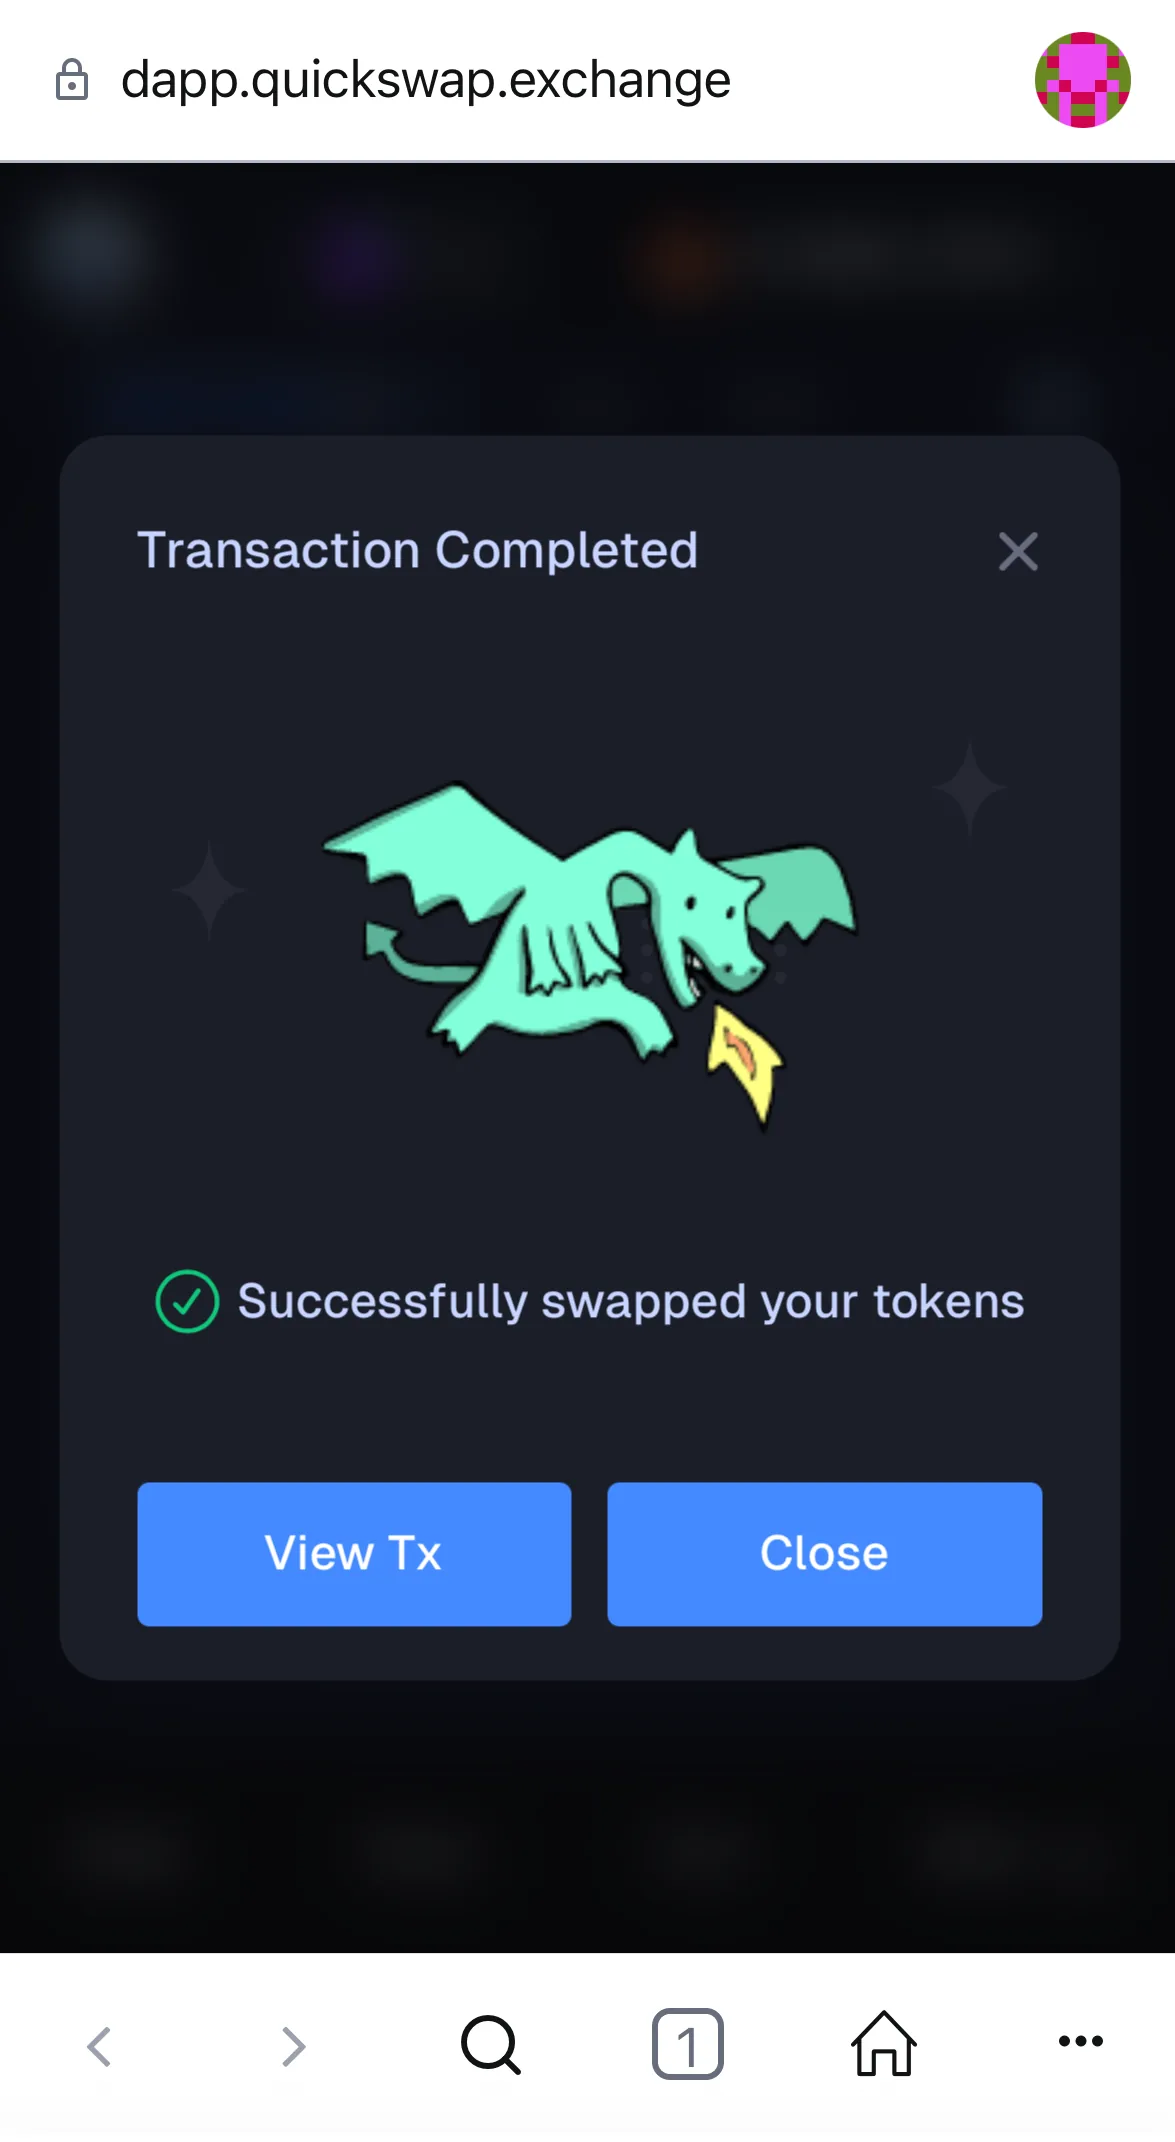
Review the estimated transaction fees shown and click ‘Confirm’ if you want to proceed. The estimated network fee in the example above is < $0.01 (the ‘POL’ amount was redacted). When the transaction is complete, you should see the following window pop up: