The decentralized finance (DeFi) industry has been growing rapidly over the past year, and has shown the sheer versatility that cryptocurrency and blockchain have to offer the financial sector. Decentralized exchanges have been one of the most prominent drivers of that growth — most notably Uniswap. This Uniswap tutorial explains how to use Uniswap safely.
Uniswap is a decentralized exchange (DEX) powered by smart contracts that run on the Ethereum network. As stated in my introduction to Ethereum, a smart contract is code that can automate activities and execute the terms of an agreement electronically. This eliminates the need for a middleman in many cases.
Uniswap is not an exchange with a custodian wallet. This means that you don’t store your funds in it. This provides a substantial security benefit as you trade from a conventional wallet that is not accessible via the APIs or username/password logins used on traditional exchanges. Both APIs and username/password login are highly vulnerable to hackers.
On a conventional cryptocurrency exchange, you do the following in order to use it:
- Create an account at the exchange and fill out personal information such as email, and possibly sensitive KYC information that could be stolen during a breach — thereby exposing you to the risk of identity theft.
- Deposit the tokens you want to sell to that new account. Your tokens are now stored in a wallet owned by the exchange. The exchange can interfere with your transactions or steal your funds.
- Select which cryptocurrency you want to sell, and the one you want to exchange it for. You have to ensure that the exchange has that trading pair. For example: ETH/DAI.
- Enter the amount and click the appropriate trade button and wait for your order to be filled.
- Return to the exchange later to see if your order has been filled, and then withdraw the new tokens to a proper non-custodial wallet for safety (for example: a hardware wallet). Hopefully your tokens are still there when you return!
Some steps can be skipped – such as the last part of 5. Many people simply leave their tokens on exchanges so they don’t have to keep depositing or withdrawing — However, this has proven to be unsafe and has resulted in many exchange-based robberies. Therefore none of the above steps should be skipped.
Uniswap Tutorial: How To Use Uniswap
To use a decentralized exchange like Uniswap, you go to the front page (app.uniswap.org) and click ‘Connect Wallet‘. Ensure that you are logged into MetaMask, which is the wallet we will use in this tutorial. Always ensure that you have typed in the correct URL, and didn’t click any links to fake websites pretending to be Uniswap, as those (phished) websites will steal your tokens.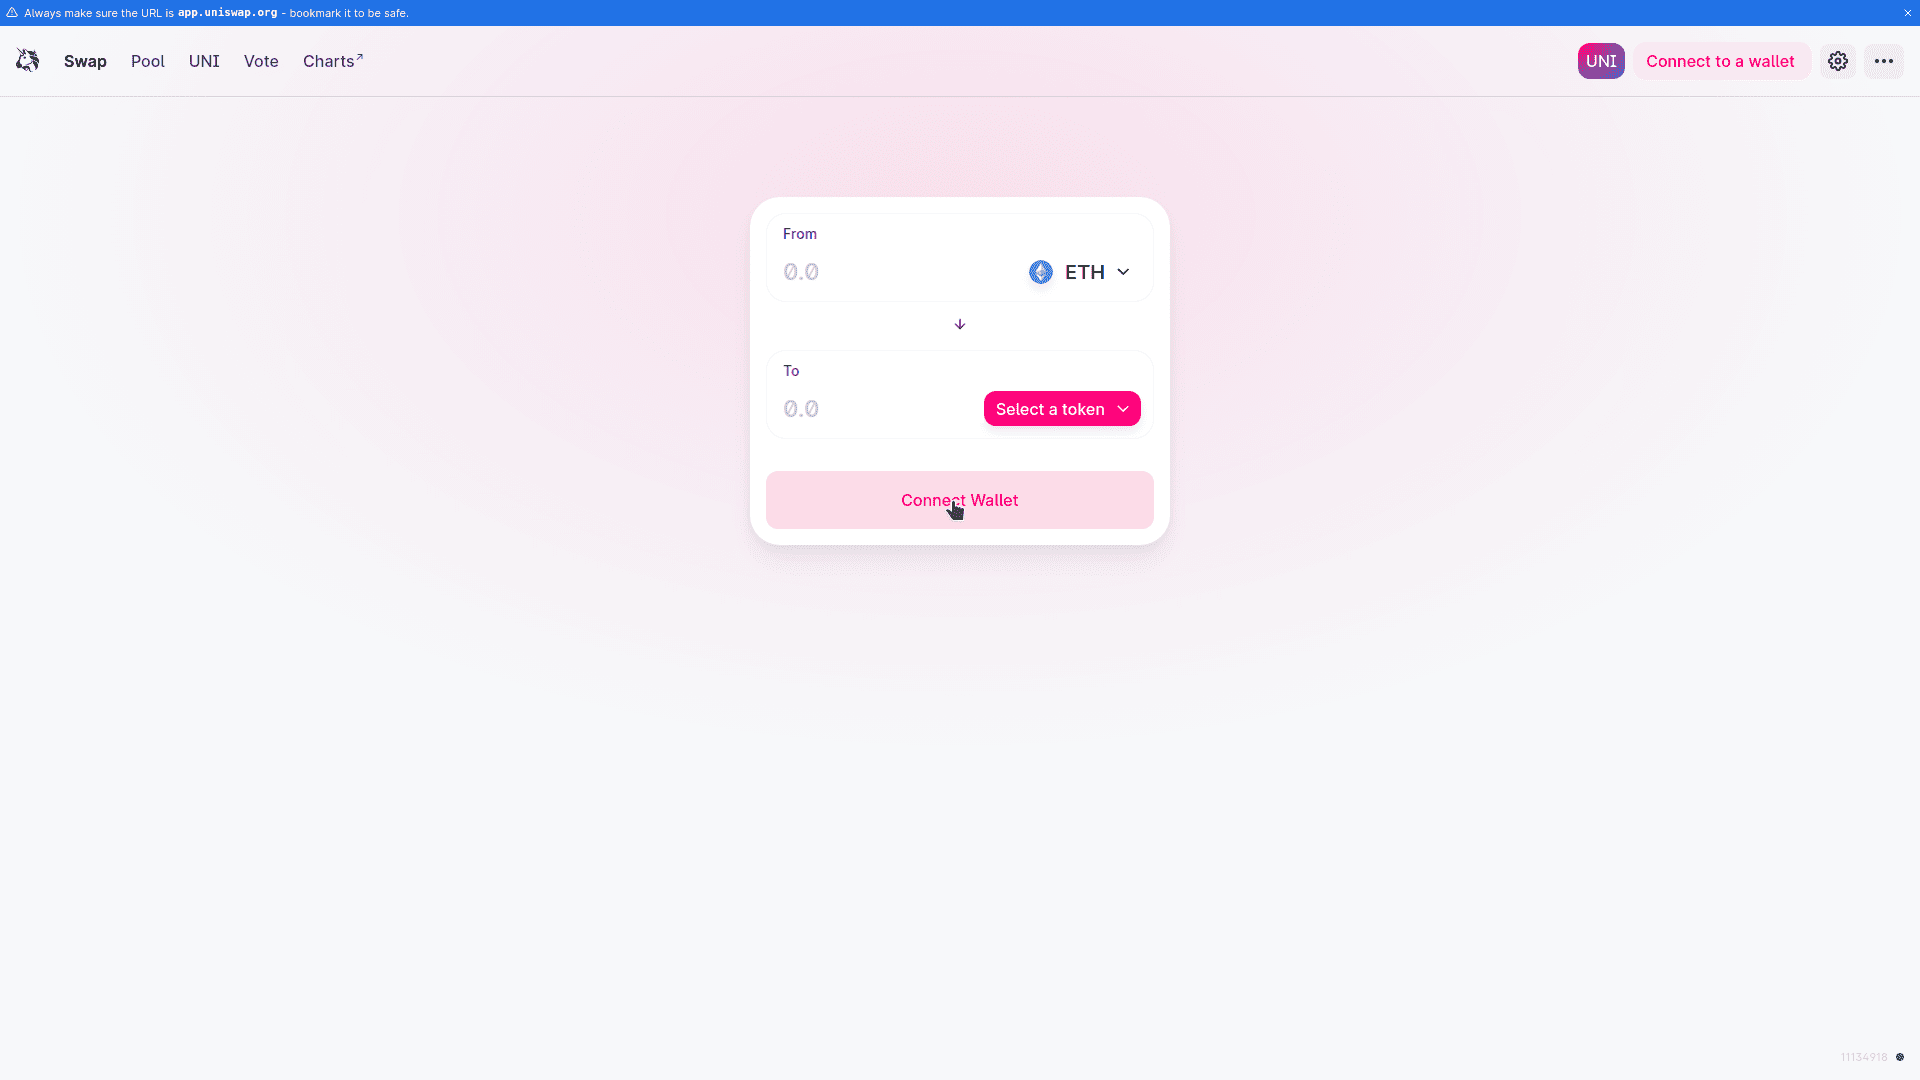
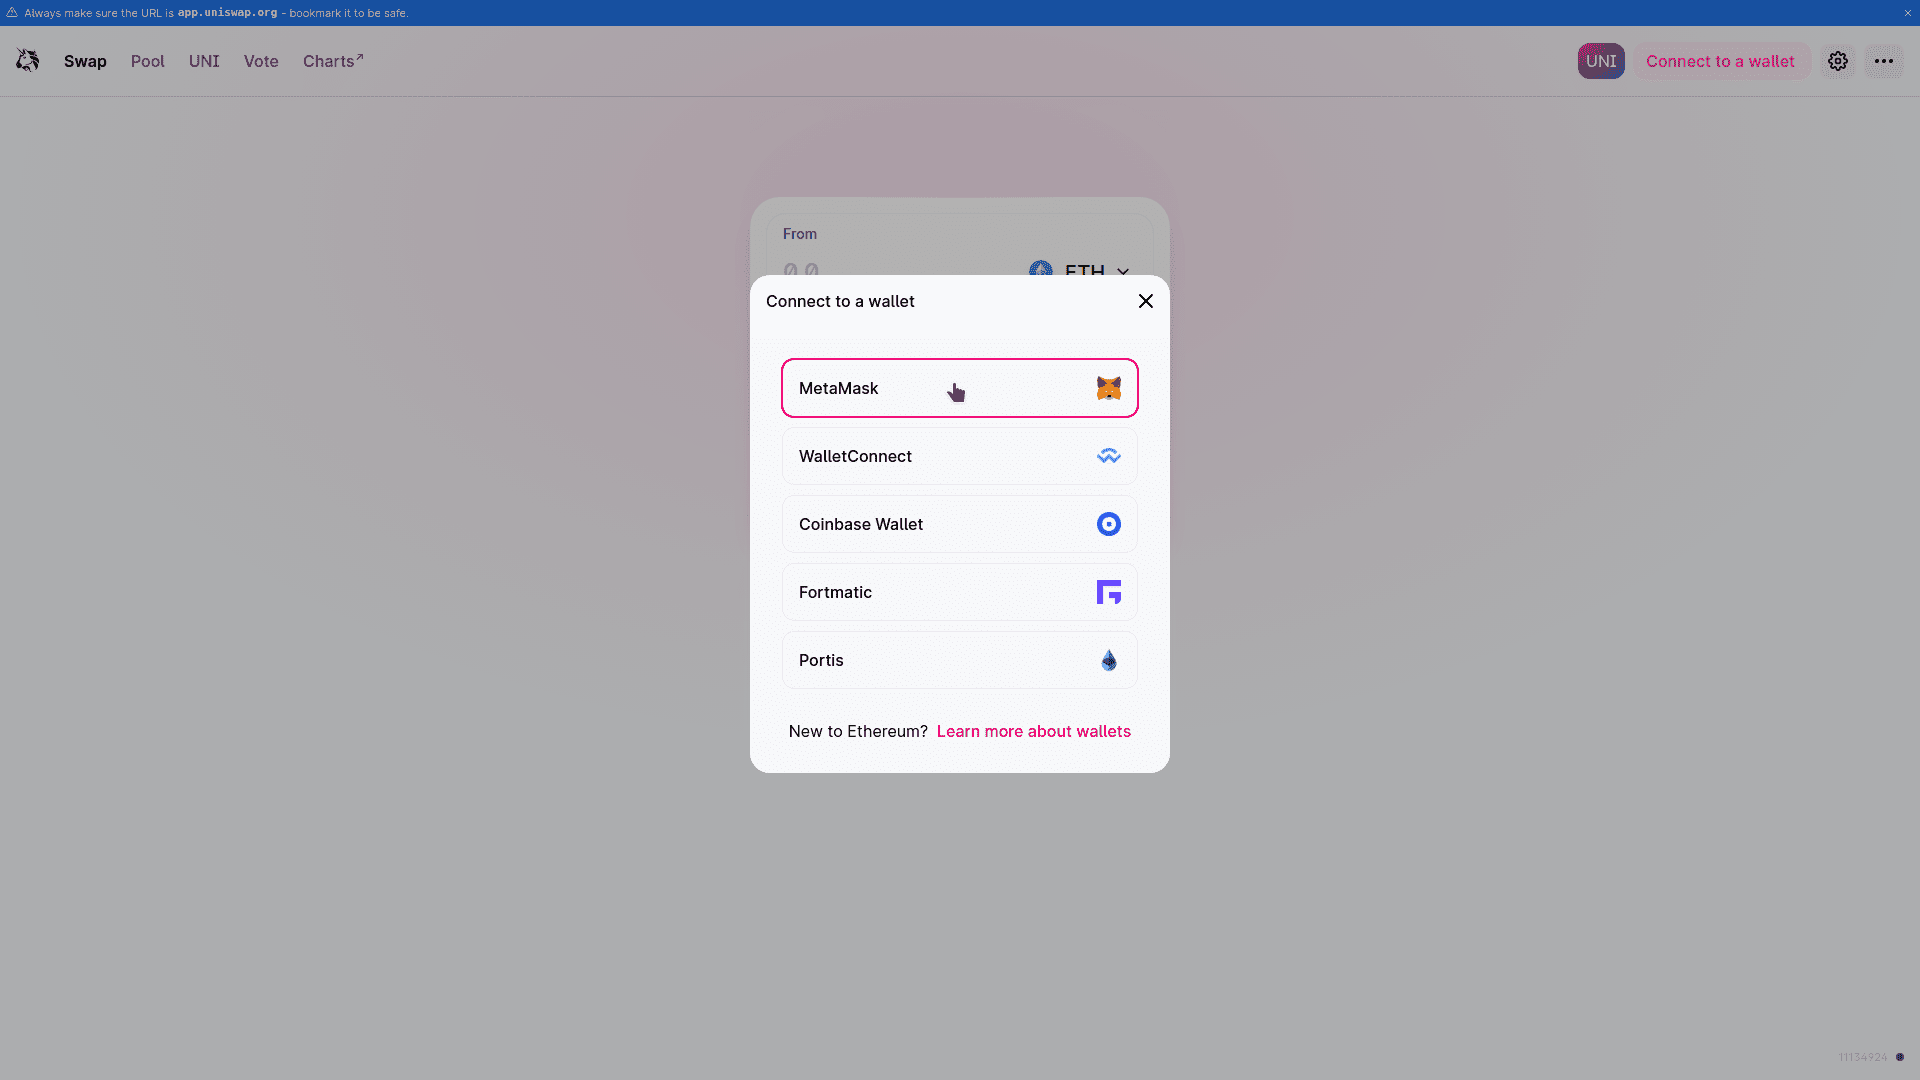
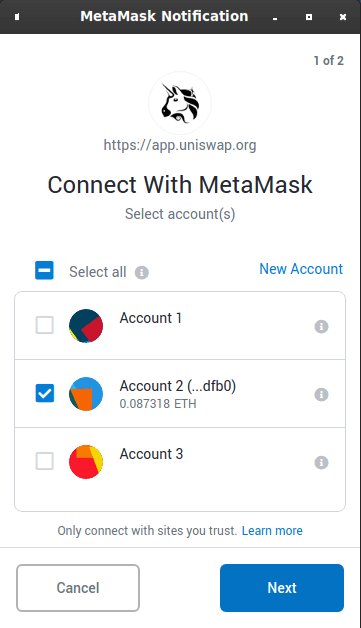
Next, select MetaMask from the following dialog.
Now you can specify which tokens you want to trade on Uniswap:
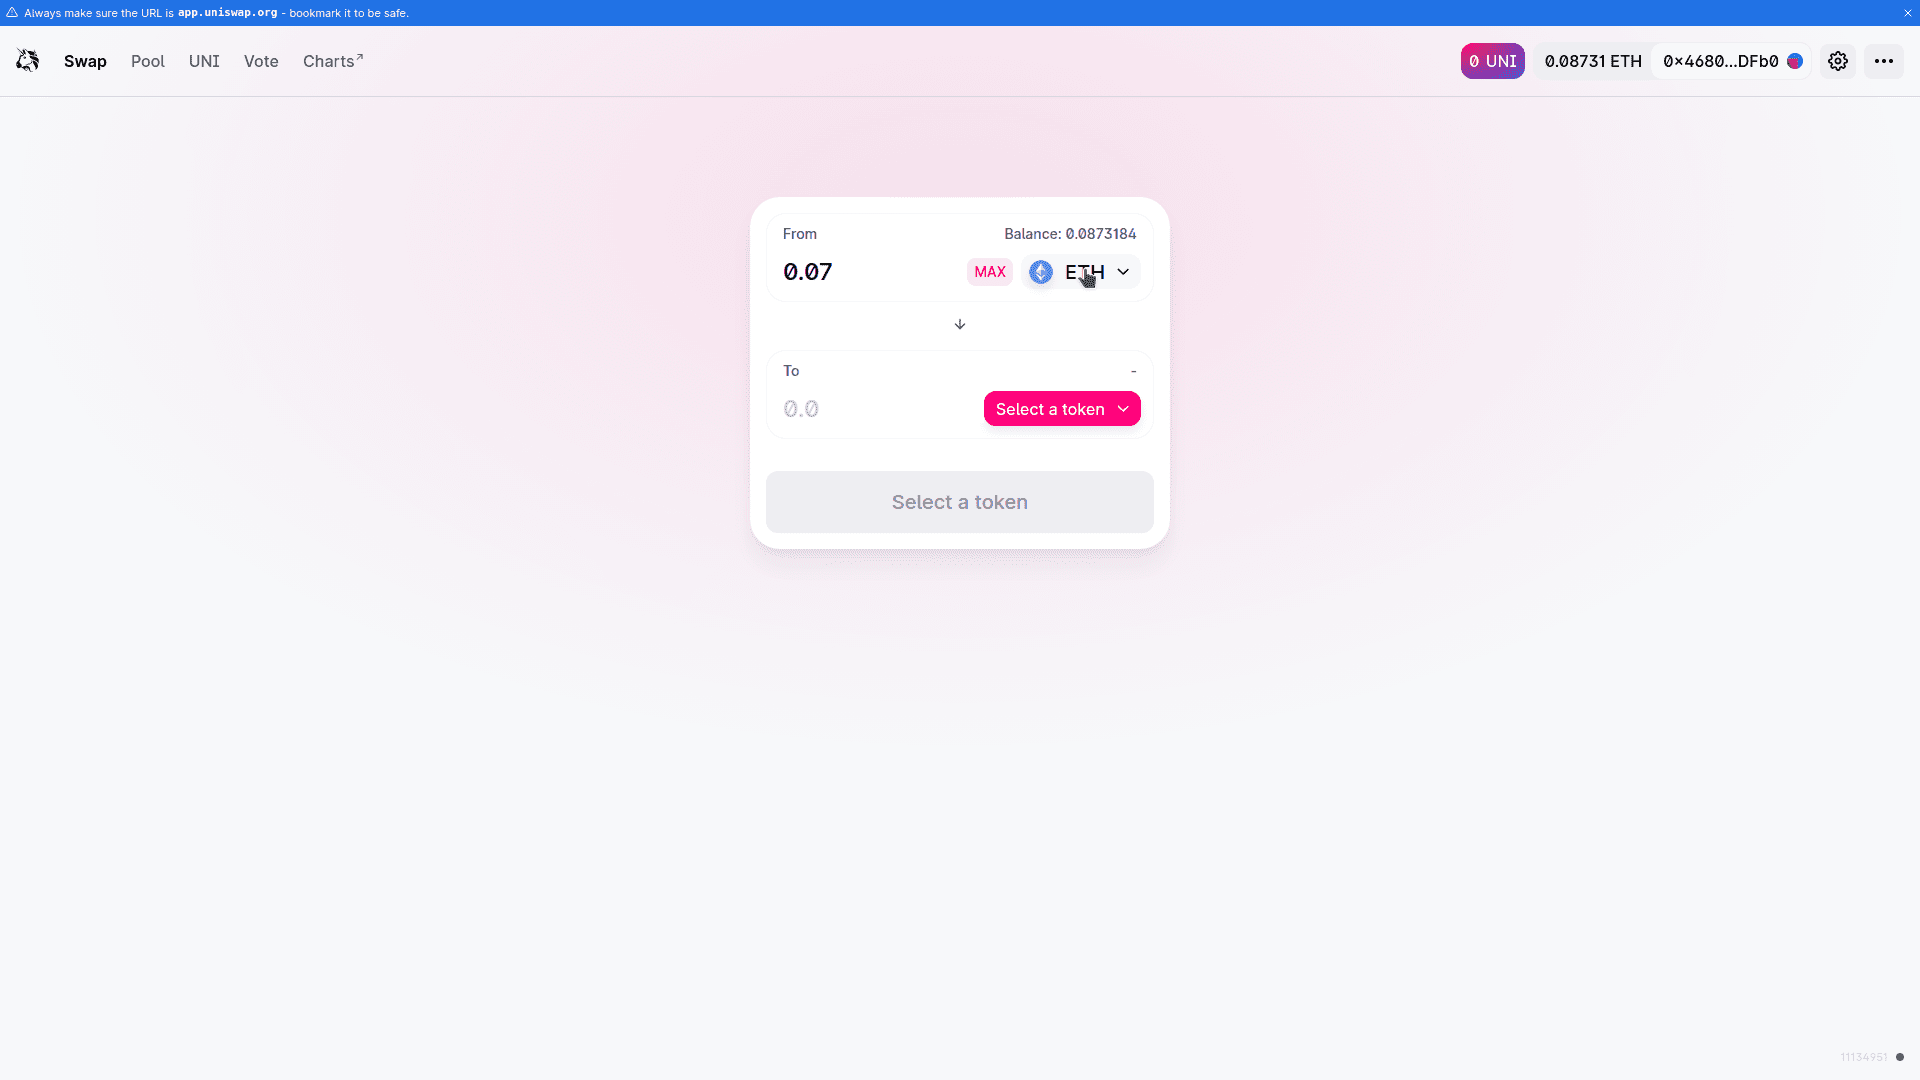
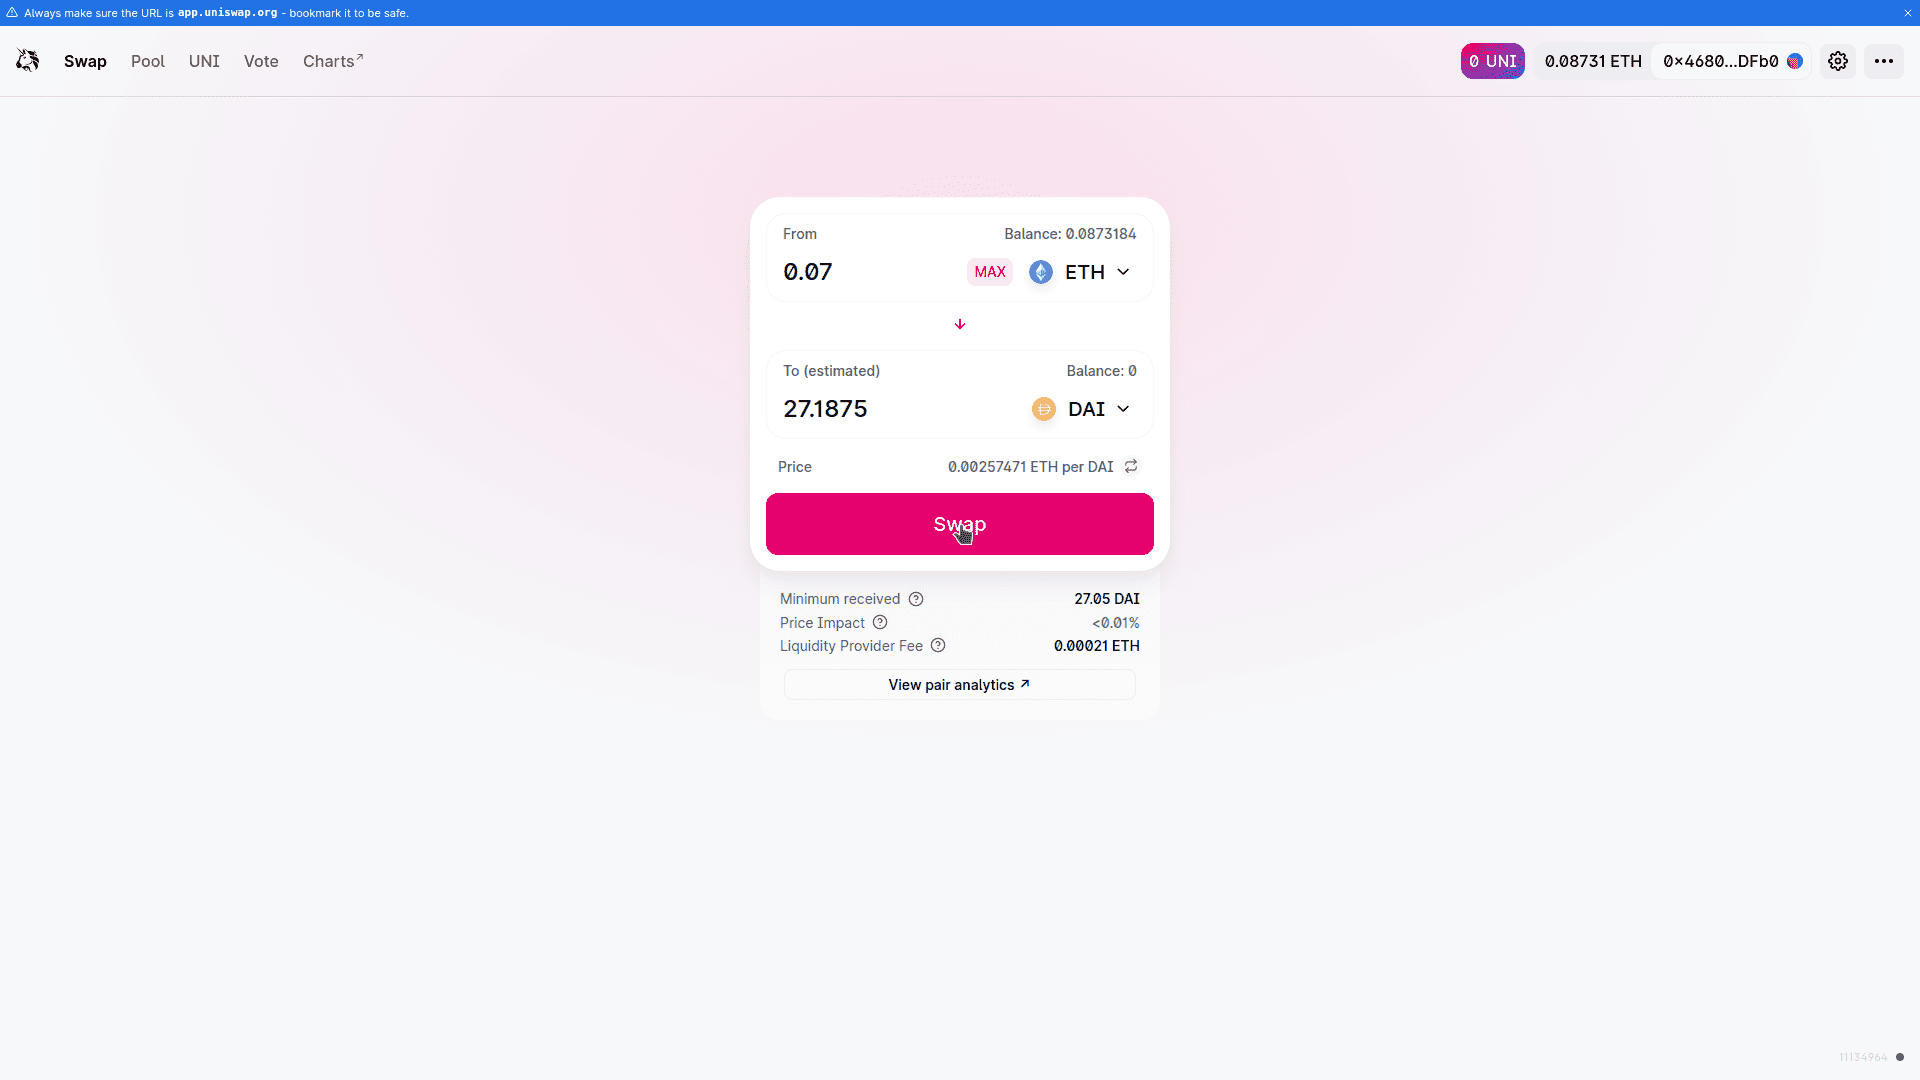
ETH and DAI were used for this example, but feel free to experiment with whichever pair of tokens you wish to trade. Enter the amount of the token you want to sell in the top text field, which is also where you specify which token you want to sell. Uniswap will automatically set an equivalent amount of the token you wish to receive and show you which exchange rate right under the second text field as ‘X ETH per DAI‘. Click ‘Swap‘.
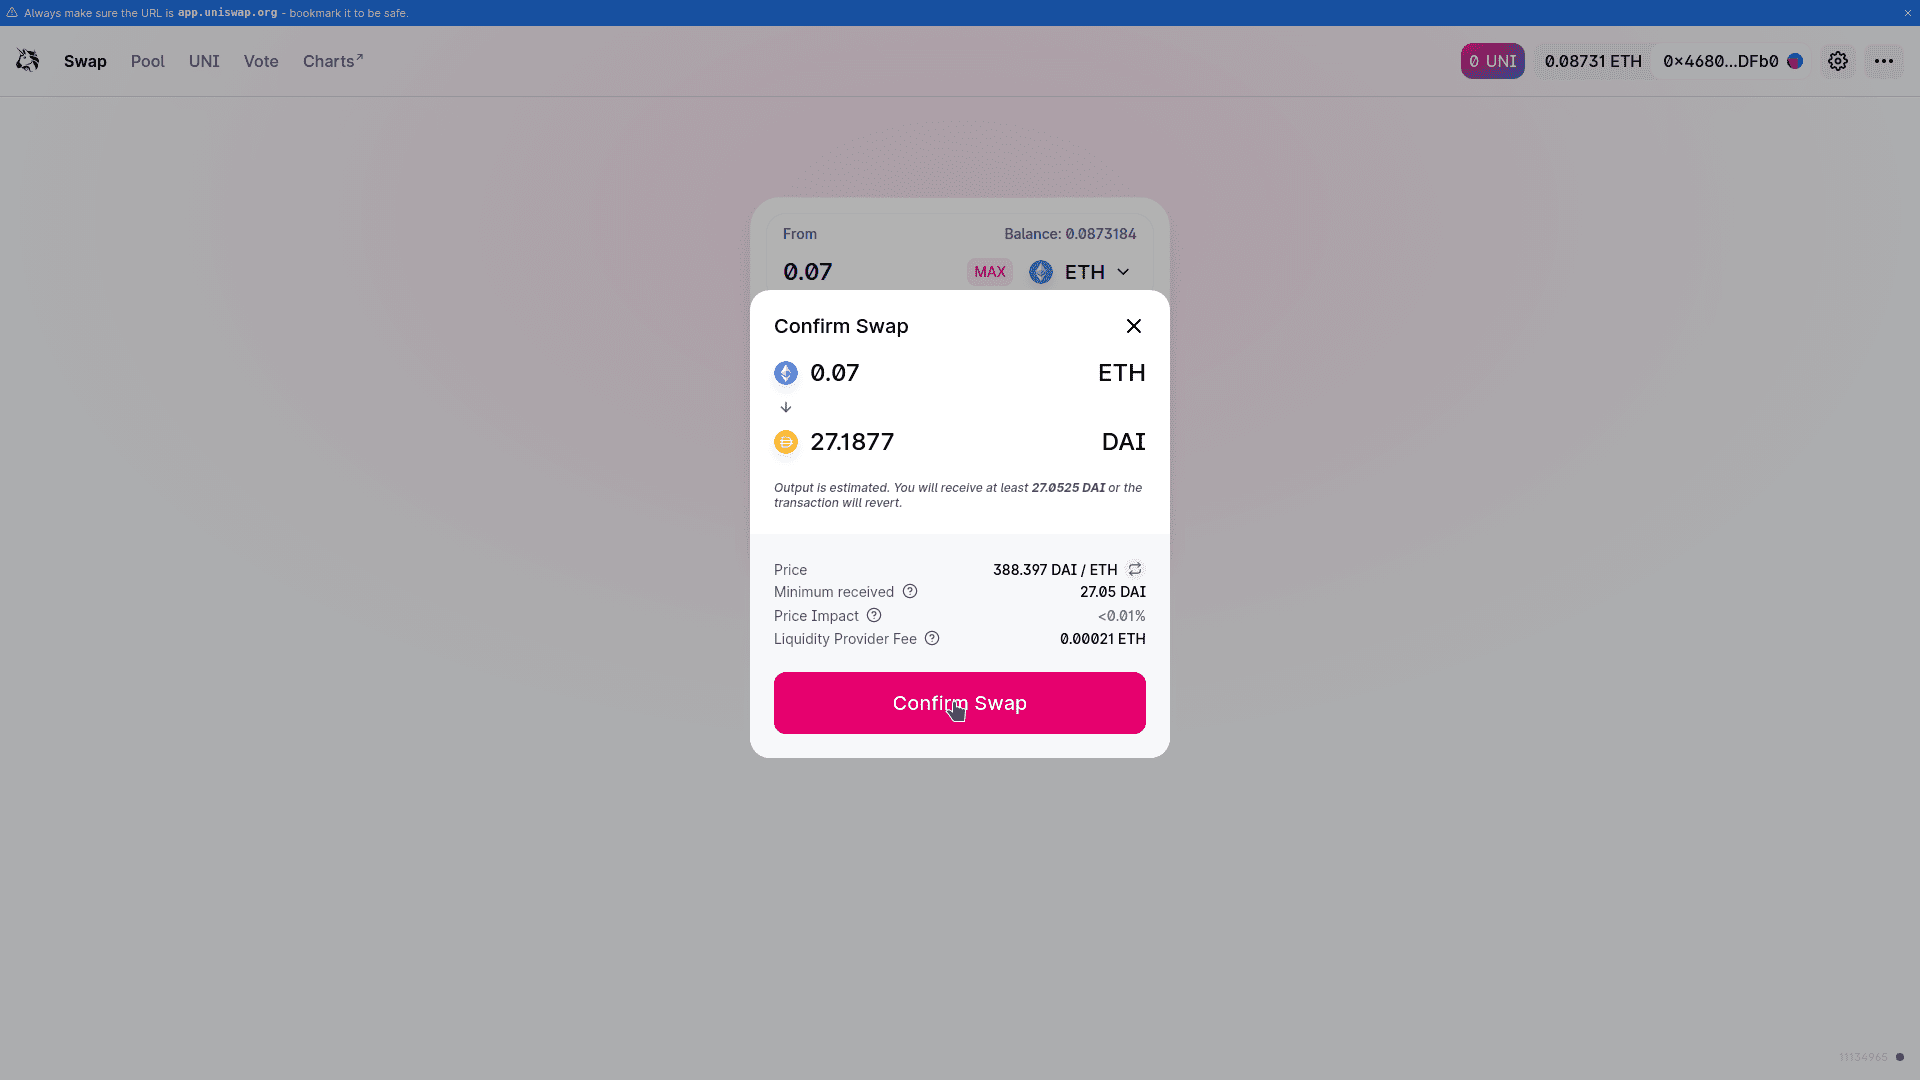
Keep a close eye on the ‘Price Impact‘ as well. Uniswap will now ask for confirmation. Carefully review all the figures and rates, and then click ‘Confirm Swap‘. Ensure that the gas fee is high enough to get the transaction mined in a timely manner, unless you have time.
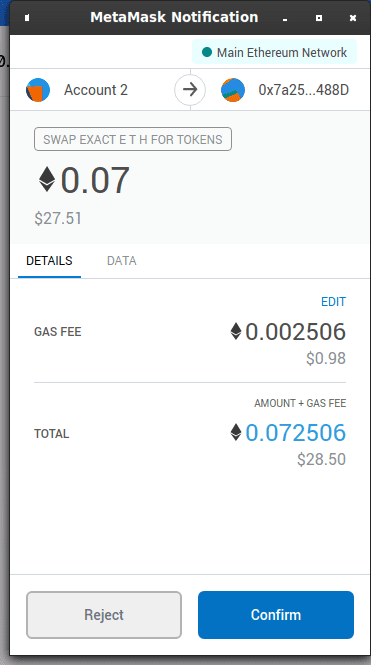
You’re done! Check your MetaMask DAI balance within the next 30 minutes to see if the trade has been completed. If it is, you’ll see the new DAI tokens in your MetaMask wallet.
How To Mine Liquidity On Uniswap
Uniswap provides the benefit of easy, seamless cryptocurrency trades without the use of an intermediary. However, you can provide Uniswap with liquidity and be rewarded for it. It’s as simple as depositing tokens to a liquidity pool.
Please read about the risks associated with impermanent loss (IL) before providing liquidity on exchanges.
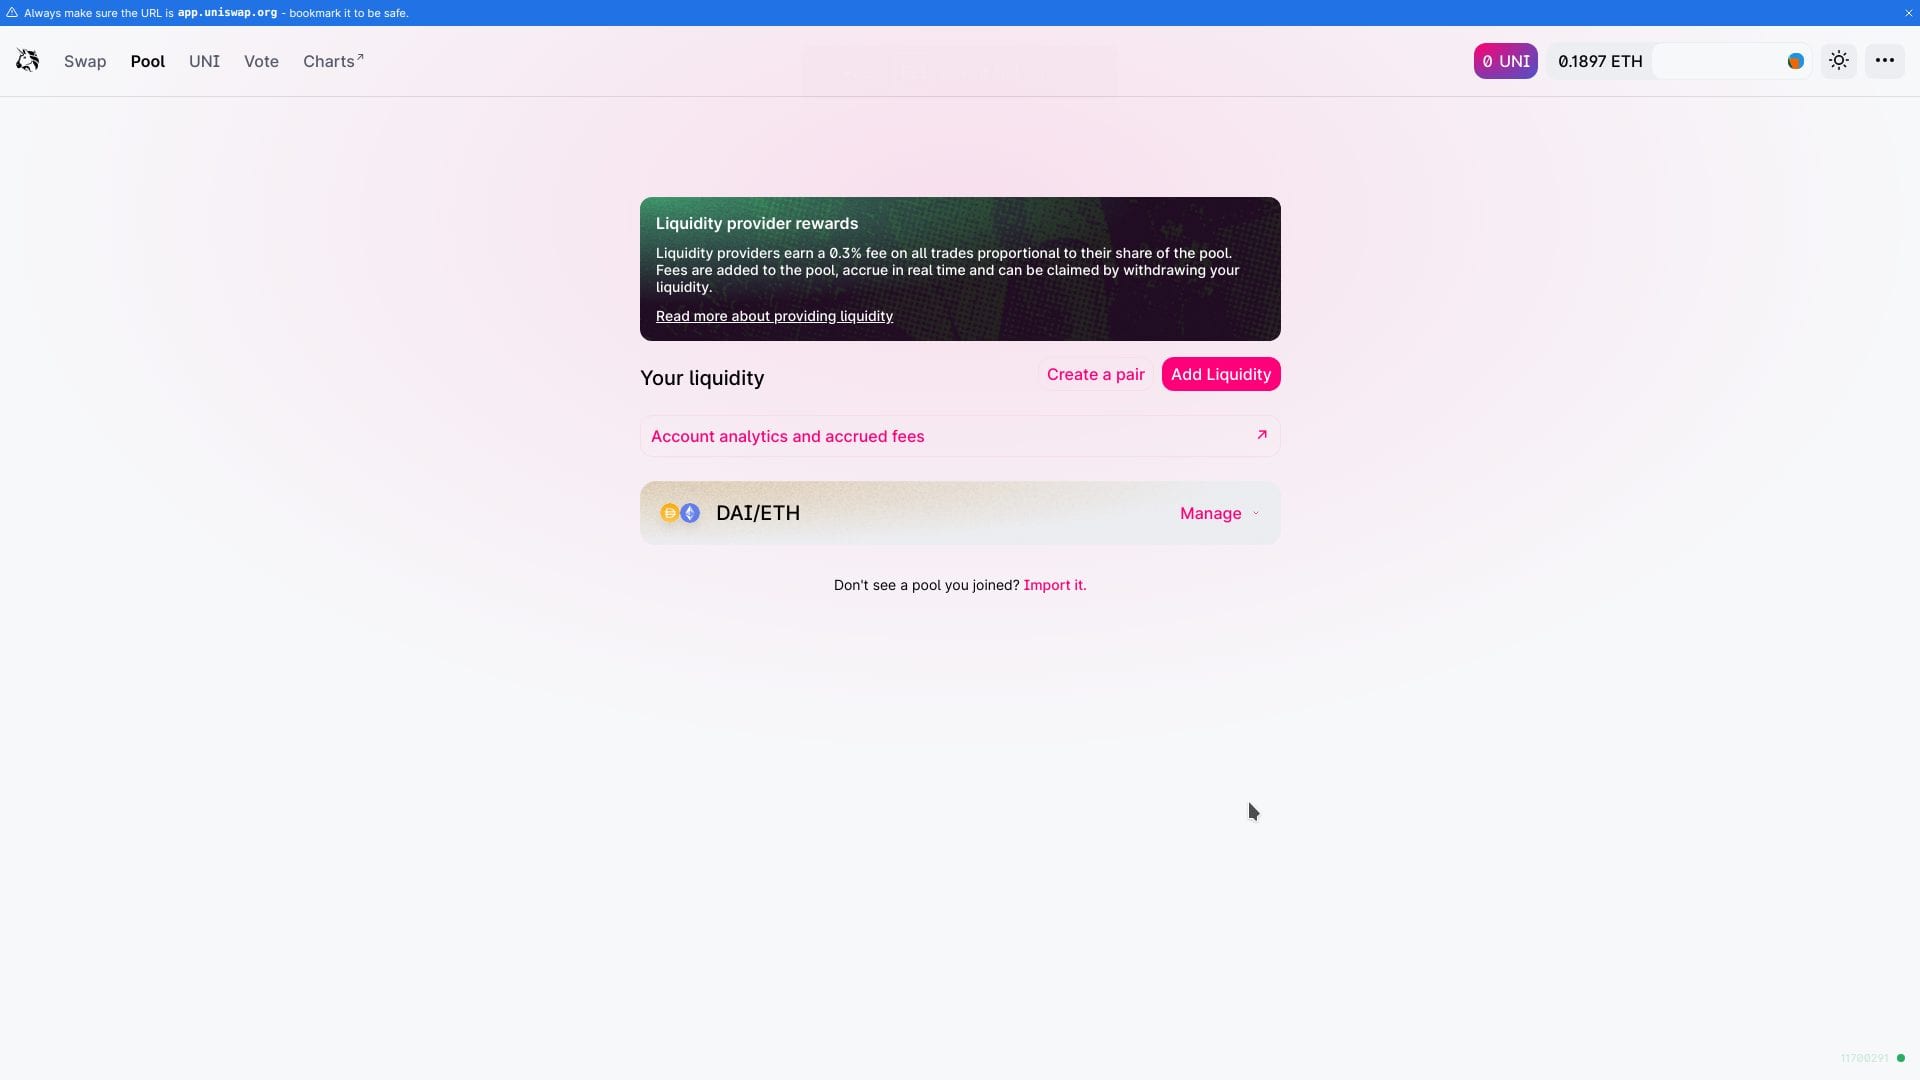
Go to the Uniswap home page and click ‘Pool‘ to see liquidity provision options. There are multiple options, but in this tutorial we will use the ‘Add Liquidity’ option. Click ‘Add Liquidity‘.
The following prompt enables you to choose which trading pair you want to provide liquidity for. In this example it is ETH and DAI. Click where you see ETH and DAI (or ‘Select a Token’) shown to the right of the screen to load dropdown boxes and select which tokens you want to supply. Read the tips and instructions provided carefully. When done, click ‘Supply‘.
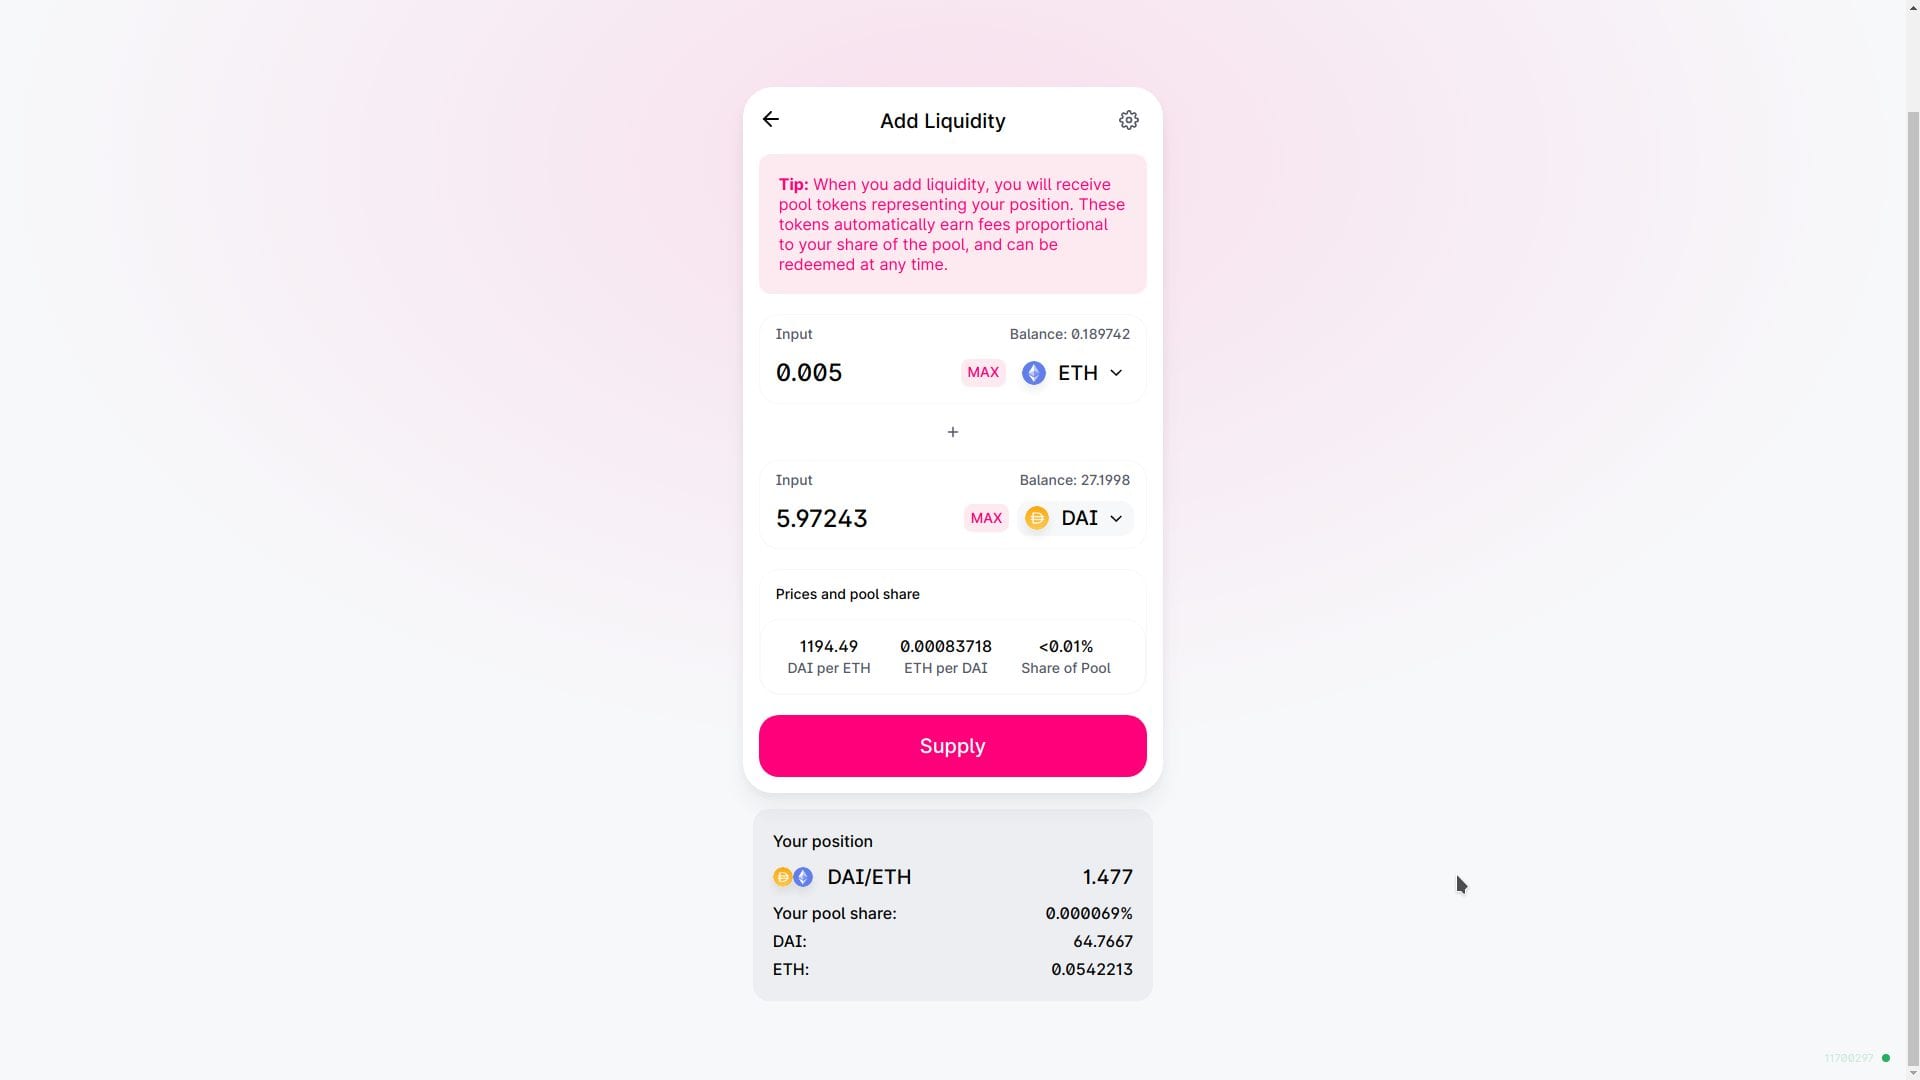
The page on which you set the amount of liquidity you want to supply.You should now see a confirmation dialog. Carefully review all the figures shown and ensure that you’re ok with them, then click ‘Confirm Supply’.

Afterwards you will see MetaMask prompts so that you can send off the tokens to the liquidity pool. Read through those prompts carefullly. Follow their instructions as you did in the Uniswap trading tutorial earlier in this article.