By Nicholas Brown.
Kinetix is a decentralized exchange (DEX) that runs on Kava — an EVM-compatible smart contract platform built with Cosmos. This means that Kinetix offers lightning-fast exchanges and low fees. This tutorial demonstrates how to swap tokens on Kinetix decentralized exchange with screenshots every step of the way. Note that you need to have MetaMask installed in your browser in order to follow this guide.
Step 1: Visit the Kinetix website and connect MetaMask
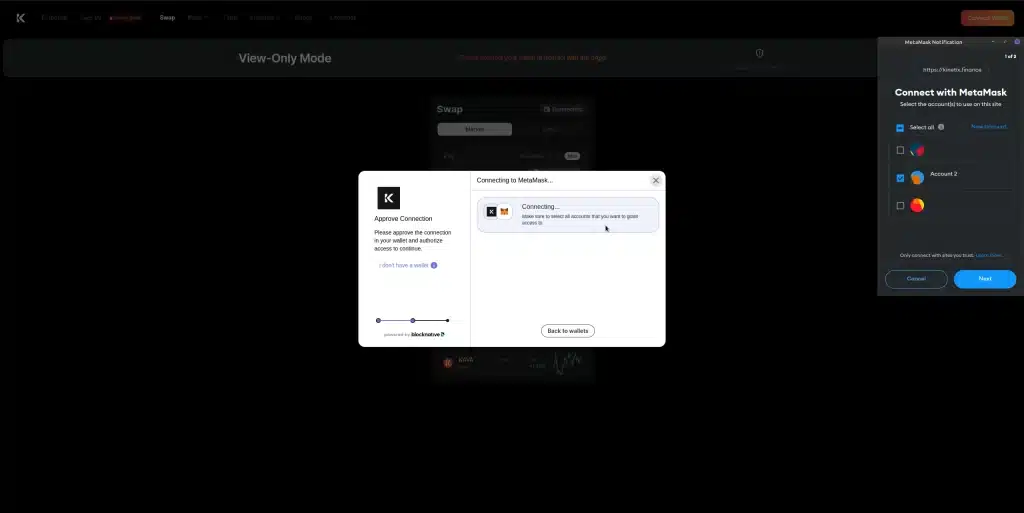
The first step to swapping tokens on Kinetix is to connect it to your MetaMask wallet. Go to kinetix.finance and then click ‘Connect Wallet’ in the top right-hand corner of the screen.
Security Alert: Always check to ensure that you are on kinetix.finance and no other address — even if the other addresses look similar. Phishing is a common problem and malicious actors will purchase similar domains and set up a counterfeit website. If you connect your wallet to the wrong website, it will steal your tokens.
After clicking ‘Connect Wallet’, wait for MetaMask to display the prompt above and select which wallet you want to use, then click ‘Next’. This tutorial demonstrates a ‘market order’, which means you should select the ‘Market’ tab when you have landed on the Swap page.
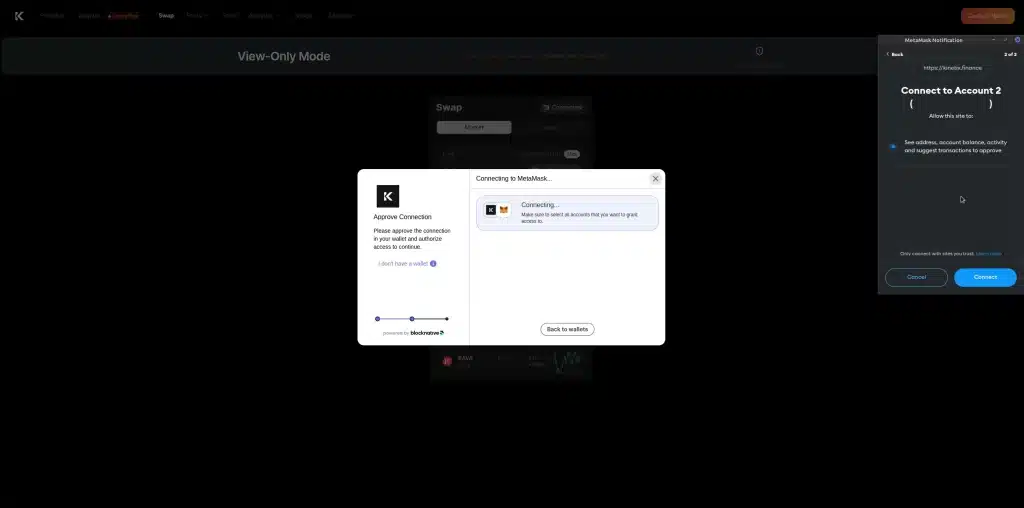
Step 2: Give Kinetix Permission To Connect To Your Wallet
Click ‘Connect’ to proceed.
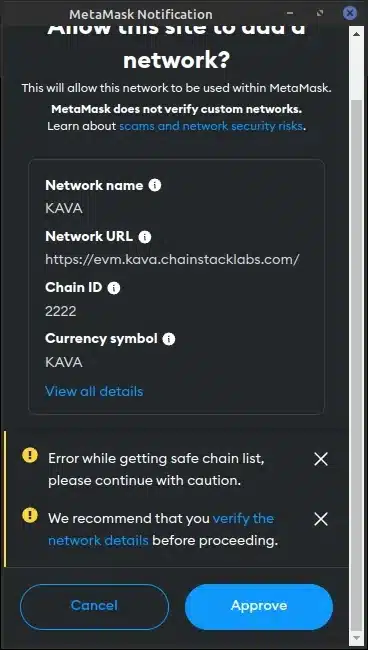
Step 3: Add Kava Network To MetaMask
You’ll now need to add Kava network to MetaMask. Fortunately, MetaMask already has Kava’s details filled out so you can just click ‘Approve’.
Step 4: Switch MetaMask To Kava Network
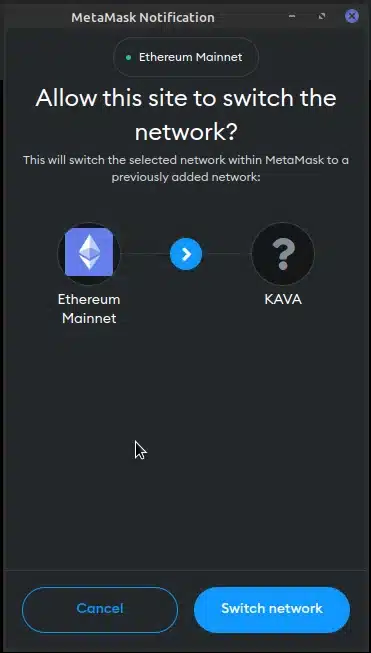
Click ‘Switch network’ when MetaMask’s confirmation prompt to switch to Kava network shows up.
Step 5: Swap Your Tokens On Kinetix
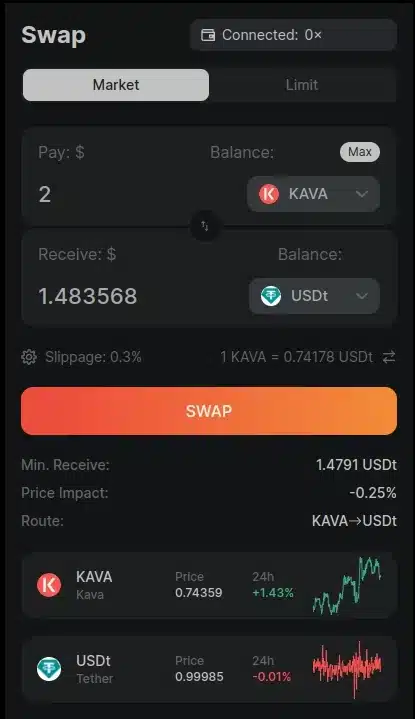
Select the token you want to exchange in the top most field where you see ‘Pay’ and enter the quantity. In the field underneath it, select the token you want to exchange it for and you should see the quantity that you will receive. In this example, we are exchanging KAVA tokens for USDt (no need to type the amount of the destination token, it will be calculated automatically based on the exchange rate). Review all the figures carefully to see if you are comfortable with the exchange rate and cost, then click ‘Swap’.
Step 6: MetaMask Confirmation To Send Tokens
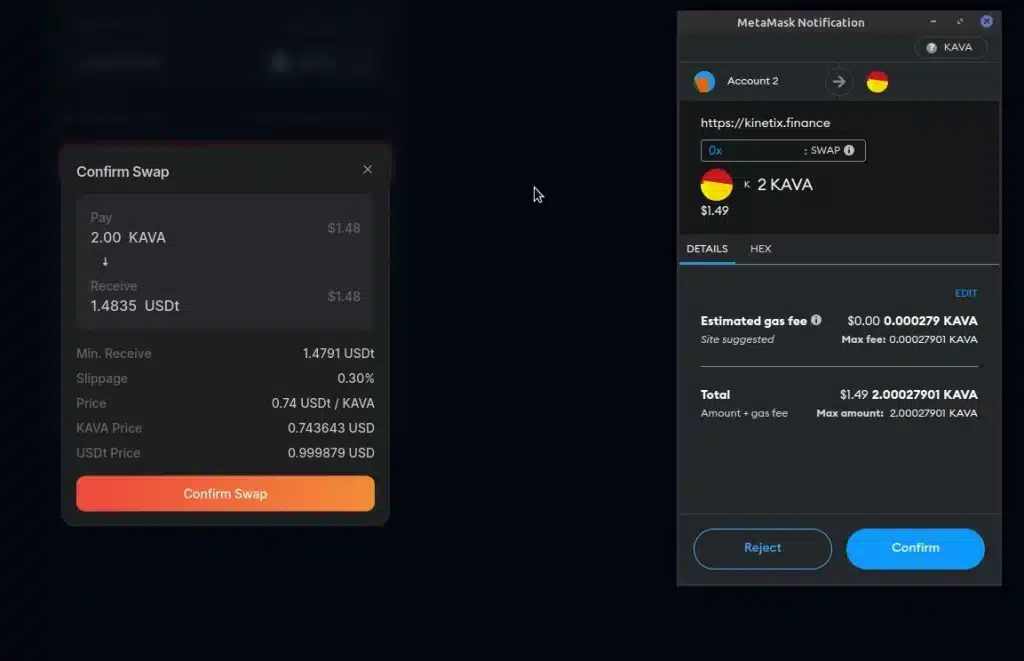
Kinetix will load a confirmation window. Read all the details in it carefully and then click ‘Confirm Swap’. MetaMask will load a dialog box asking if you’re sure you want to send your tokens to be exchanged. Review the gas fee (transaction fee) and all other details to ensure you are comfortable with them and then click ‘Confirm’.
Step 7: Wait
Your order has now been submitted to the blockchain. Please wait a little for the exchange to be complete or check back later. When the transaction is complete, the tokens you desired should be in your MetaMask wallet. Look out for a green ‘Swap Succeeded’ dialog.


