By: Nicholas Brown.
The first step to recovering data from a formatted drive (or to recovering deleted files) is understanding file systems and how they ‘remove’ data. When you delete a file, the file descriptor is removed instead of the slower (albeit more thorough) process of properly erasing the file.
What this means is that you shouldn’t only look for your file’s original names (but still keep an eye out for them), but you’ll have to sift through numerous files with different filenames and even the incorrect file extension!
Further down in this article, you’ll see an example of a recovered file that lost both its name and extension! (don’t give up, because this is more often than not the case, so you can expect to encounter this problem). It was originally main.css, and now has a .txt extension. The contents of the file were preserved.
Disclaimer: Attempting to recover (even merely copying files) files from a damaged hard drive can be the final straw that finishes off your drive. Follow the instructions herein at your own risk.
This guide is for you If:
- You need to recover data from a damaged hard drive which is still able to switch on (the drive needs to be accessible). This isn’t recommended unless you can’t afford to have a data recovery expert to handle this scenario for you.
- You did a ‘quick format’ on a conventional hard drive or USB drive and need to recover the files lost in a format.
- You need to recover deleted files.
- You need to recover photos from a USB thumb drive.
This guide is not for you if:
- Your drive doesn’t turn on.
- Your hard drive is making clicking noises.
- Your data has been securely erased/’scrubbed’.
Under these grim circumstances, you may need a data recovery firm to handle the recovery process for you, so as to limit the amount of damage caused by recovery attempts.
The good news: Your chances of recovering files are most likely very good!
First Step To File Recovery: Start Scanning The Affected Drive
In this tutorial, we will use the R-Studio data recovery utility to scan the affected drive (this works for both internal hard drives as well as USB-drives) and assist us with the data recovery procedure. Launch R-Studio and right-click the affected drive (more specifically the partition on the affected drive), which in this case is Drive D: on the Kingston DataTraveler.
A hard drive can contain multiple partitions. In R-Studio, there is a tree view in which you will see the physical drive, and then you’ll see the partitions on the drive (such as C:, EFI System Partition, etc on that other physical drive called TOSHIBA in the screenshot below. D: is the partition we’re trying to recover data from.
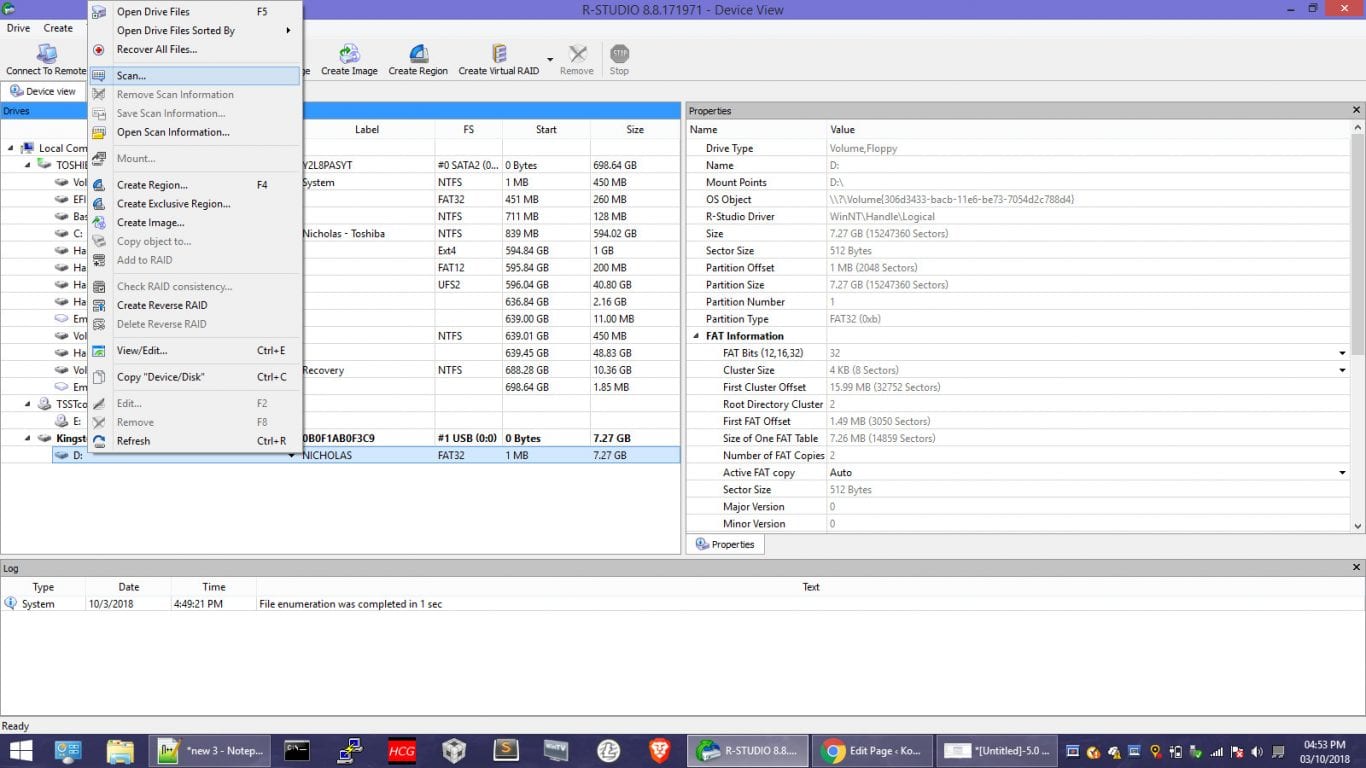
First click ‘Scan’, and then you should see the following screen come up. It’s where you configure the data recovery scan window and specify where to save your scan results and criteria (if any).

Click ‘Scan’ again to start scanning for recoverable data, and you should be able to see your progress in this window:
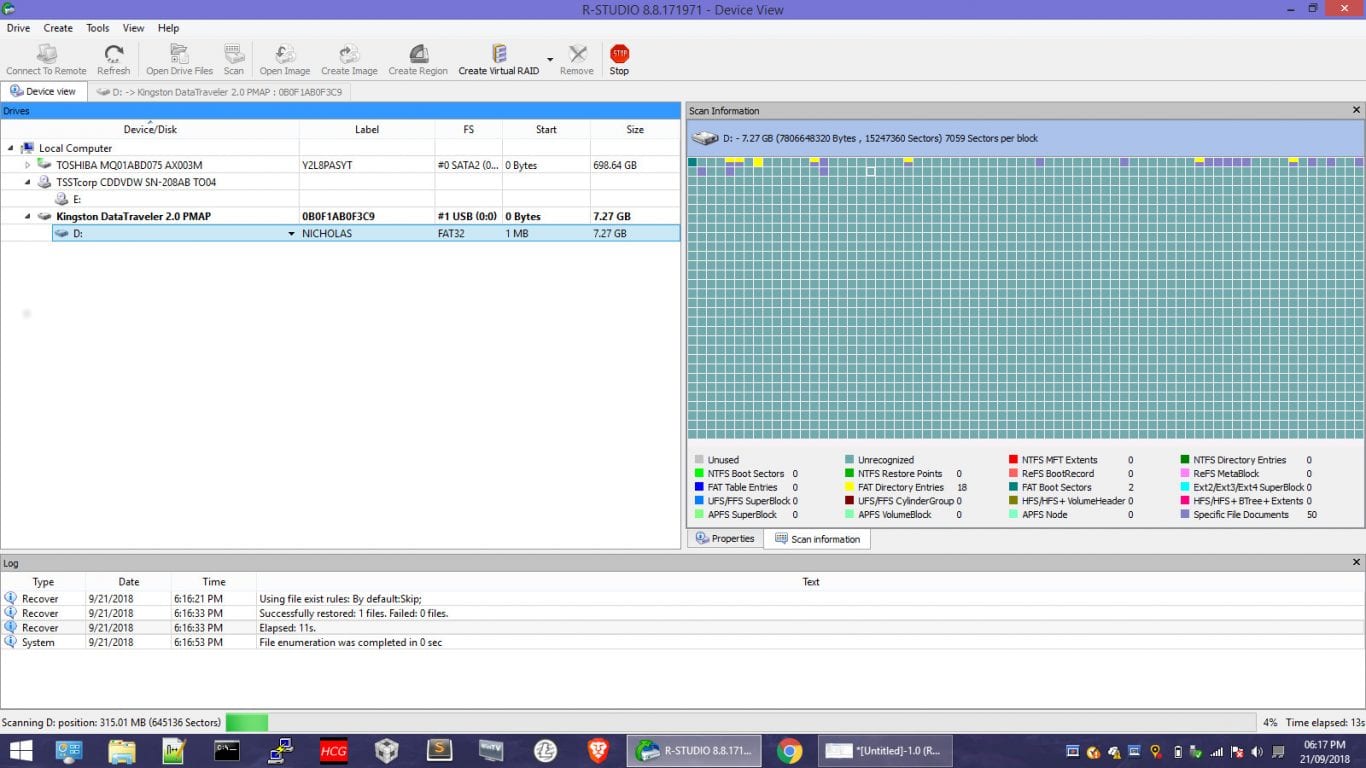
When the scan is complete, you may see a partition called something like D: (Recognized1) show up under the partition you scanned. You can right-click it and select ‘Open drive files’ to view the deleted files it found, or ‘Recover all files’ to initiate the data recovery process, and then specify a safe place you’d like to save your recovered data (such as a new external drive) when prompted.
Please don’t save recovered files back to the same drive that you’re recovering them from unless it is in good health. You need to recover your data to an external hard drive in other scenarios to reduce the likelihood that the ailing drive doesn’t die on you and take the recovered files with it.
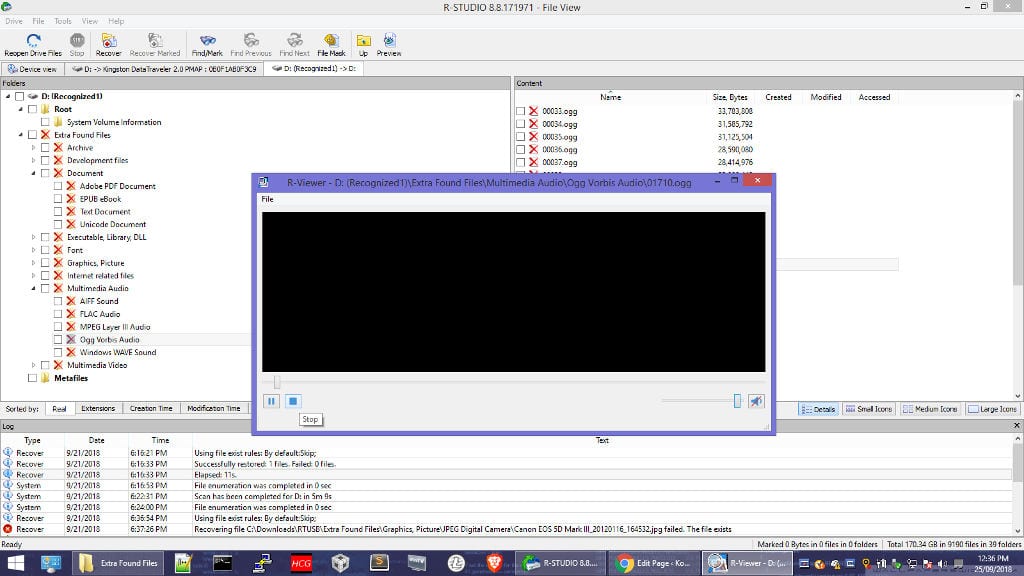
R-Studio will then show you some file categories under ‘Extra Found Files’ such as ‘Adobe PDF Document’, ‘EPUB Ebook’, ‘Text Document’, ‘Graphics, Picture’, among others. Click the one that corresponds to the type of file you’re searching for. For example: Click ‘Multimedia Audio’ if you’re looking for your compositions or other music (not necessarily DAW project files, though).
If you’re looking to recover an MP3 file, and don’t see the correct filename, you might see a portion of the ID3 tag in the filename instead. For example: The artist, record label name, or other info stored in the MP3).
To recover music in the MP3, Ogg, and FLAC format, double-click them in the same view. ‘R-Viewer’ will launch and play the song so you can identify it and see if it is in pieces or if it’s fully intact. For other file formats that may be uncommon, the R-Viewer may not be able to play or open them, so you may have to wait until you use the ‘Recover all files’ option and look at those files later with your preferred app.
It’s amazing how many files I was able to fully recover without damage! Don’t give up!
A helpful tip for images (considering the likelihood of the filenames being lost) is to just use the ‘Recover all files’ option. After that, open the directory with those recovered images in a file browser and select the icon or thumbnail view so you can quickly find the images you want by actually viewing them.
For example: If you don’t see the ‘Mr. Kitty.jpg’ filename there, you might be able to visually identify him and then rename the image accordingly. This way, you don’t have to manually open each and every one of the images to look at them.
If you want to create a mirror image of your hard drive so that you can replace it without having to reinstall Windows, you can use CloneZilla to image the drive or copy it over to the new one.