By Nicholas Brown – Follow me on Twitter.
QuickSwap — a decentralized finance product, is a fork of the popular Uniswap decentralized exchange (DEX), except it runs on the Polygon network (formerly Matic Network). Running on a Layer 2 scaling solution like Polygon enables it to achieve low fees and complete trades in a matter of seconds (even if Ethereum is congested). Polygon runs atop the Ethereum network.
Uniswap provides a fast and convenient way to trade ERC20 tokens because you can use existing browser-based wallets such as MetaMask, without having to deposit your tokens to a centralized exchange before you can start trading. Despite skipping the time-consuming deposit step, it slows down significantly during times of congestion.
Layer 2 scaling solutions have been catching on as a sound way to reduce confirmation times and Ethereum gas fees to a mere fraction of what they’ve typically been. QuickSwap, running on Polygon, has become more practical for swing trading and microtrades due to its low fees.
Purchasing Tokens/Setting Up A Wallet
Before proceeding, it is highly recommended that you familiarize yourself with Ethereum and how to set up your wallet safely. Also, purchase MATIC tokens so you can get started and pay the Matic Network/Polygon fees. You can also swap MATIC tokens for others on QuickSwap. I wrote a guide explaining how to buy cryptocurrency safely.
Prerequisites For The QuickSwap Tutorial
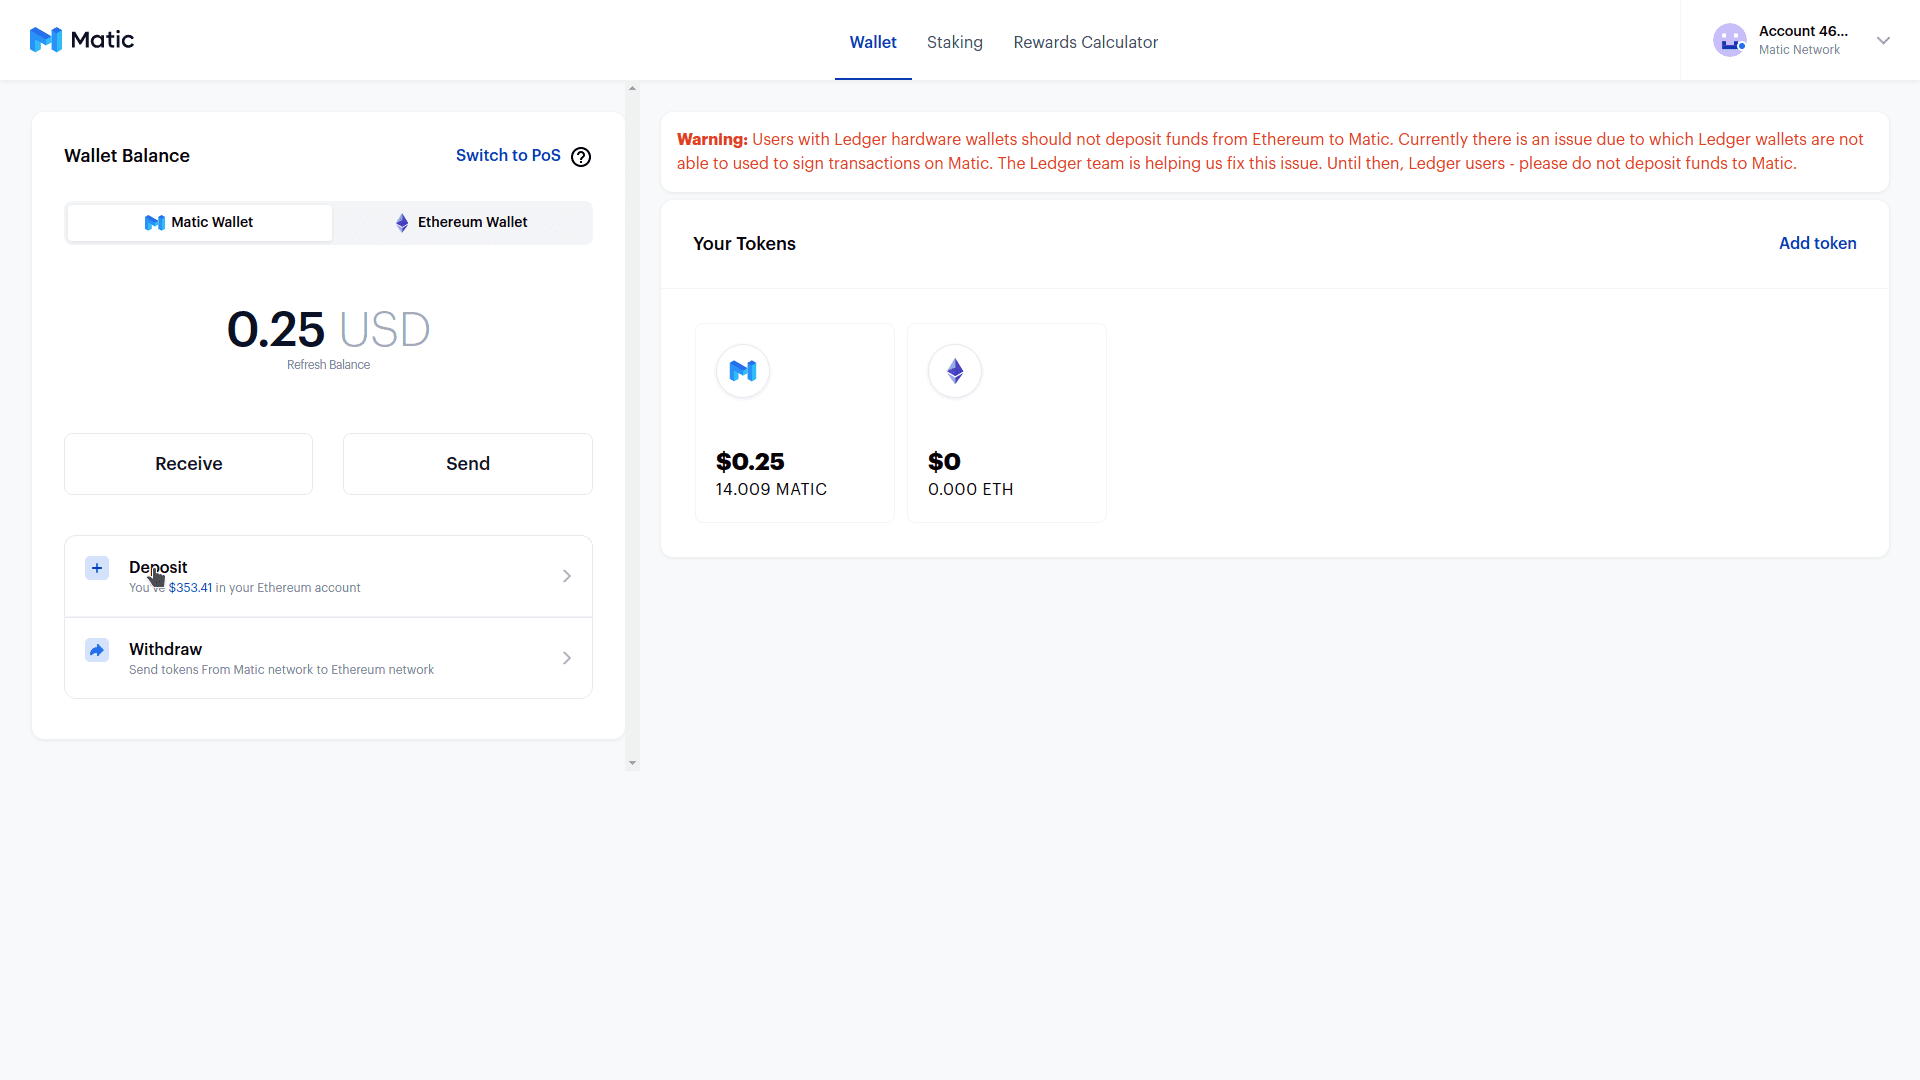
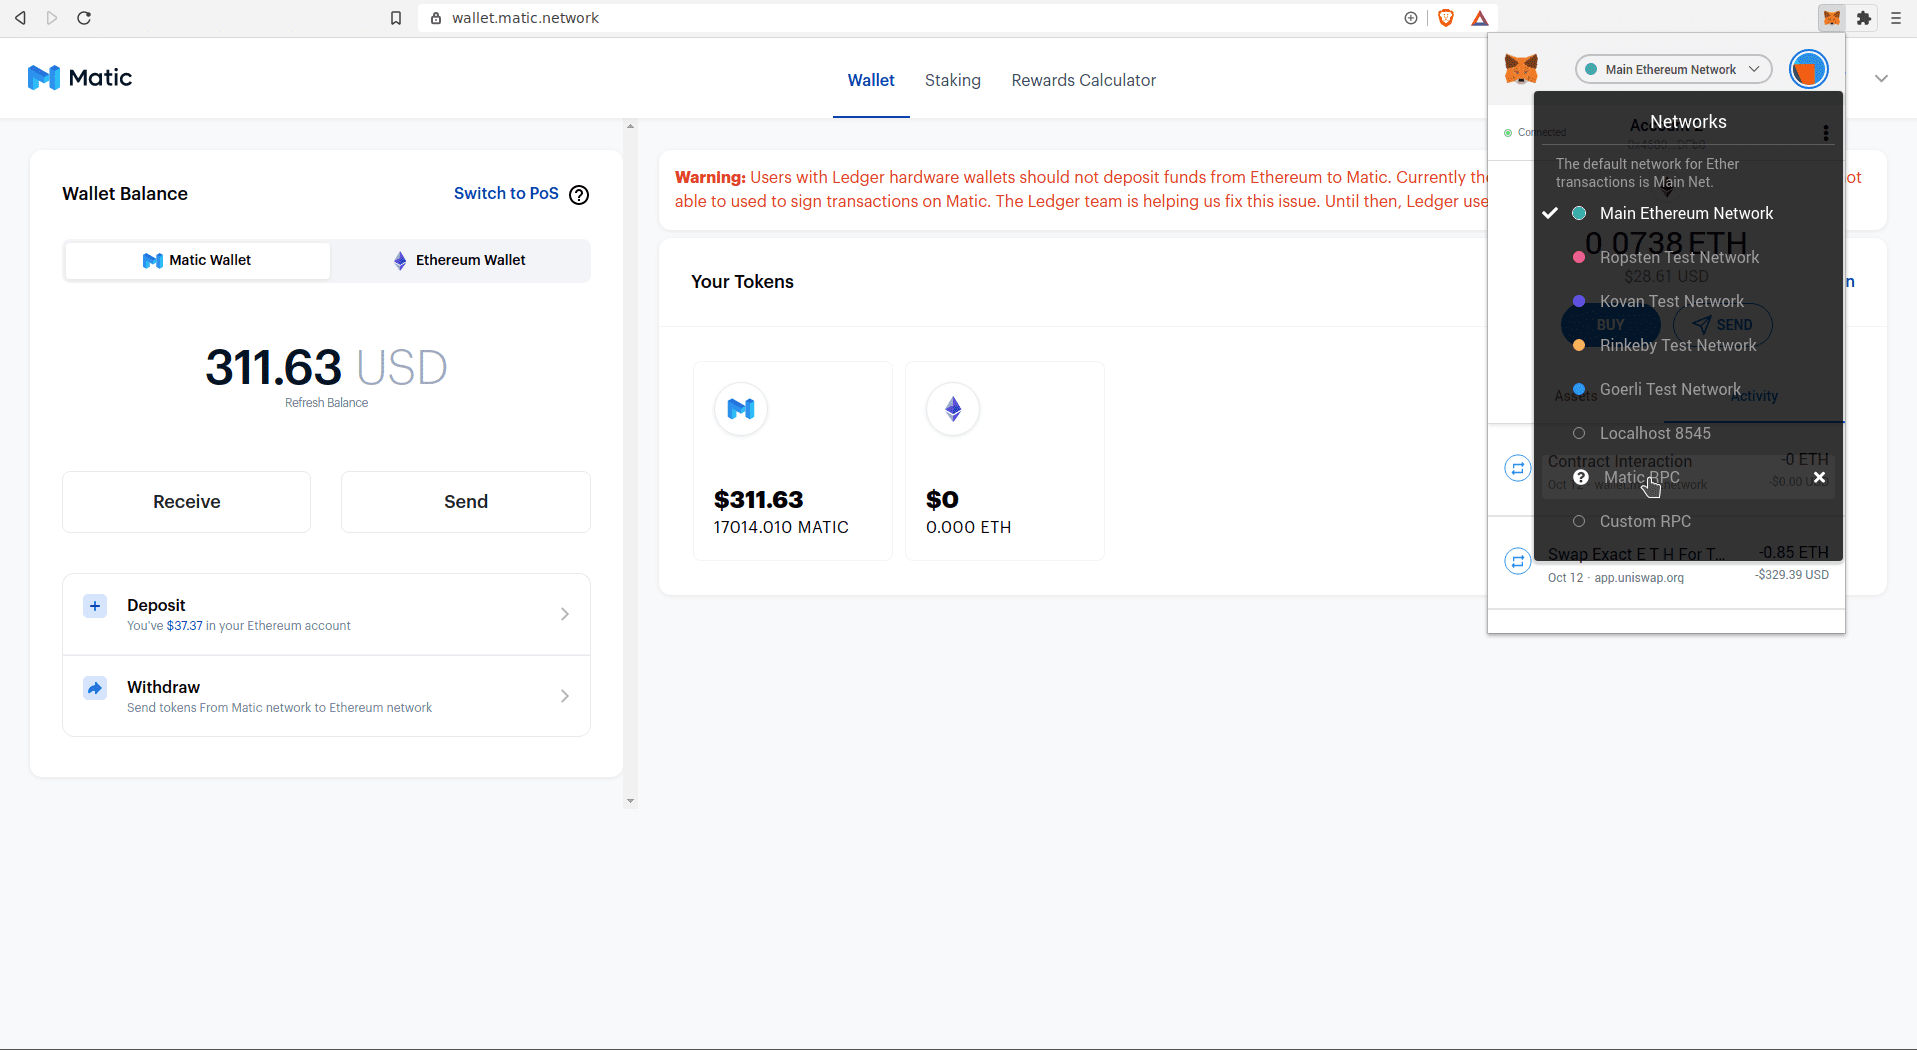
The first step to learning how to use QuickSwap is to familiarize yourself with the network it runs on — the Polygon Mainnet. In order to use the Polygon Mainnet, you need to first purchase MATIC tokens, and then deposit them to the Matic Mainnet using the Matic web wallet. Go to https://wallet.matic.network/ and click the ‘Wallet’ tab so you’ll see the following screen:
Ensure that you use the PoS bridge for ETH and ERC-20 tokens, and use the Plasma bridge only for the MATIC token.
Select the ‘Matic Wallet’ tab and click ‘Deposit’ where you see the mouse pointer on the left side of the screen. In the resulting dialog, enter the amount of MATIC you’d like to deposit to the Mainnet and click ‘Deposit to Matic Network’.
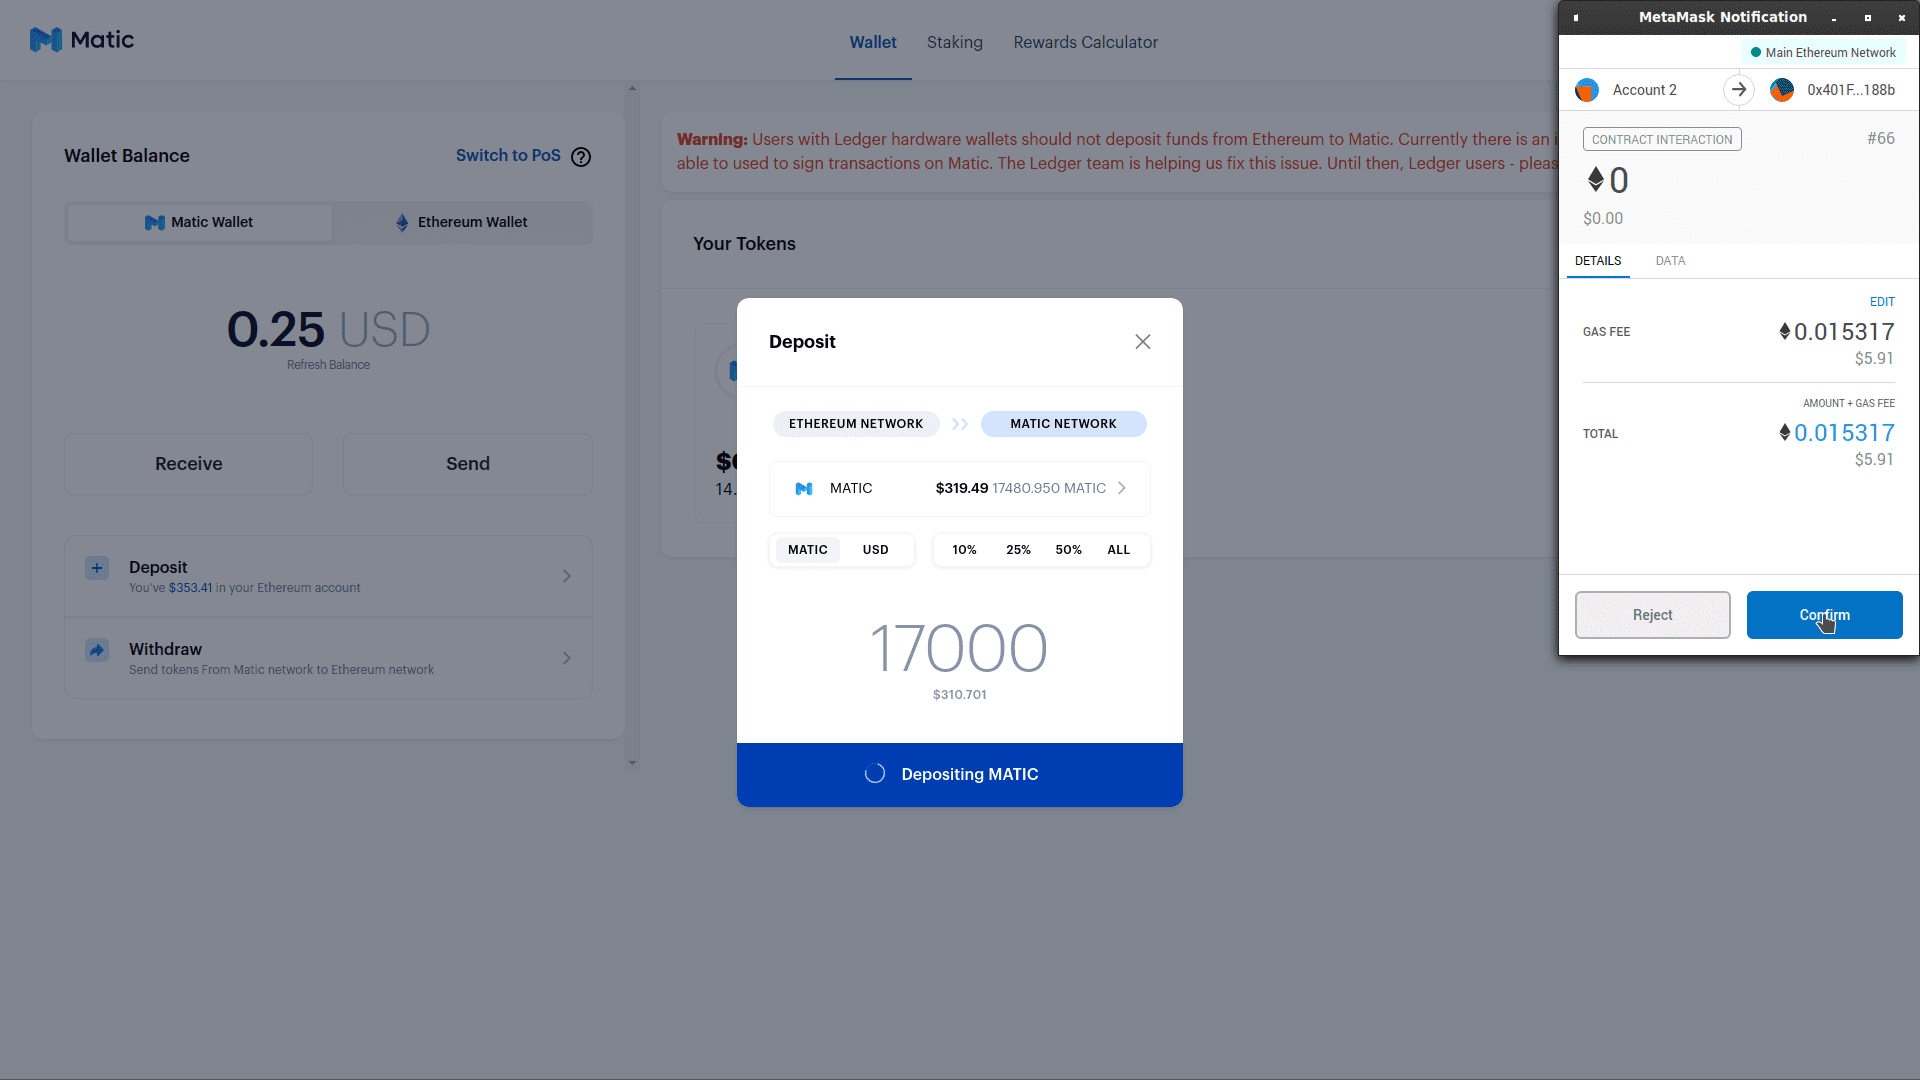
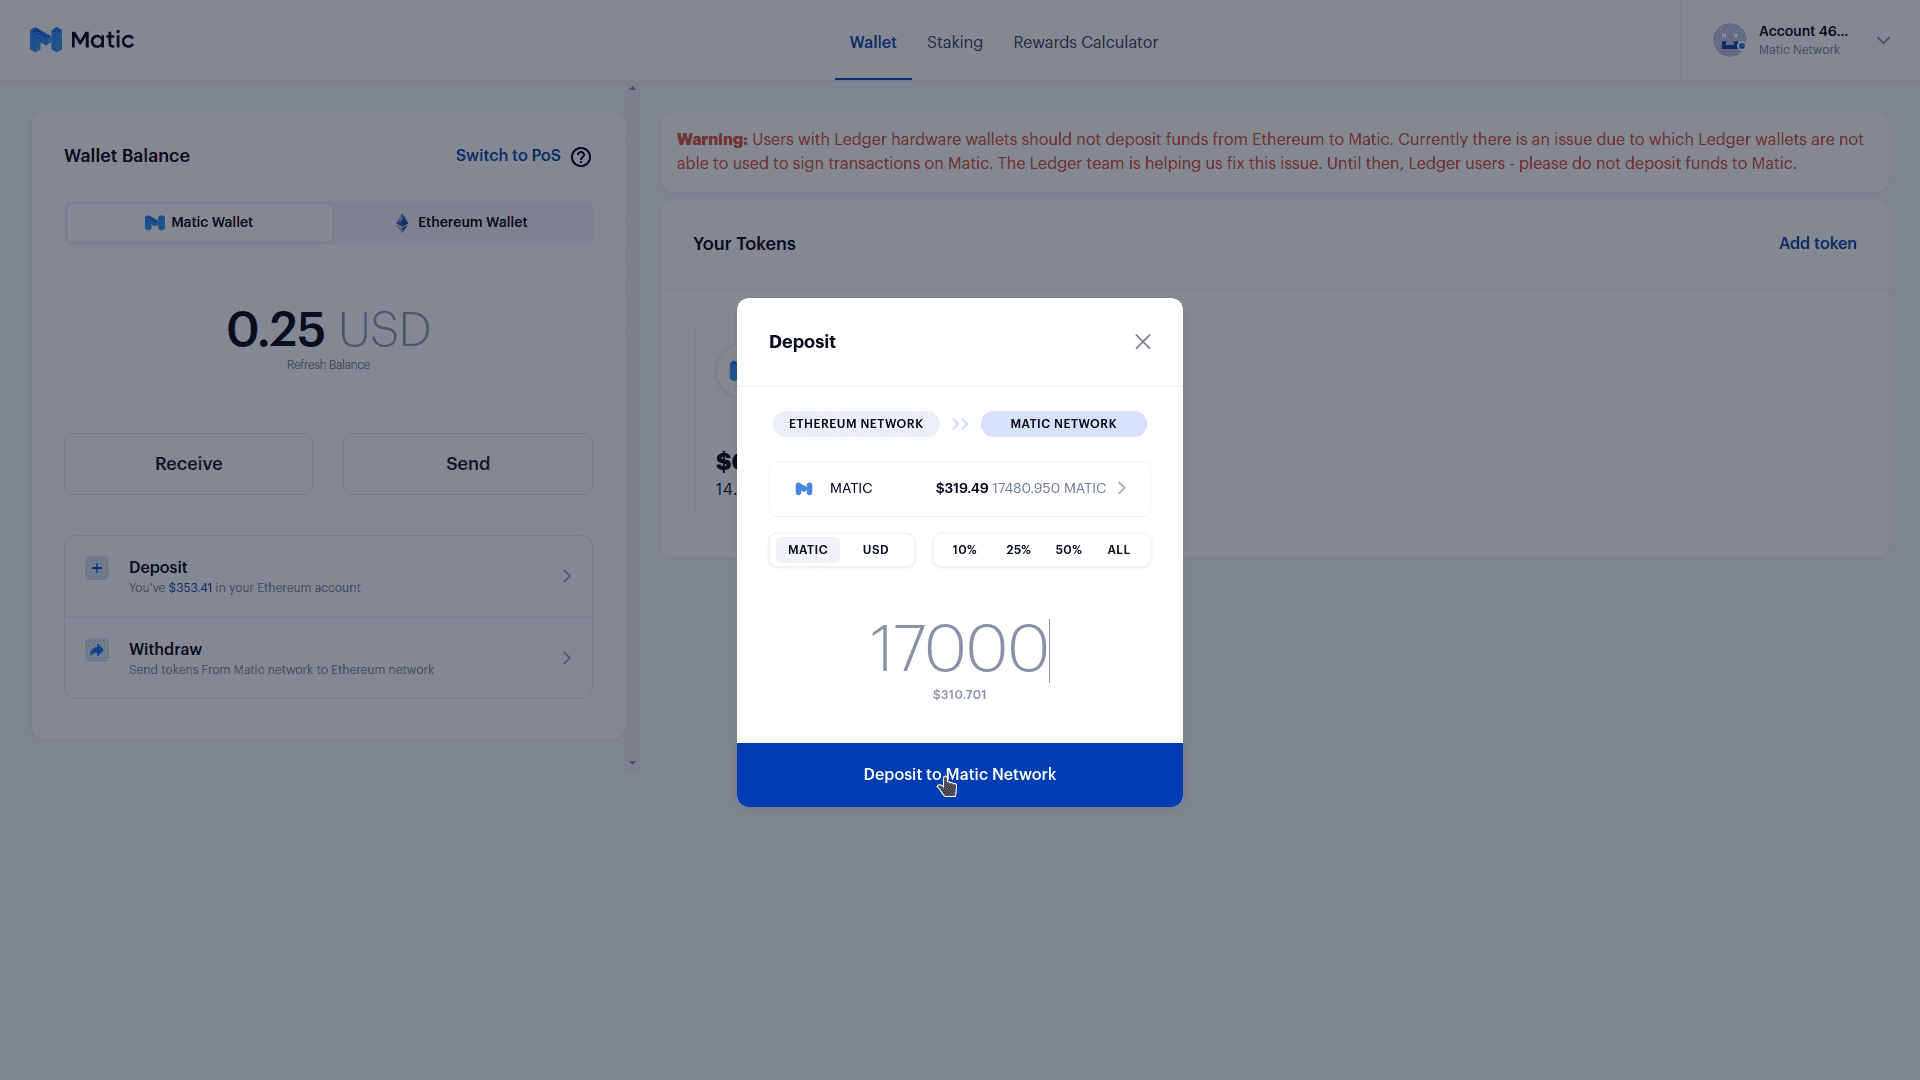 Depositing to Matic Network. Enter the correct amount and click the deposit button.
Ensure that ‘MATIC’ is selected on the left. You can enter the amount manually, or click ‘25%’ to deposit 25% of the MATIC tokens in your MetaMask wallet to the Mainnet, ‘50%’, or ‘ALL’ to deposit all of it.
Wait a moment after clicking and it will load the MetaMask confirmation prompt. Carefully review the amount being sent and the gas fee and click ‘Confirm’. If there is a great deal of congestion on Ethereum, ensure that your gas fee is high enough so your transaction isn’t pending for eternity:
If it isn’t, you can click ‘Edit’ right above the gas fee and increase it. Once the transaction has been confirmed, you should see those funds in your Matic Web Wallet under ‘Wallet Balance’.
You can now switch to the Matic RPC network in MetaMask by clicking the elliptical dropdown box where you see ‘Main Ethereum Network’. Next, select ‘Matic RPC’ or what you named that network when you added it to MetaMask:
Adding Matic Network To MetaMask
If you haven’t already added it to MetaMask, click the circular image in the top right corner of your MetaMask window, then ‘Settings’ > ‘Networks’ > ‘Add Network’ and you should see the following form. You should now name the network (just type ‘Polygon’ in the ‘Network Name’ field), then paste ‘https://polygon-rpc.com/‘ in the ‘New RPC URL’ field.
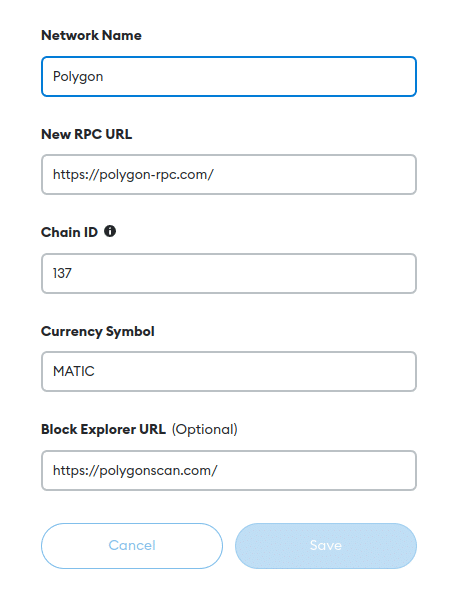
If you’re experiencing problems, try ‘https://matic-mainnet.chainstacklabs.com‘ instead.
Change ‘Symbol’ to ‘MATIC’ to avoid confusion. Then scroll down and click ‘Save’. For your convenience, you can also add https://polygonscan.com/ to the ‘Block Explorer (Optional)’ field and ‘137’ to the ‘Chain ID’ field.
After completing the instructions above and switching over from MetaMask to Matic, you may now start using QuickSwap!
QuickSwap Tutorial: How To Exchange Tokens On QuickSwap
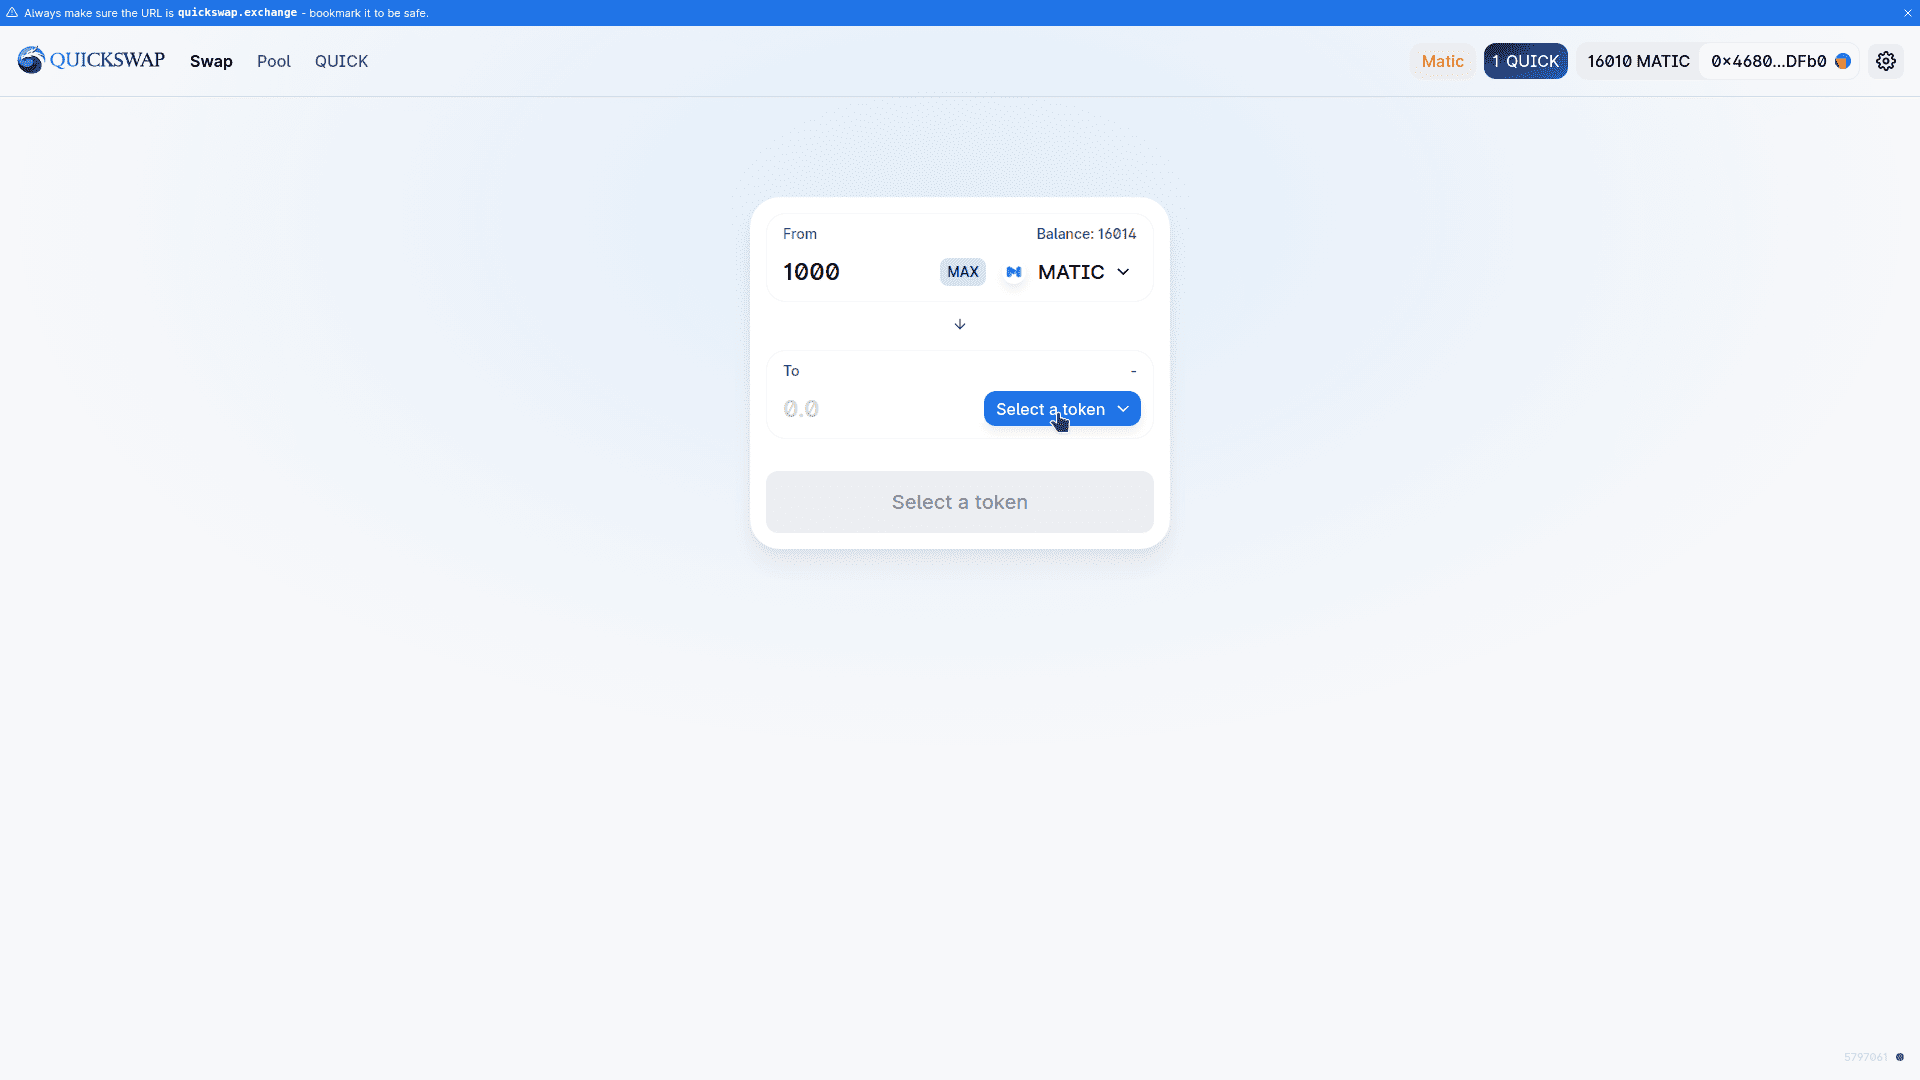
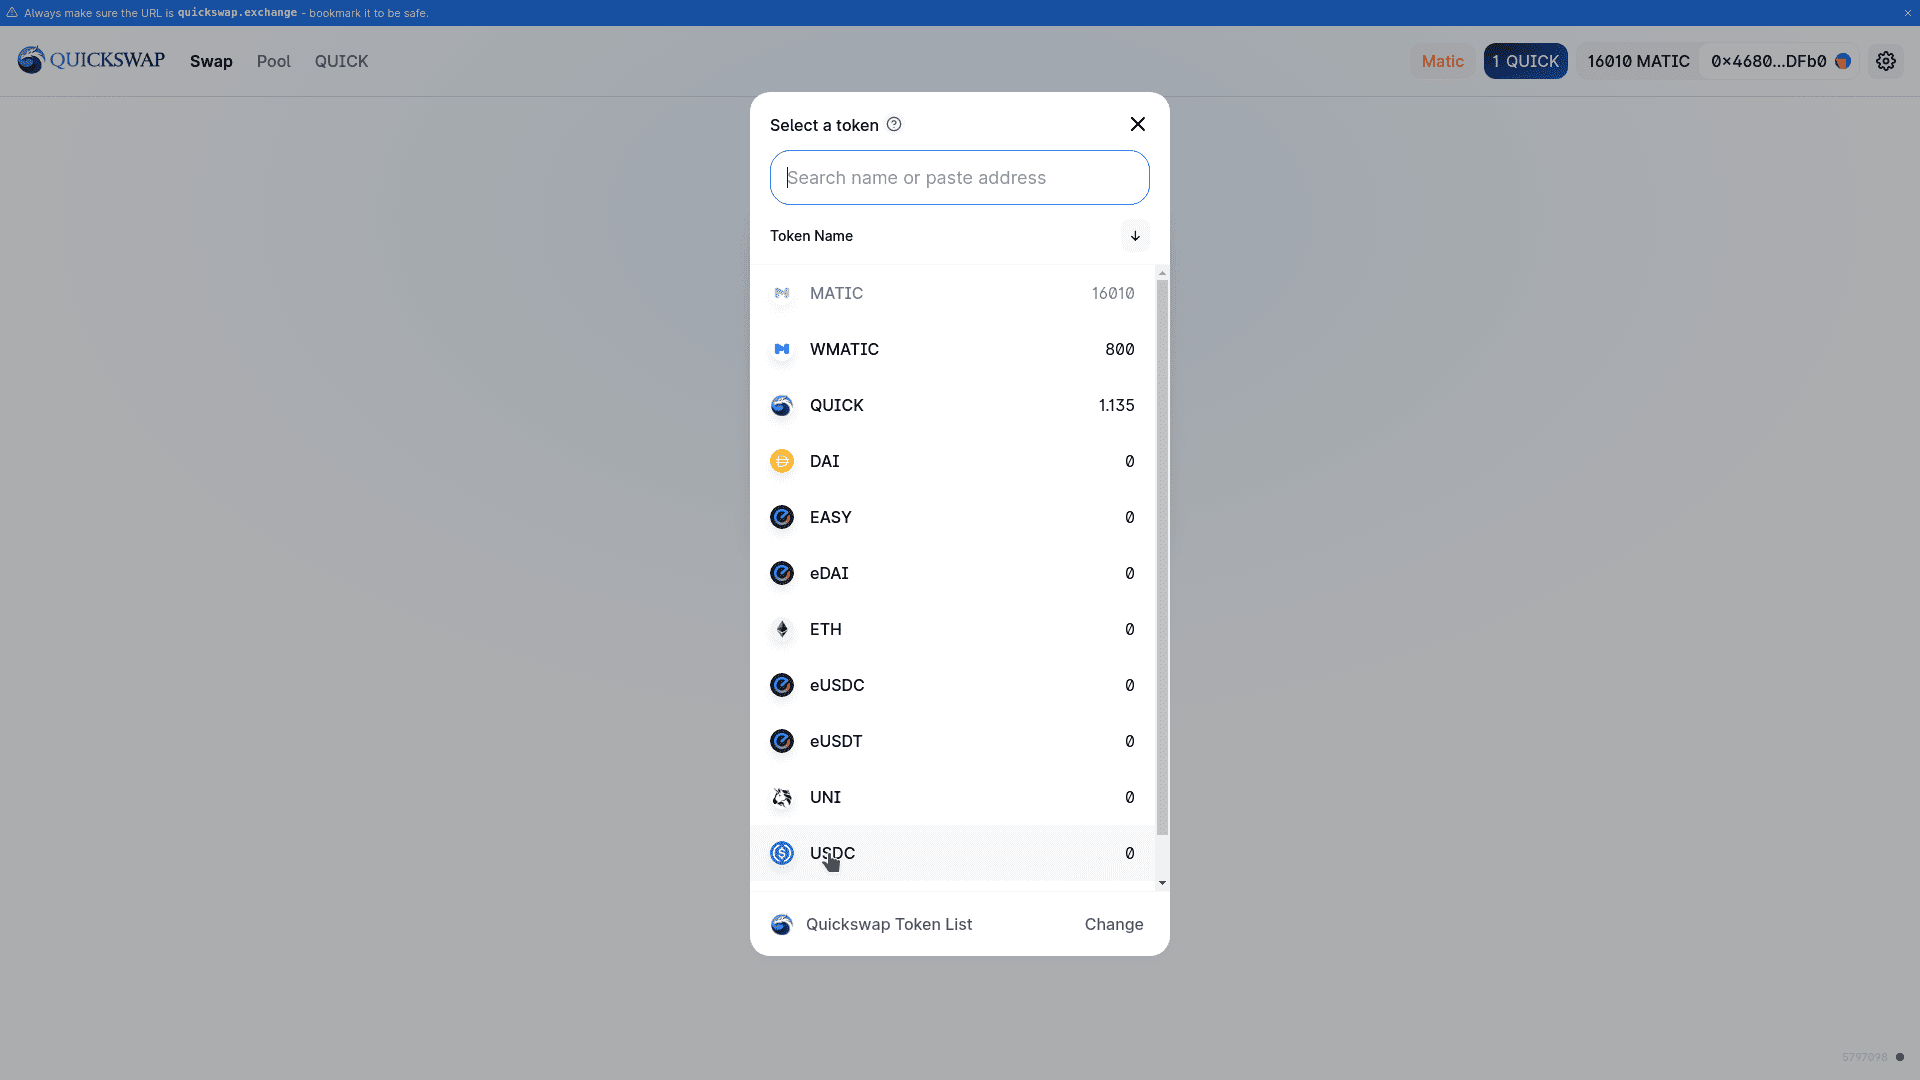
Go to https://quickswap.exchange and select the tokens you want to convert from (top) and convert to (bottom) using the provided dropdown boxes (always ensure there are no typos and you’ve typed in the correct URL to avoid phishing):
In this example, we’re trading MATIC for USDC:
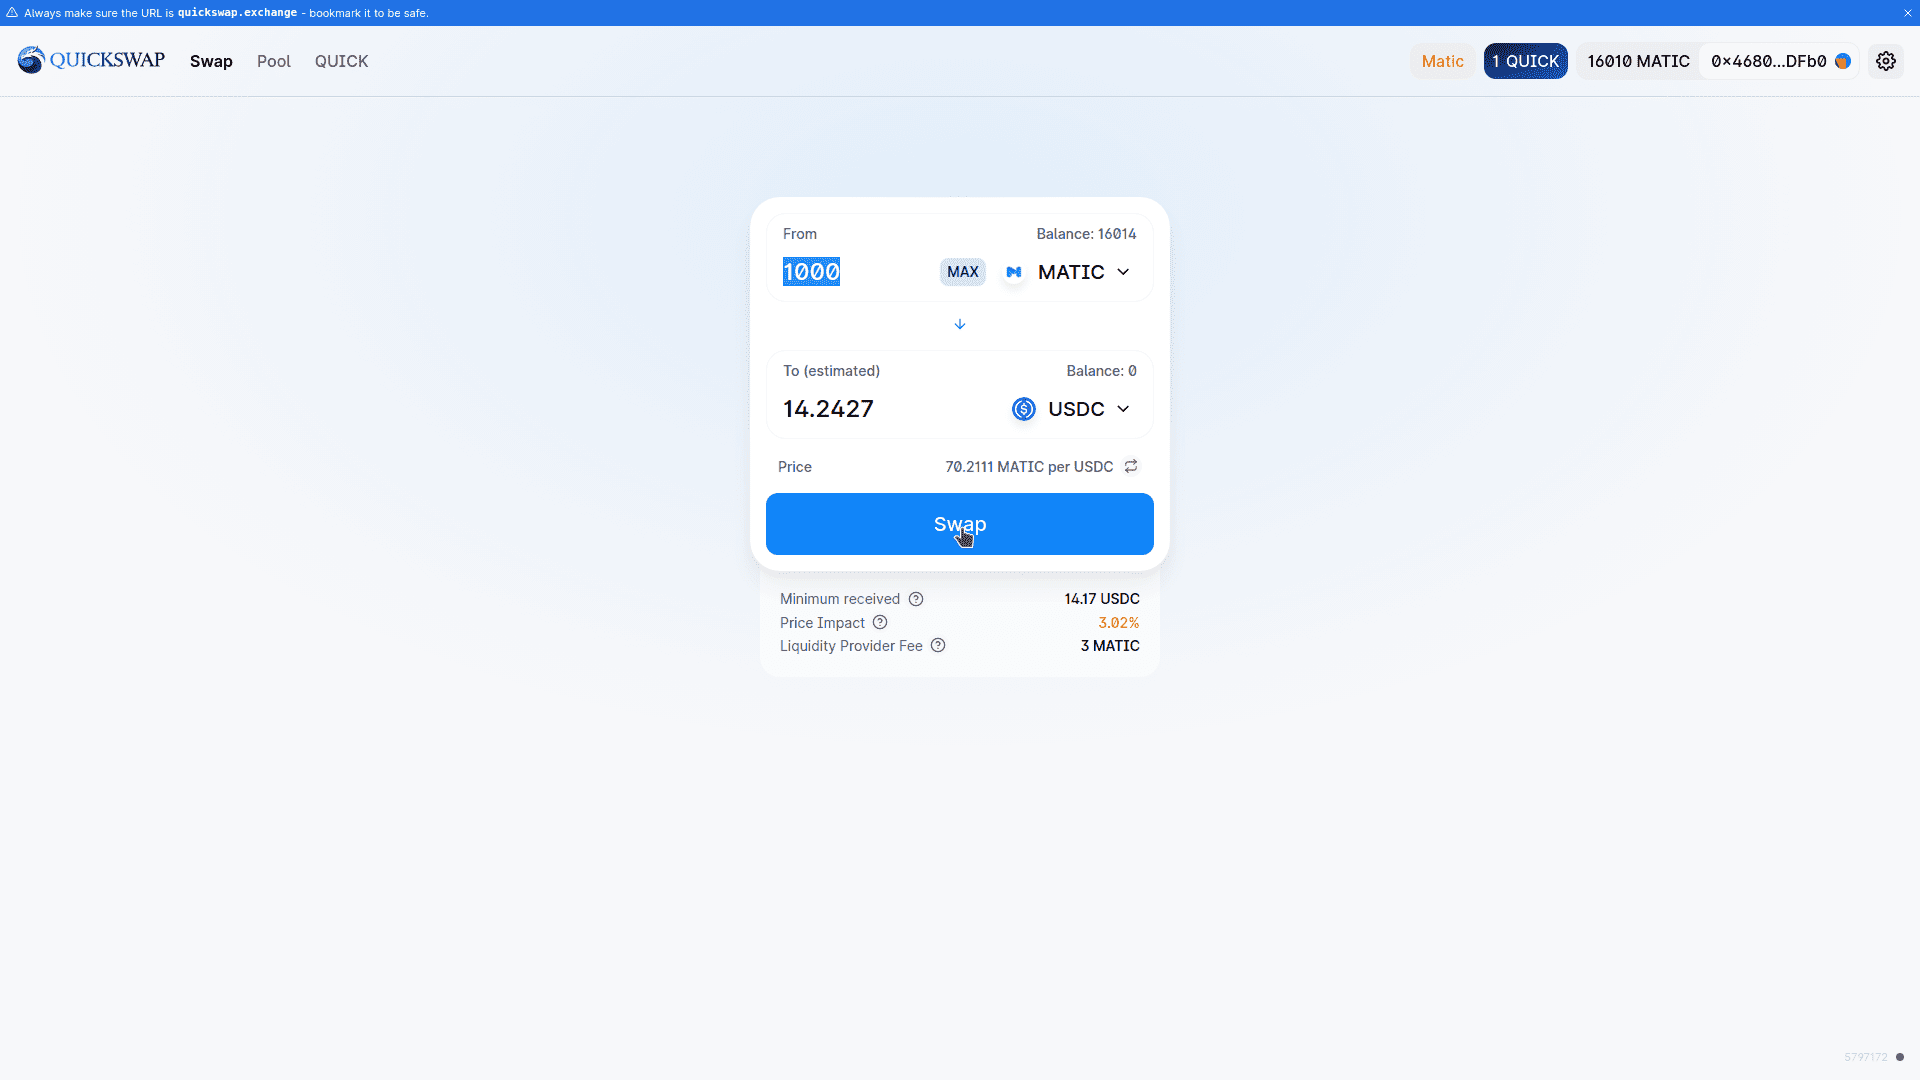
Now enter the amount of MATIC you want to trade for USDC in the first text field and the corresponding amount in USDC will be shown automatically based on the current price of that trading pair. Click ‘Swap’ after carefully reviewing the amounts and the price impact:
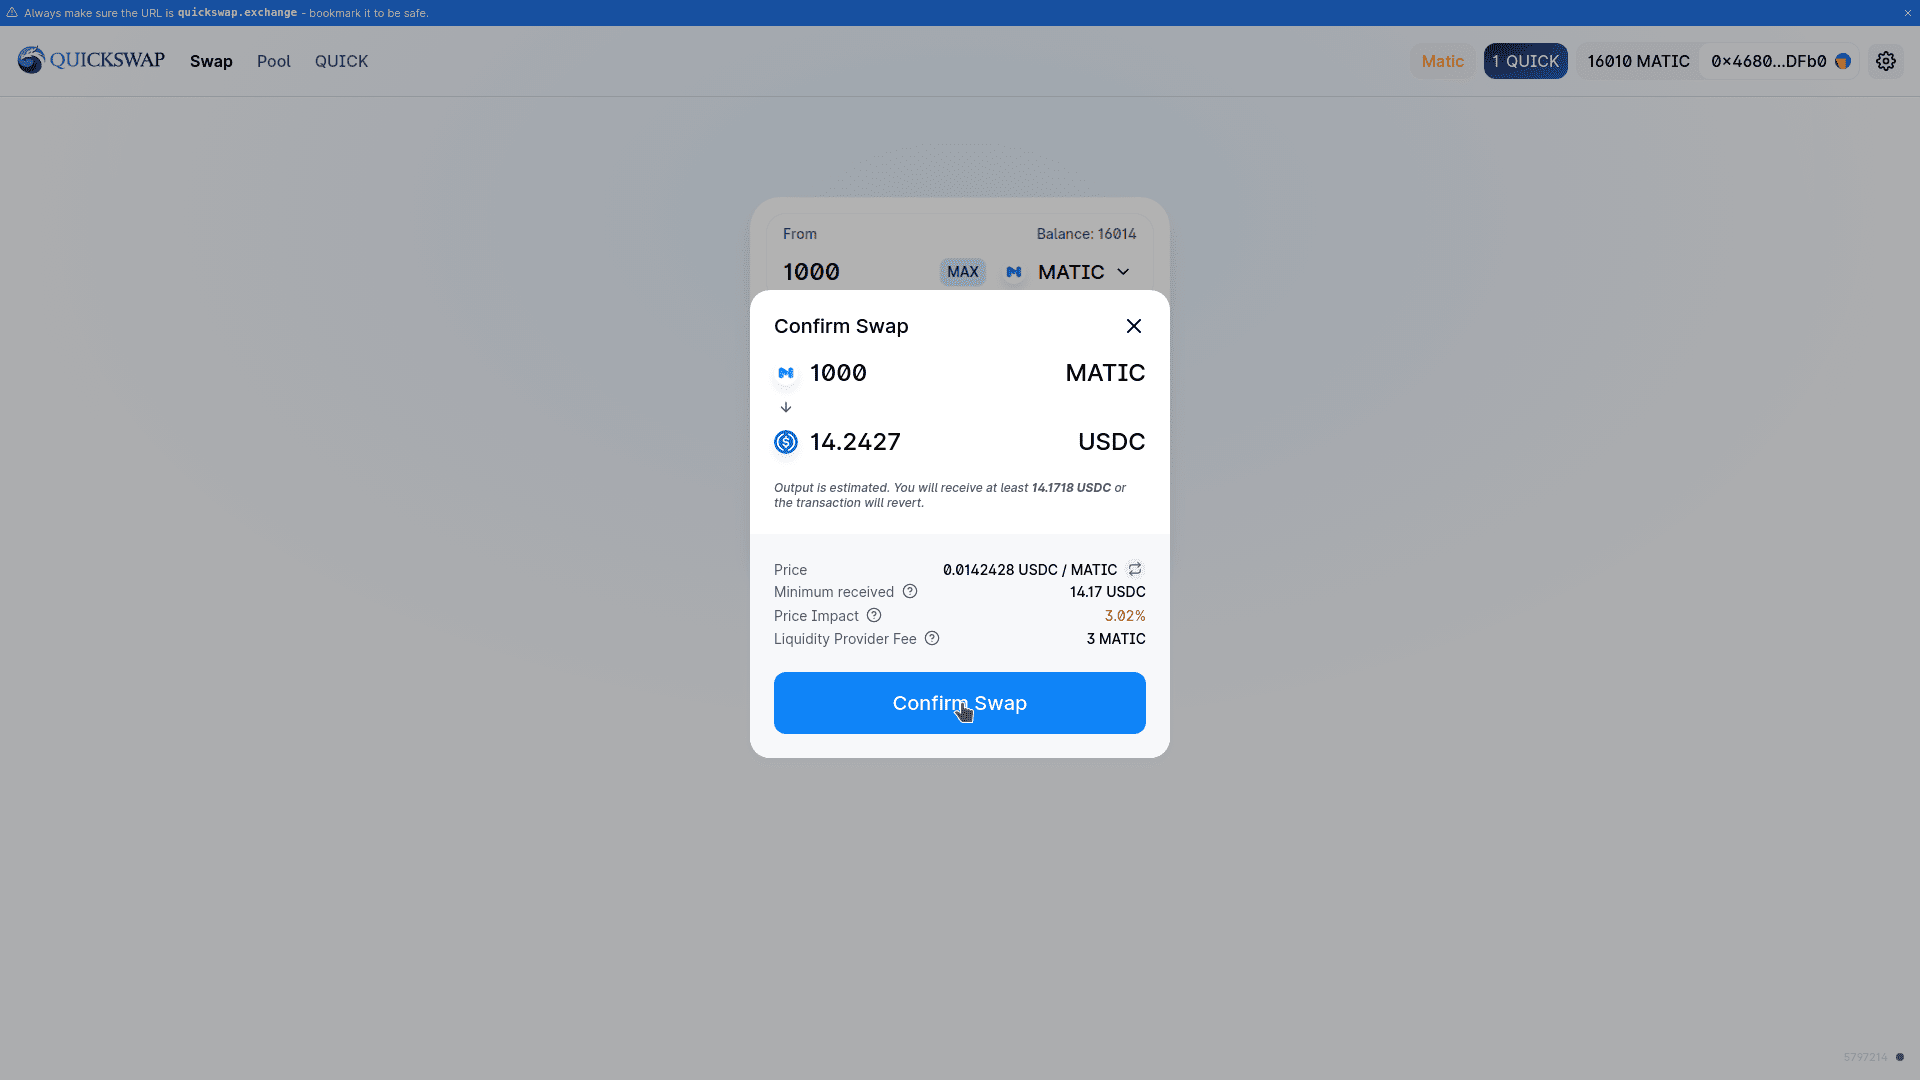
QuickSwap will ask you for confirmation to ensure that this is what you want to do. Click ‘Confirm Swap’ if that is the case:
You will now be prompted by MetaMask to permit QuickSwap to spend your tokens. Review the amounts and gas fees carefully, then click ‘Confirm’:
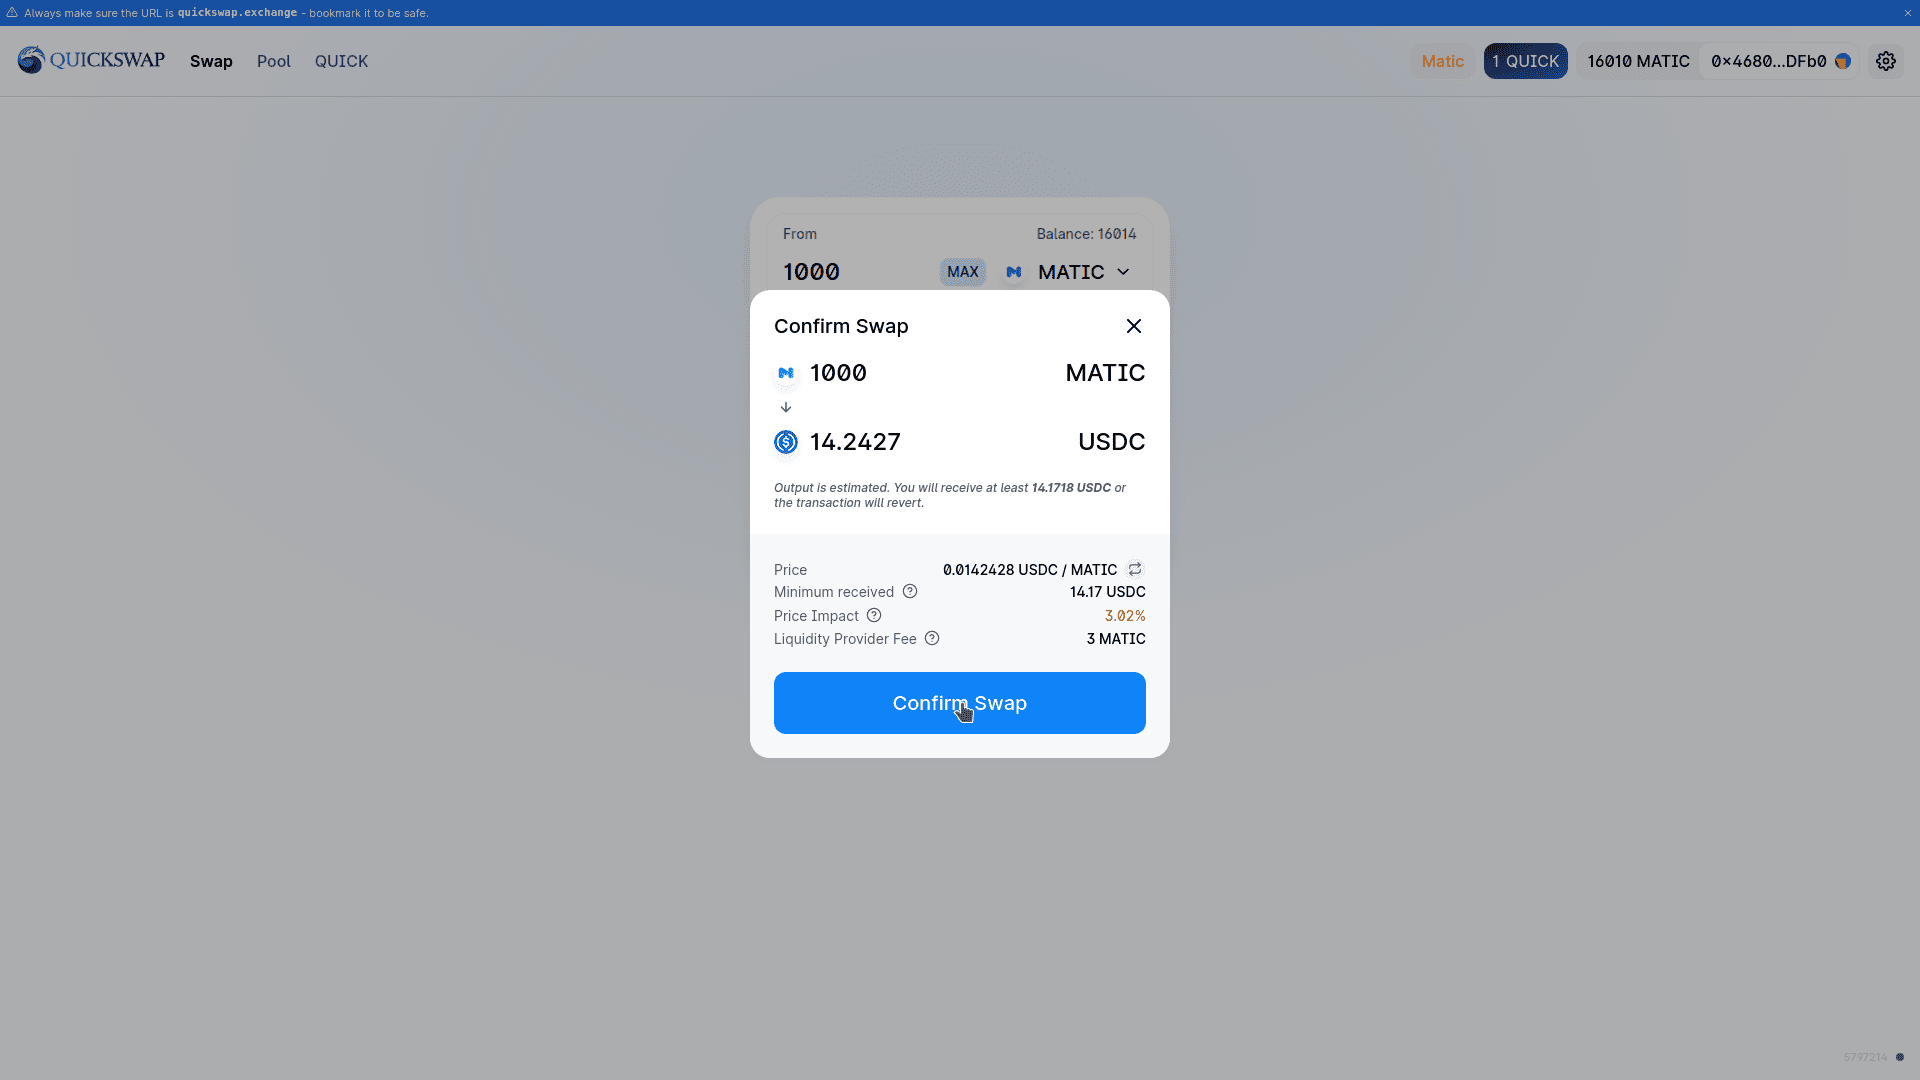
Click ‘Confirm’ after you’ve reviewed everything. In this example, we’re swapping 1000 MATIC tokens for 14.2 USDC (a stablecoin).
That’s it for swapping!
Earn Money By Providing Liquidity On QuickSwap
If you’d like to generate a passive income, you can do so by providing liquidity to QuickSwap traders. You can provide liquidity for trading pairs by depositing a pair to a liquidity pool.
For example: Let’s add liquidity for the ETH-USDC trading pair. You have to deposit equivalent amounts of each of the tokens you want to add to a mining pool. So you should have 50% ETH and 50% USDC; 50/50.
First swap some of your MATIC tokens for ETH, then trade an equivalent amount or more for USDC, by following the same steps explained above. Just ensure you have enough for both tokens.
Please read about about the risk of impermanent loss (IL) before proceeding.
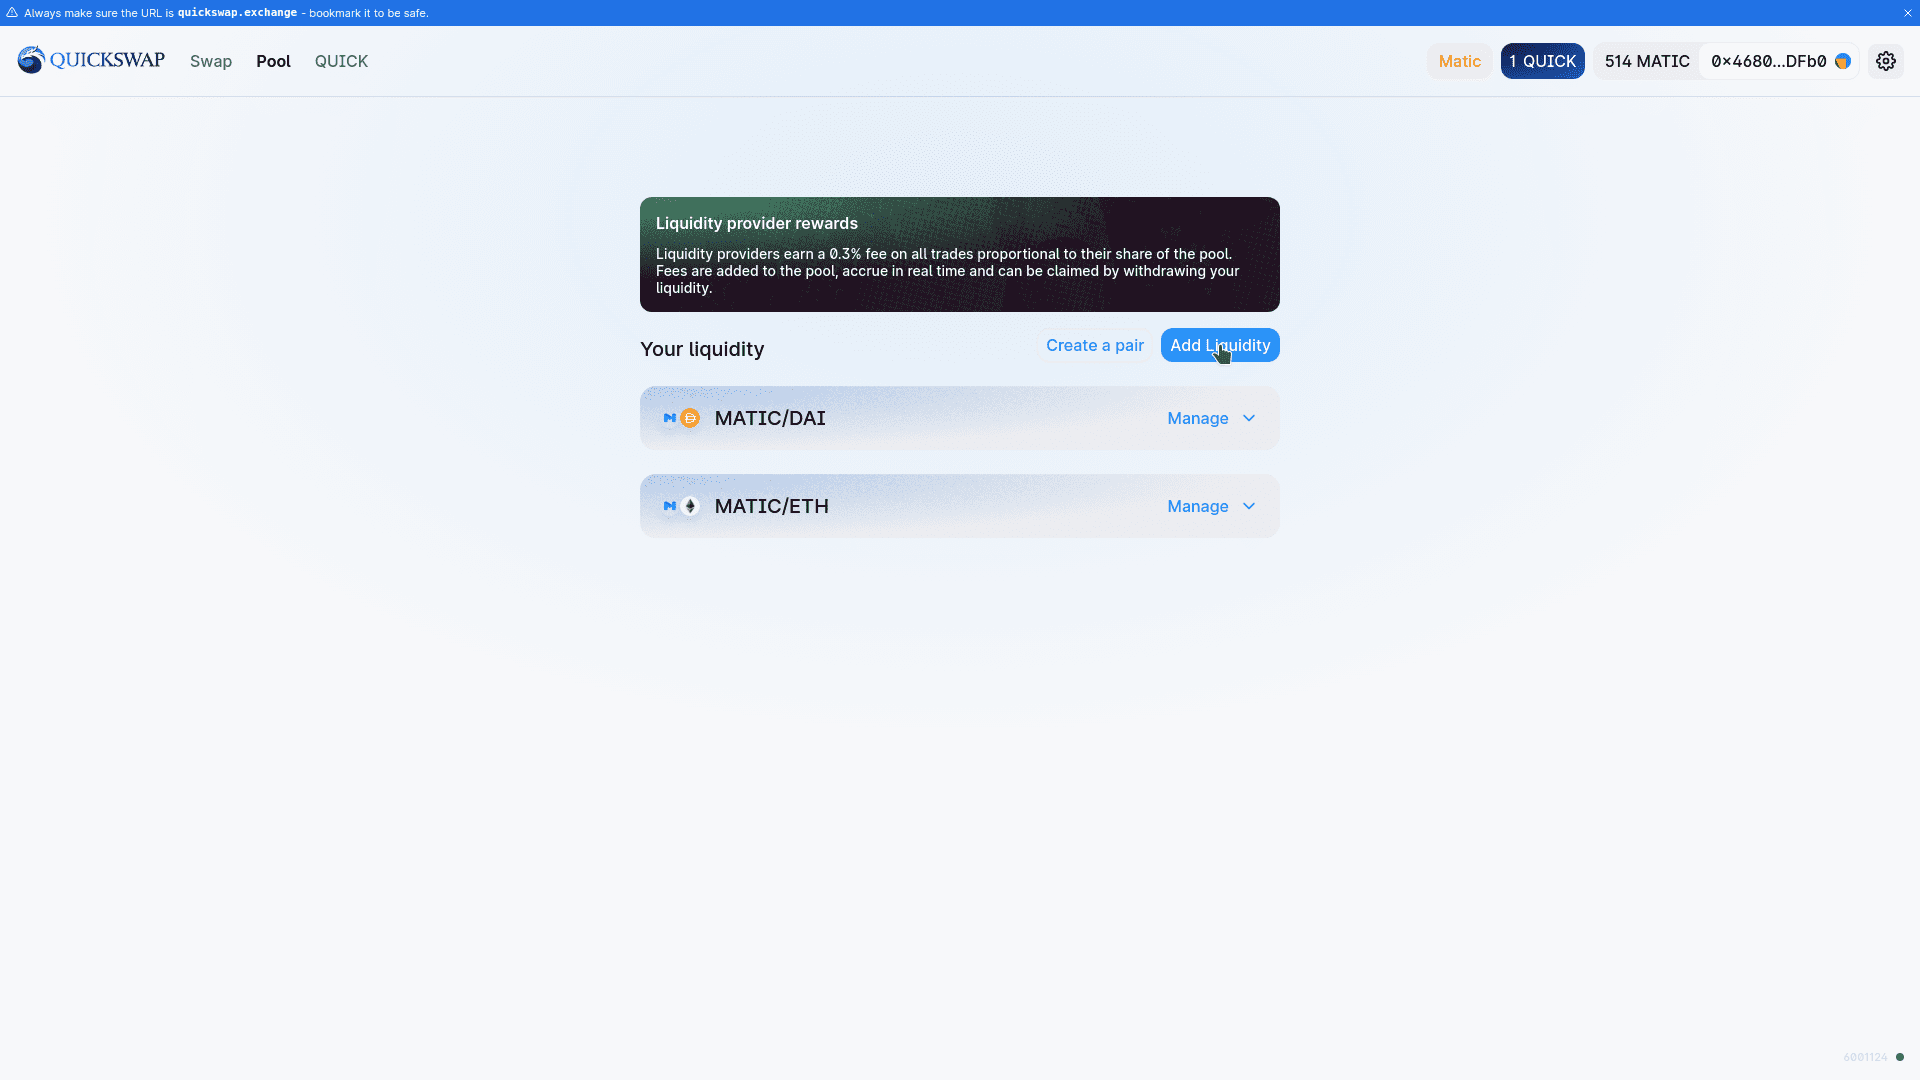
After those trades are complete, go to the ‘Pool’ tab on QuickSwap and wait a moment. After a moment, you’ll see a list of liquidity pools you’ve already created (if any), and a ‘Create a Pair’ option as well as an ‘Add Liquidity’ option. Click ‘Add Liquidity‘.
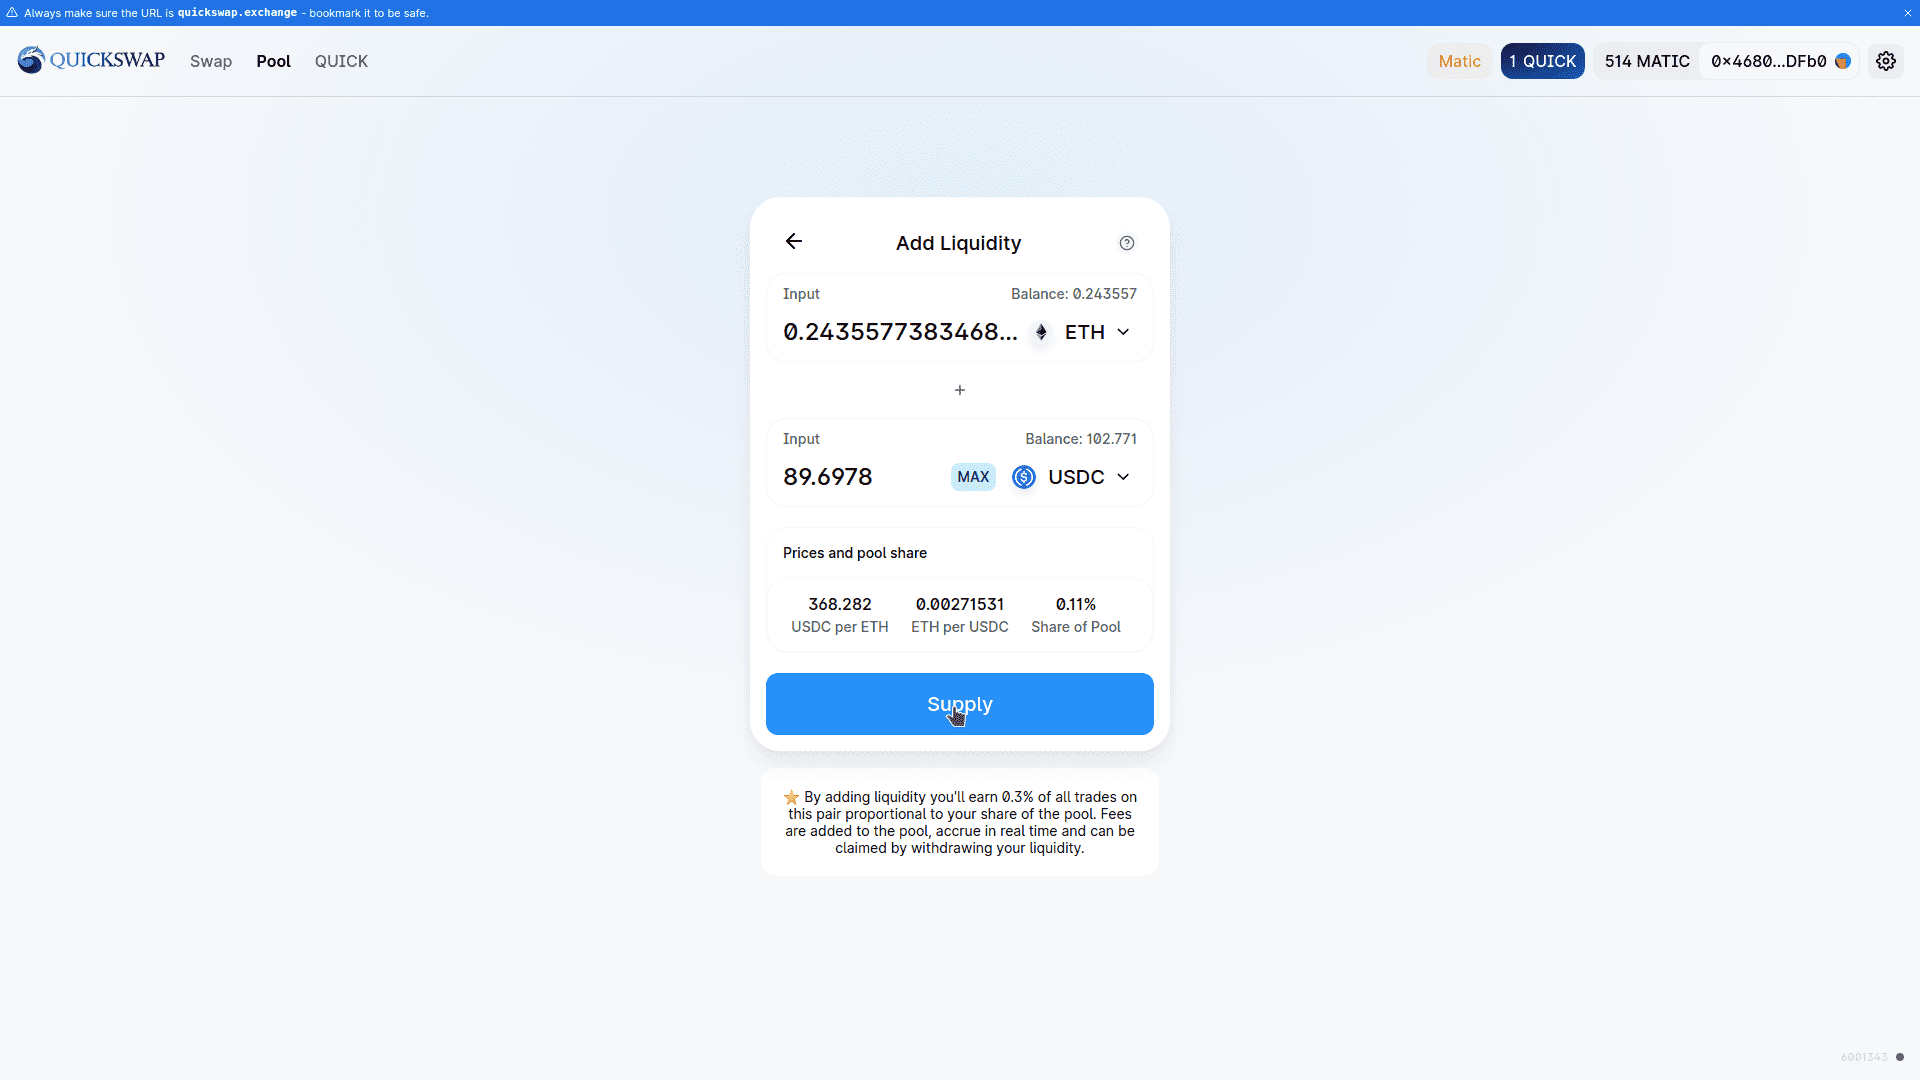
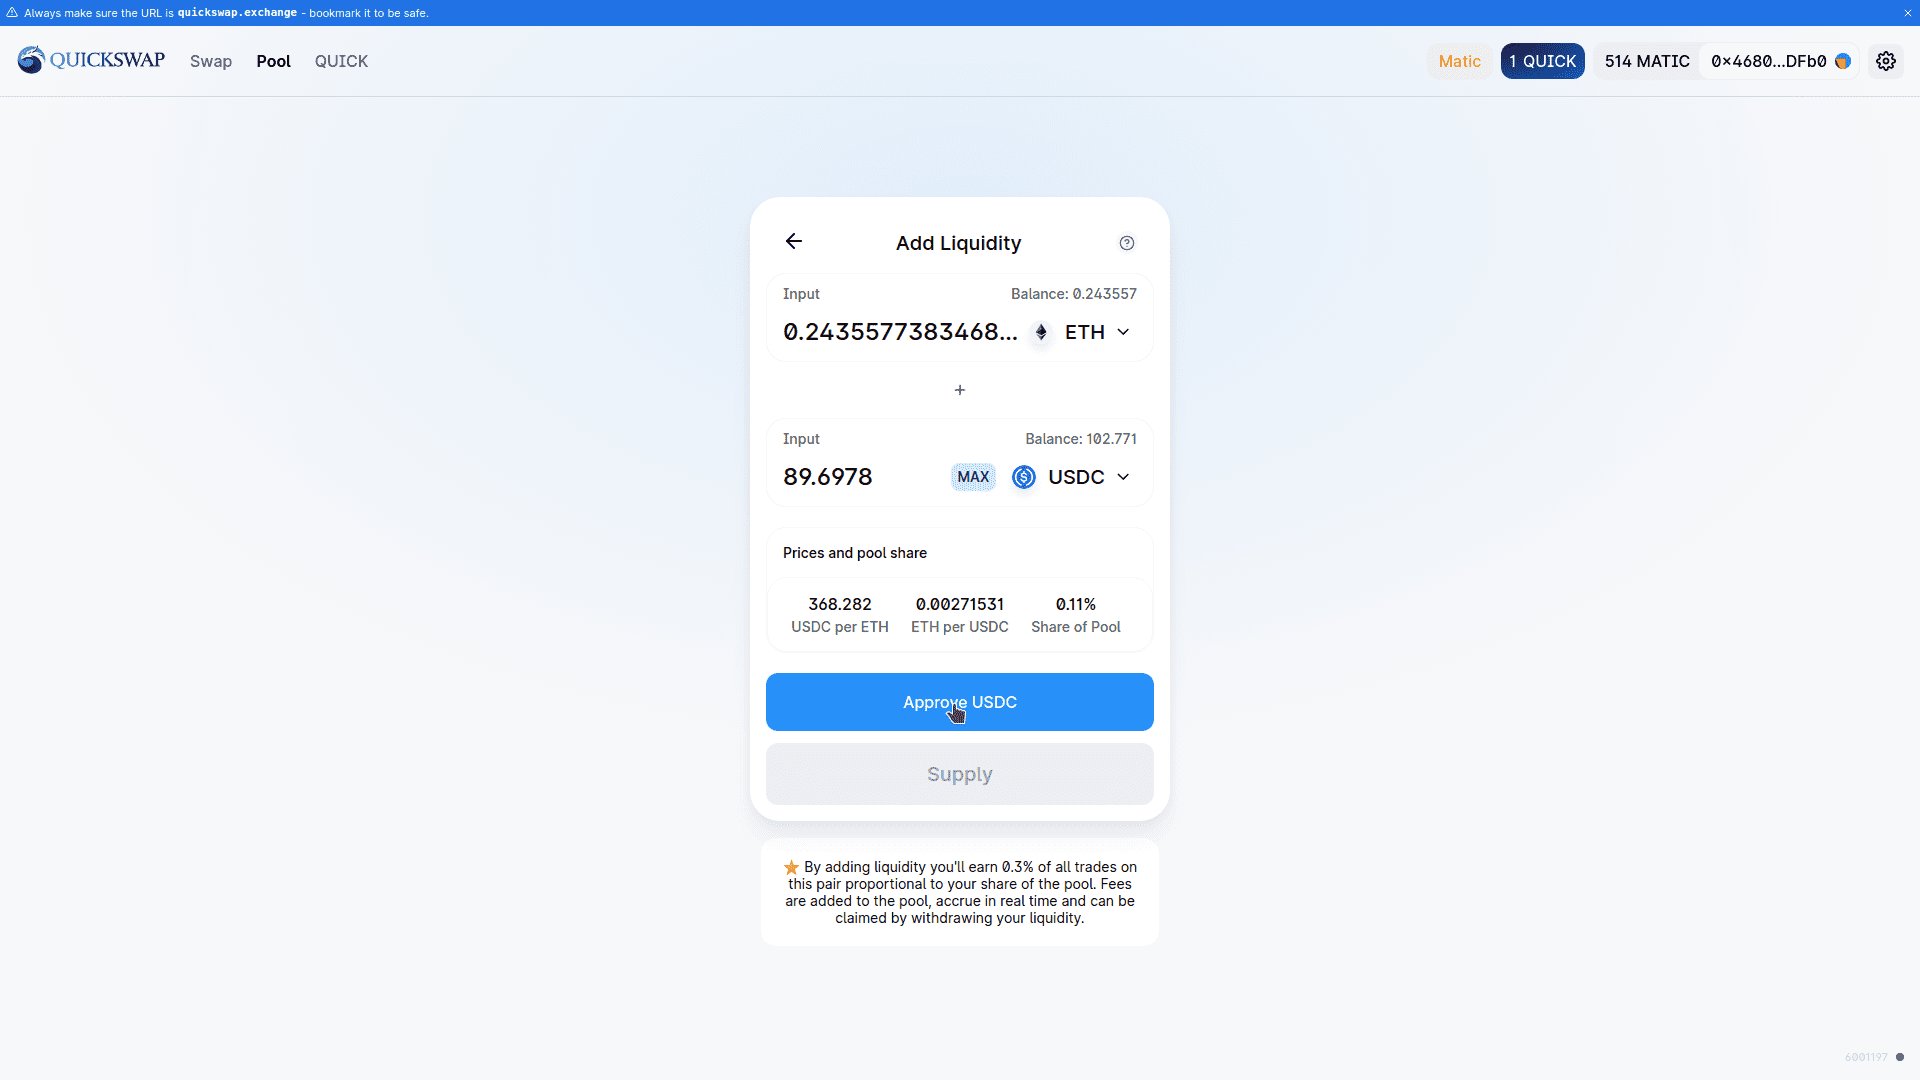
You’ll now see the option to select which tokens you want to add. Select ‘ETH’ in the first field, then ‘USDC’ in the second field. Click ‘Approve USDC’. Read through the MetaMask confirmation carefully and click ‘Confirm’.
Wait a moment for the confirmation transaction to complete and you’ll see a ‘Supply’ button.
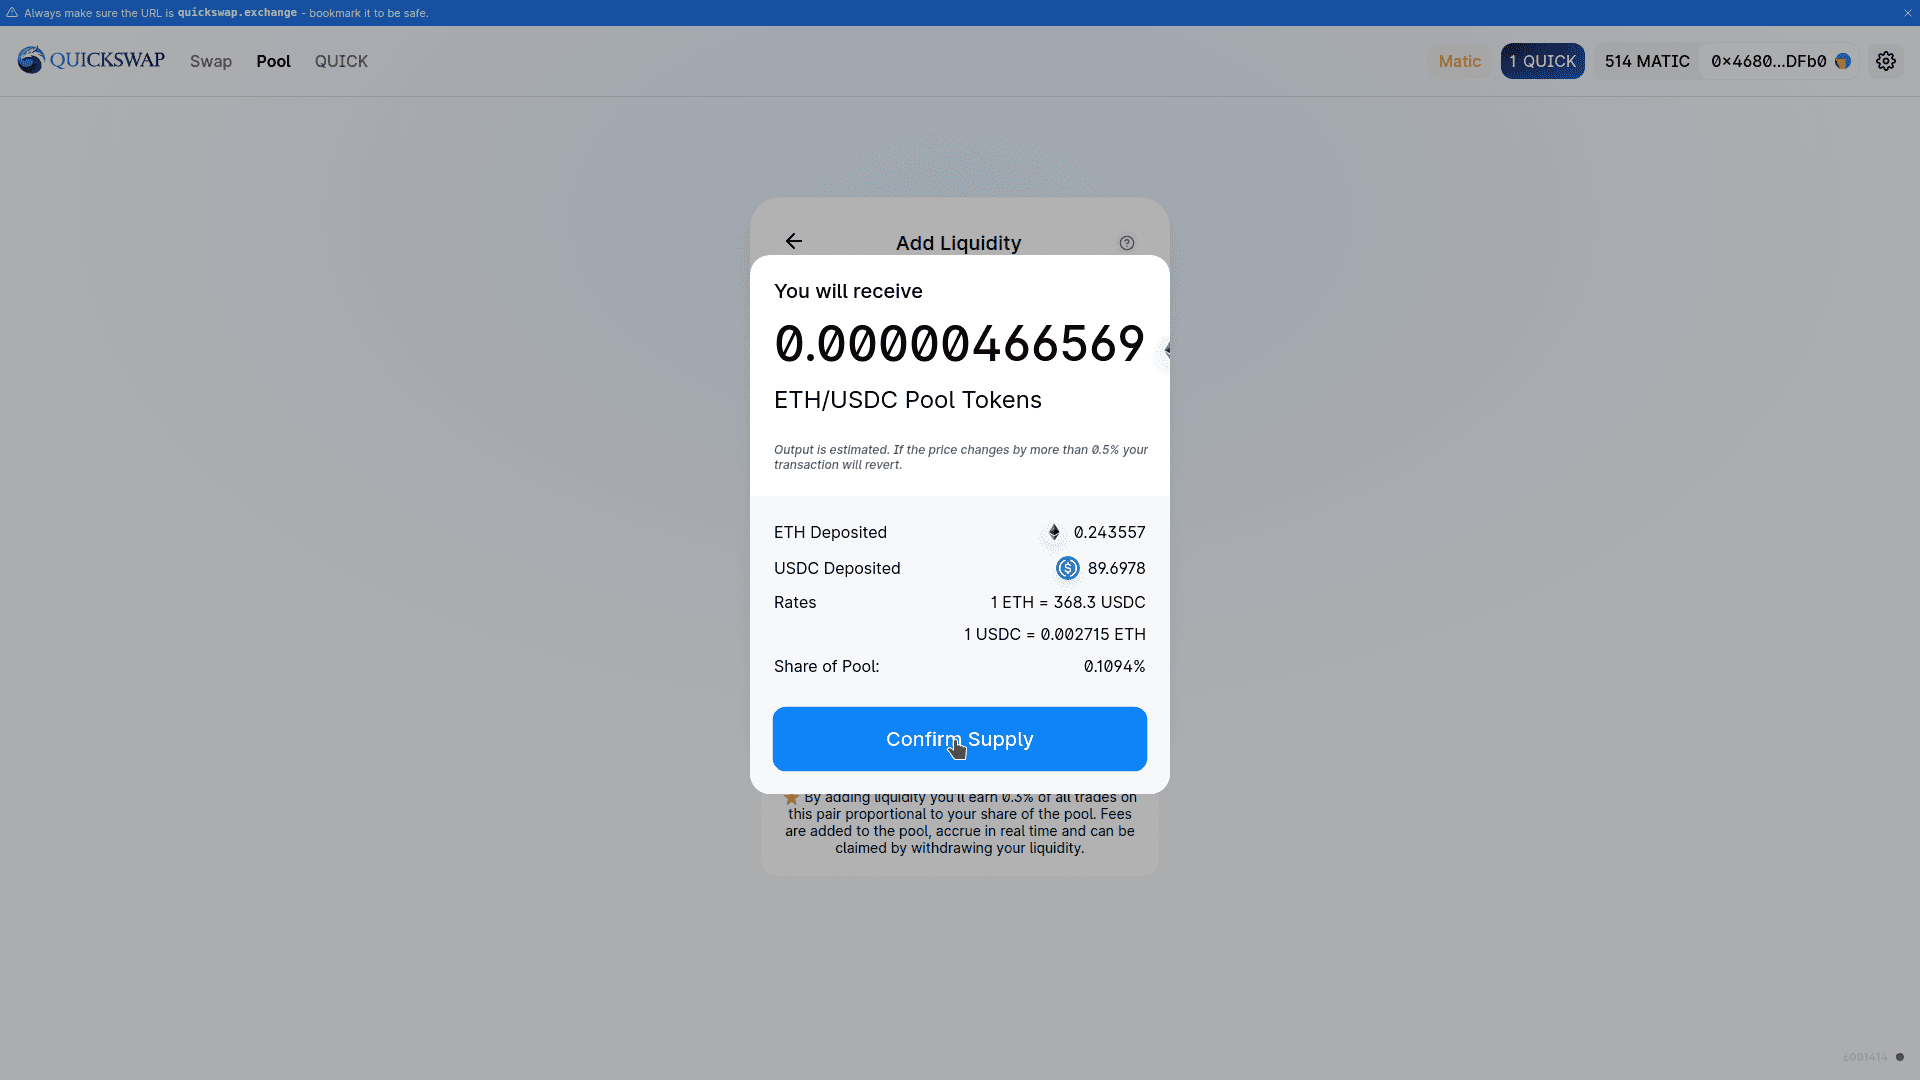
A confirmation dialog will pop up. Review what it says and click ‘Confirm Supply’, then follow through the MetaMask confirmation window and you’re done!
You may now go back to the ‘Pool’ tab and you should see your USDC/ETH liquidity pair. Feel free to experiment with possible yields by adding liquidity for other trading pairs. Some generate more revenue than others! This is due to their popularity.
On QuickSwap, you’re paid a 0.3% fee on trades proportional to your share of the liquidity pool. You can also experiment by browsing through existing pools under the ‘QUICK’ tab and deposit to them too.
How To Do Limit Orders On QuickSwap
How To Use QuickSwap On Your Phone (With The MetaMask Mobile App on iPhones)
If you want to trade cryptocurrency on your phone using QuickSwap, you can do so by using the MetaMask mobile app. You just need to set up MetaMask with Matic Network and then switch to it, as shown below:


