Modern Android app development has gotten easier in some ways, and it’s a good idea to capitalize on that. This tutorial provides a quick introduction to get you started with Android development in Android Studio, with a focus on aligning UI elements to ensure they stay put regardless of what happens.
Key points covered are the Constraint Layout, adding a widget to your Android app, adding a button to your Android app, and making your button do something when clicked. The first step is to launch Android Studio and click ‘Start a new Android Studio project‘. Next Click ‘Empty Activity’ and then ‘Next’.
Type your desired app name in the ‘Name‘ field and watch as it creates a ‘package name’ for you. If you name your app ‘myapp‘. You might see something like ‘com.example.myapp‘ in the package name field. The package name is what the operating system (and Google Play) use to identify your app (or at least one of the things they use to identify your app.
Change the ‘example‘ part of the package name to your company name so that it reads ‘com.companyname.myapp‘. Now set the language to ‘Java’ for this example. It will provide the option to set the minimum SDK version of your app. You can set a lower SDK version to support older devices, but there are requirements and limitations associated with doing so. To keep this tutorial simple, we’ll leave it at the default setting (API 19) for now.
The default setting will still enable your app to run on the vast majority of Android devices. Make a note of the directory it will the save the app in or set your own, then click ‘Finish’. Gradle will need some time to sync, so wait a little until it says that the Gradle sync has finished at the bottom of the screen (in the status bar).
Gradle is a build automation system.
Once your new Android Studio project has finished loading, you should see an XML file with a name like ‘activity_main.xml‘, and a Java source code file called something along the lines of ‘MainActivity.java‘. Click the ‘activity_main.xml’ file and take a look inside. You should see a form designer (a familiar sight if you have used the Visual Basic or Delphi IDEs).
Ensure you’re in the ‘Design’ perspective. If you’re seeing what looks like an app screen with ‘Hello World’ on it and a ‘Palette’ section with widgets such as buttons and ‘TextViews’ in it, then you’re in the ‘Design’ perspective. If you are seeing XML code, then you are in the ‘Code’ perspective.
Drag and drop widgets (start with buttons and EditText widgets) from the Palette onto your Activity (the ‘screen’ or ‘view’ that helps you to get an idea of how your app looks) and follow the included video for details. The video shows you how to snap widgets/set margins in such a way that they resize automatically and stay where you want them to, regardless of screen orientation or which phone is being used.
Check that you’re using a ConstraintLayout by looking for in in the starting and ending tags of your activity’s XML file. It looks something like this:
<androidx.constraintlayout.widget.ConstraintLayout xmlns:android="http://schemas.android.com/apk/res/android"
To do this, you need to enter the ‘Code’ perspective by clicking the corresponding button in the (near) top right corner of the screen. Hover and read the tool tips that show up until you see three small buttons for ‘Code’, ‘Split’, and ‘Design’ to the left of the ‘Gradle’ tab. Once you’ve seen it, go back to the ‘Design’ perspective and set margins for one of your EditText widgets by clicking the widget and then look for the ‘Layout’ tab on the right side of the screen. Below that you’ll see ‘Constraint Widget’ and the option to set margins and biases.
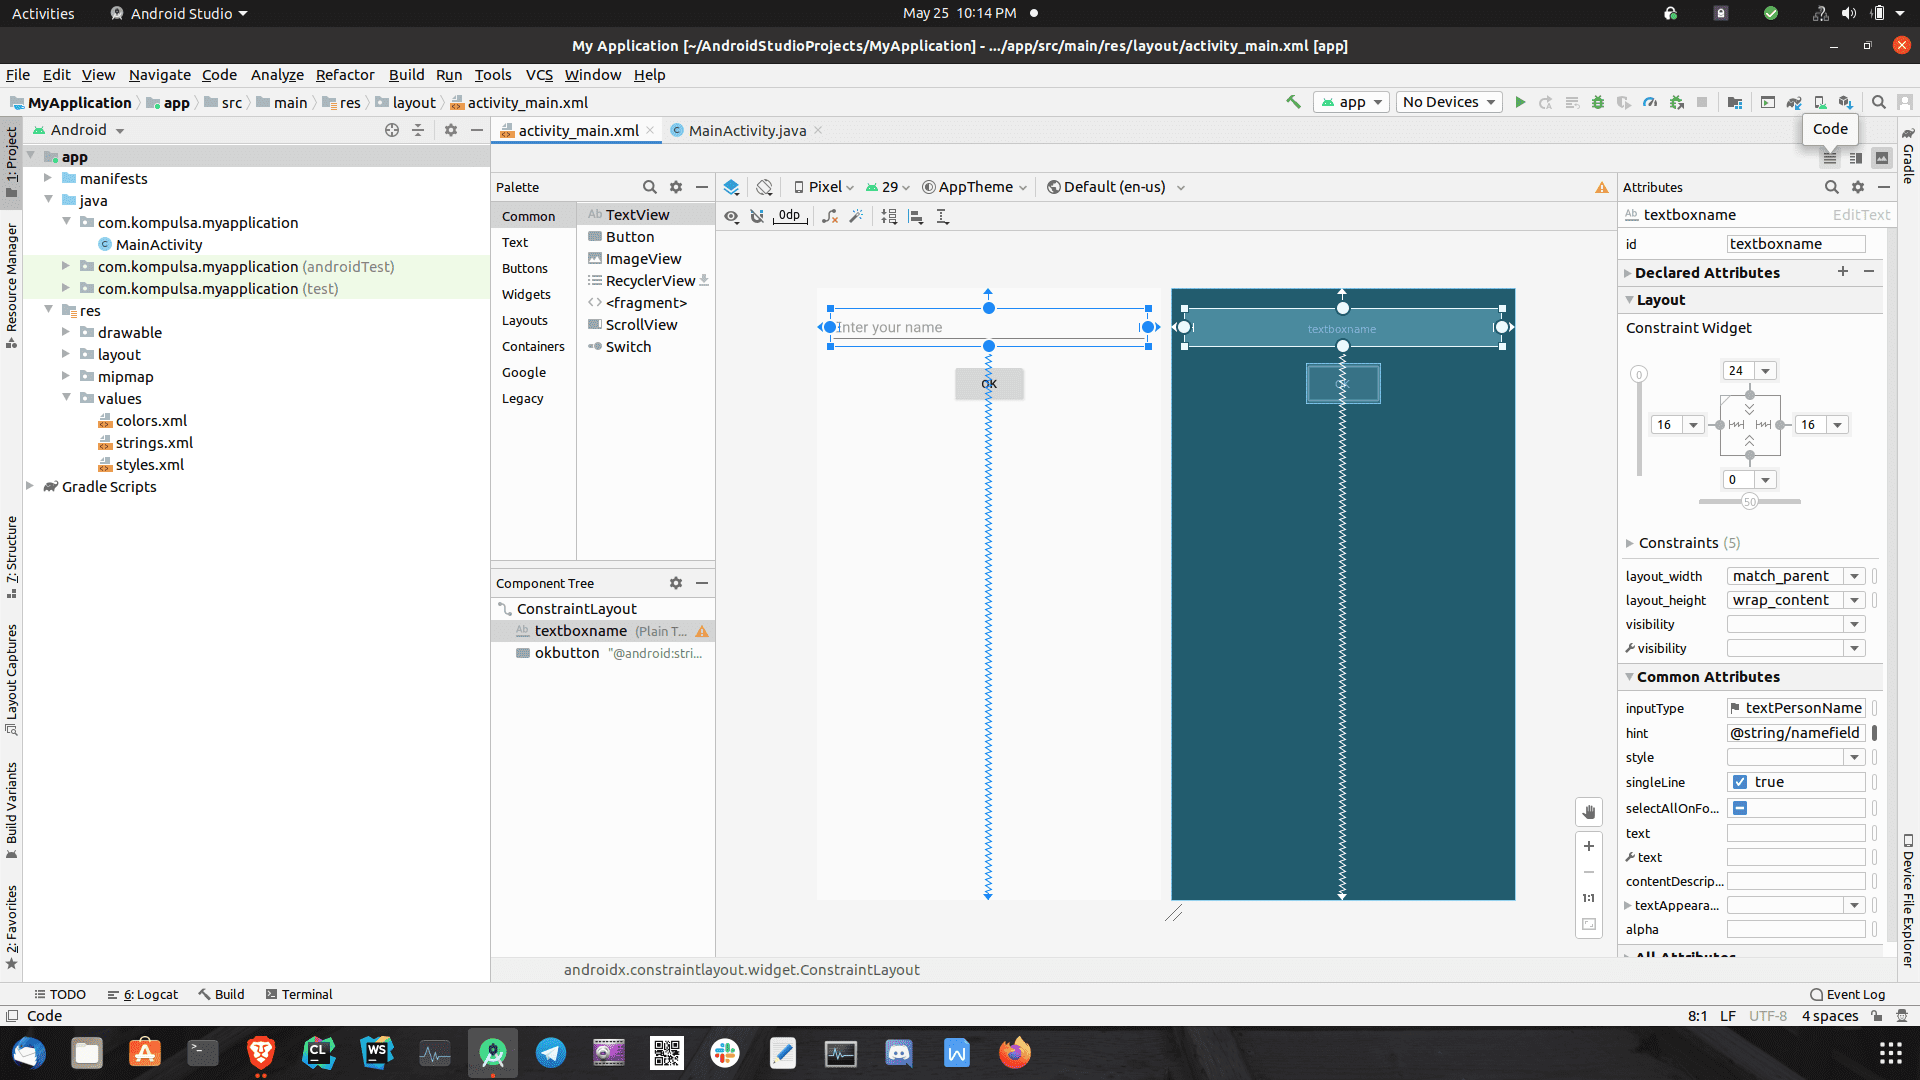
Margins and biases do similar things (dictate your widget’s position relative to the edges of the screen), but they work a bit differently and may have a different effect. You will have to gradually gain an idea of how each option affects your app and decide whether biases or margins or best based on what you’re doing. Once you drag a widget to a certain spot in the screen, it will automatically set a horizontal bias and a vertical bias. You can also position a widget by setting the top margin, bottom margin, left margin, and right margin.