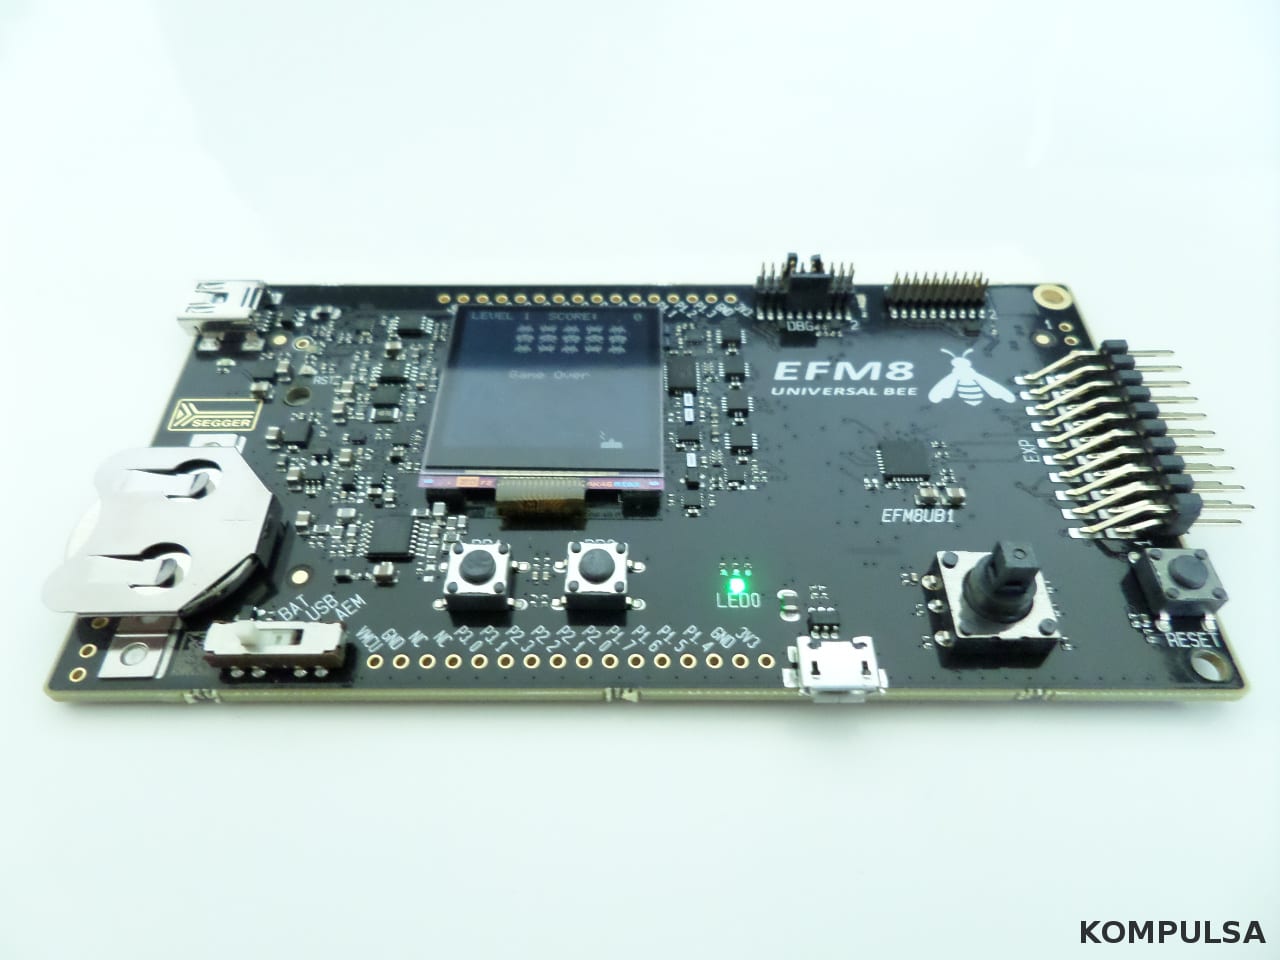
I recently got my hands on an EFM8 Universal Bee MCU starter kit (thanks to Silicon Labs for sending it) and have been trying it out. It offers clock speeds up to 50 MHZ, 2 KB of RAM, 16 KB of flash memory, as well as a variety of timers and pins for PWM, analog to digital conversion, UART communication, Linux support (great for makers! which often use Linux), among other things.
PriceThe Universal Bee SLSTK200A starter kit (which includes the 8-bit, 28-pin EFM8UB1 MCU), is priced at $30, which is very common for microcontroller kits. However, the MCUs in some other $30 kits offer faster CPUs, more RAM, and more storage. That led me to believe that the Universal Bee was a little expensive for what it was offering.
After reading the specs further and spending a little time with it, I realized the price is reasonable because it includes an LCD screen, lithium battery (CR2032), a battery holder, and their Advanced Energy Monitor (AEM) technology that can measure voltage and power consumption in real time.
If you need a smaller or cheaper kit, but don’t need the LCD or want to use a power source other than the included lithium coin cell, there are many other development kits on the market from Arduino and Texas Instruments that may better suit your application.
The cost of the EFM8 MCU’s themselves is just as important if you’re implementing them without the SLSTK200A starter kit. The EFM8UB1 microcontroller is currently priced at a reasonable $1.23 on Arrow, and £0.75 on Farnell.
Power Consumption And Energy Conservation Capabilities
The power consumption of the EFM8UB1 MCU is right on par with that of the other low-power microcontrollers, capable of reducing its current consumption to less than 200 microamps (depending on the peripherals used and power settings).
Despite the fact that it is already very low, the power consumption of embedded systems [PDF] such as MCUs is still an issue for many applications, for example: tiny battery-powered devices that are infrequently used. This is one reason for using an ultra low power microcontroller. The microcontrollers in this power class (for example, the EFM8UB1 and TI Launchpad MSP430) consume power in the order of microwatts (depending on their settings), virtually enabling them to run on thin air.
A microwatt is a millionth of a watt, so where your electricity bill is concerned, that’s not going to be a problem.
It comes with the following oscillators that can be easily disabled within the IDE to reduce power consumption, including:
- HFOSC0 – High Frequency Oscillator 0: A 24.5 MHZ oscillator.
- HFOSC1 – High Frequency Oscillator 1: A 48 MHZ oscillator.
- LFOSC0 – Low Frequency Oscillator: An 80 kHZ oscillator.
- There is also an external clock input: EXTCLK.
Low-Energy USB Mode
In some cases, when using USB, the power consumption of embedded systems (often microcontrollers) is unacceptably high (especially if your project is running off a small battery or ultracapacitor). The EFM8UB1 MCU offers a low-energy USB mode for such applications. Considering that these 8-bit microcontrollers are targeted at USB applications, that’s a bonus.
Power Consumption Monitor
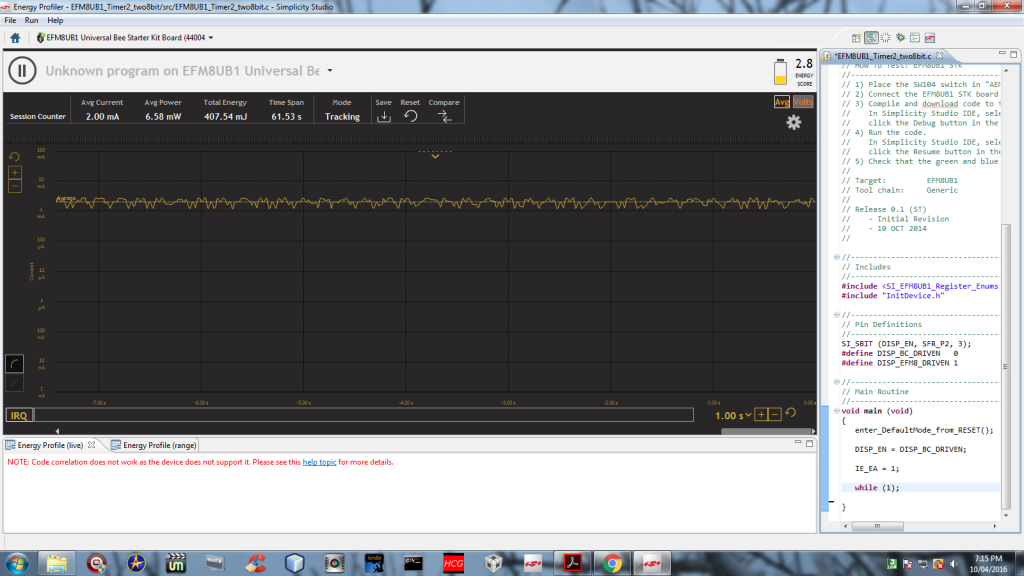
To make it easier to reduce power consumption, Silicon Labs implemented the Energy Profiler in Simplicity Studio (the IDE provided for the EFM8 microcontroller), which enables you to measure the EFM8’s power consumption when the switch is in the ‘AEM’ position without connecting a meter to it, as shown below.
Ease Of Getting Started
I was delighted to see that the EFM8UB1 includes a battery holder because I intend to install it in a battery-powered solar project (which sits for extended time periods without much sunlight) shortly, so in my case, powering the controller with a separate battery is convenient because it won’t drain the main battery before I actually get a chance to use it.
It will also continue to monitor the battery’s state of charge (my own project) and keep the correct time, among other things even if the main battery is dead. The main selling point of the battery holder for me is that I won’t have to construct another 5 or 3 volt power supply for it. Also, it has a power switch that enables me to quickly switch from the on-board lithium battery to USB if it dies, providing an easy backup power source until I replace it.
EFM8 Documentation
The documentation for the EFM8UB1 that I found was not geared towards beginners. However, I wrote a getting started tutorial for beginners here, for those who are interested. If you already have experience with MCUs, the reference manual has a wealth of information on everything it offers.
The IDE
Everyone has their preferences, but the configurator perspective in the IDE wasn’t my favourite, as it was’t as straightforward I hoped it would be. With time, i’ll become accustomed to it and see what it has to offer.
To be fair, it provides a visual representation of the EFM8’s pinout in such a way that you can click each pin and configure it quickly. It also comes with many example projects that beginners can can use to try it out easily without typing a single line of code. Notable example projects include, but are not limited to: PWM LED dimmers, clock demos, an oscilloscope demo, UART demos, various timer demos.
This EFM8 kit also comes with a Space Invaders demo preinstalled, so users can try out the joystick and LED right out of the box.
If you’re new to microcontrollers, this is a model i’d recommend (albeit not the easiest model to get started with), but you should definitely start with one of the example projects included, such as ‘Blinky Simple’.
You can learn more about microcontrollers here [PDF] before getting started, or use the article I mentioned in the documentation section above.


